
Vemus, theme documentation
Below is the detailed documentation for the Vemus theme
Below is the detailed documentation for the Vemus theme
HELLO ! FIRST OF ALL WE WOULD LIKE TO THANK YOU SO MUCH FOR CHOOSING OUR THEME!
Here are some basics on installing, configuring and customizing the Vemus theme. If you have any questions that are beyond the scope of this help file, please feel free to contact us via email : themesflat@gmail.com
We truly appreciate and really hope that you'll enjoy our theme!
Best Regards,
Vemus is a sleek and modern Shopify theme created for brands that value clarity and purpose. Its design language focuses on simplicity and functionality, blending clean layouts, smooth interactions, and a refined aesthetic that enhances the customer experience.
The theme includes all shop pages: Product listing, product detail, add to cart, checkout, quick view, compare ... with customized layout and style to make it look incredible. The product filtering system is powered with the integration of modules: Categories list, Filter based on product attribute, New products, Related products... to help user find out their best fit items at a glance. The Shopify theme is easy to customize with the Theme Customizer tool that let you change settings for most of the pages, sections in the site based on predefined parameters.
The Vemus - Pet Store Shopify Theme is SEO optimized that makes your site friendly with Search Engines, CSS and JS compression helps to improve your site performance a lot.
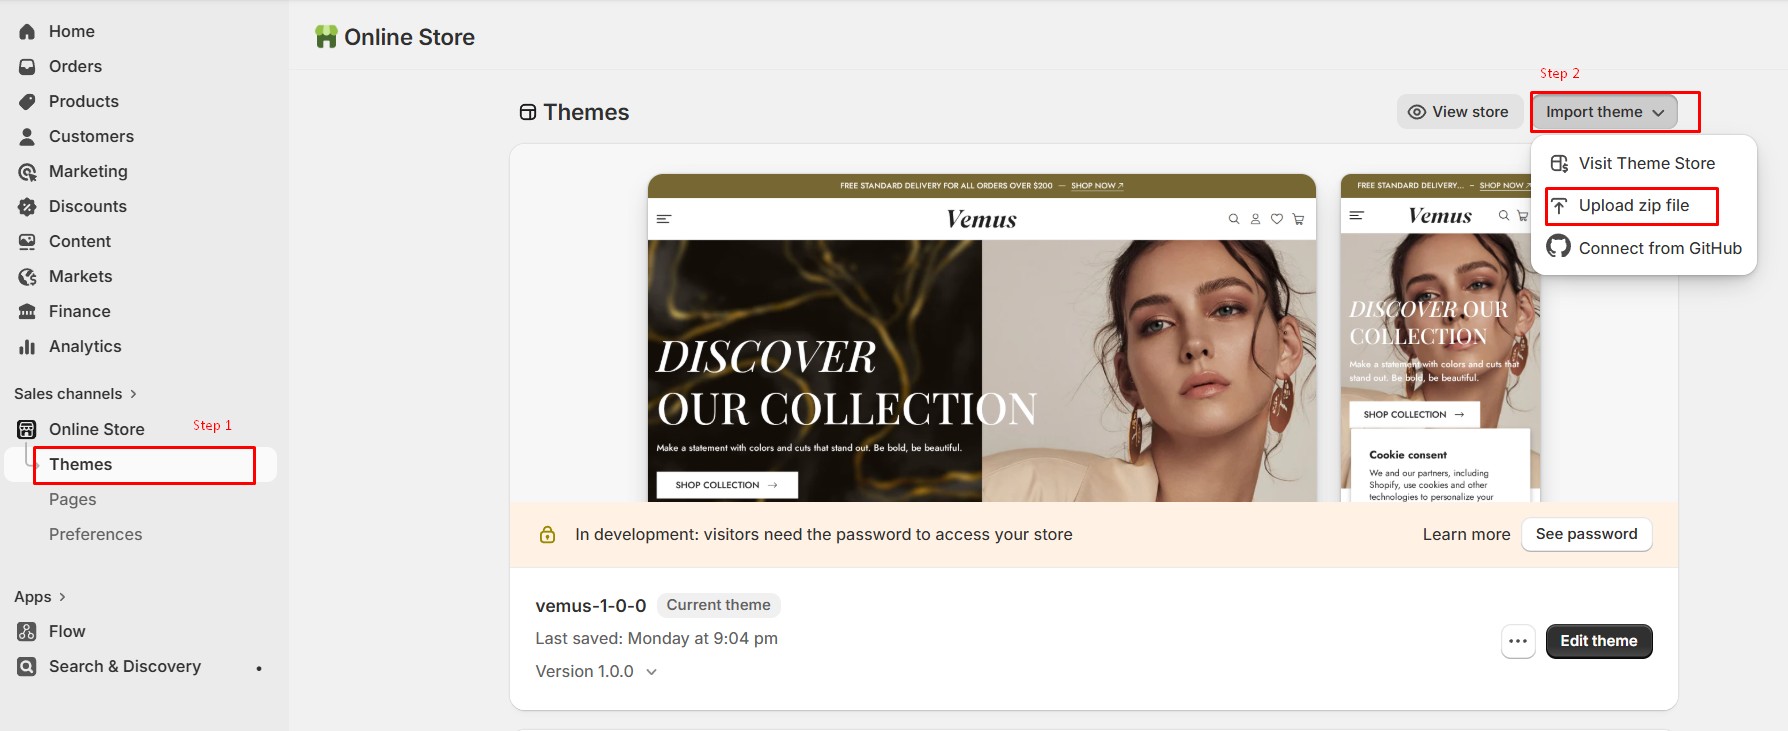
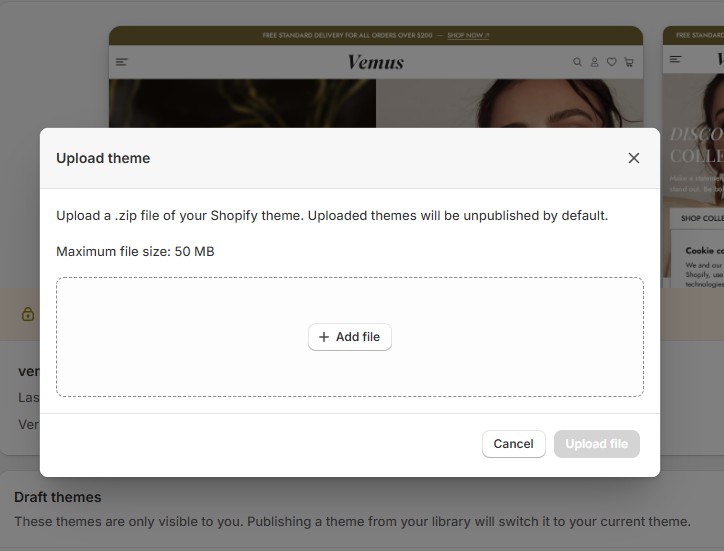
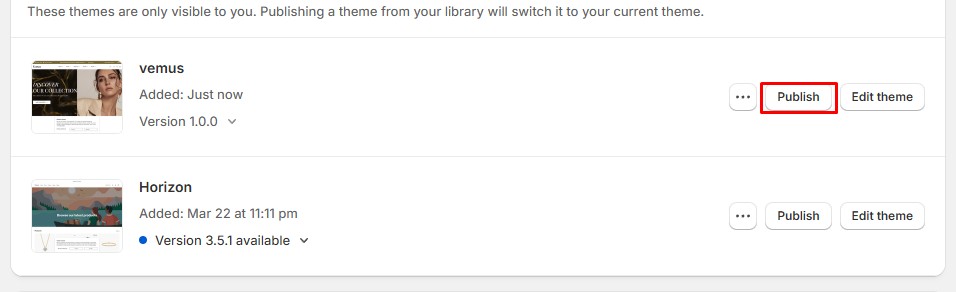
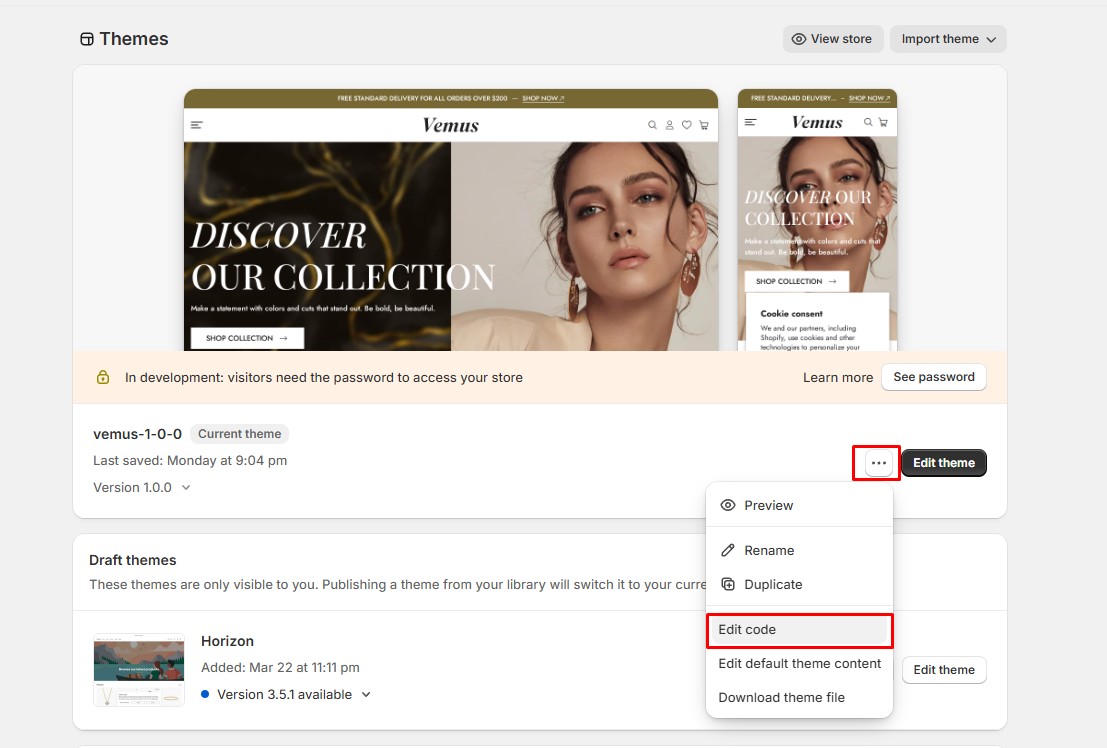
Installing the theme is fast and straightforward. To get started, log in to your Shopify admin and follow the steps below:
Note: We highly recommend reviewing the Shopify Manual. It is a well-written and comprehensive guide created by Shopify, helping you understand theme customization, store settings, and many other essential features of the platform.

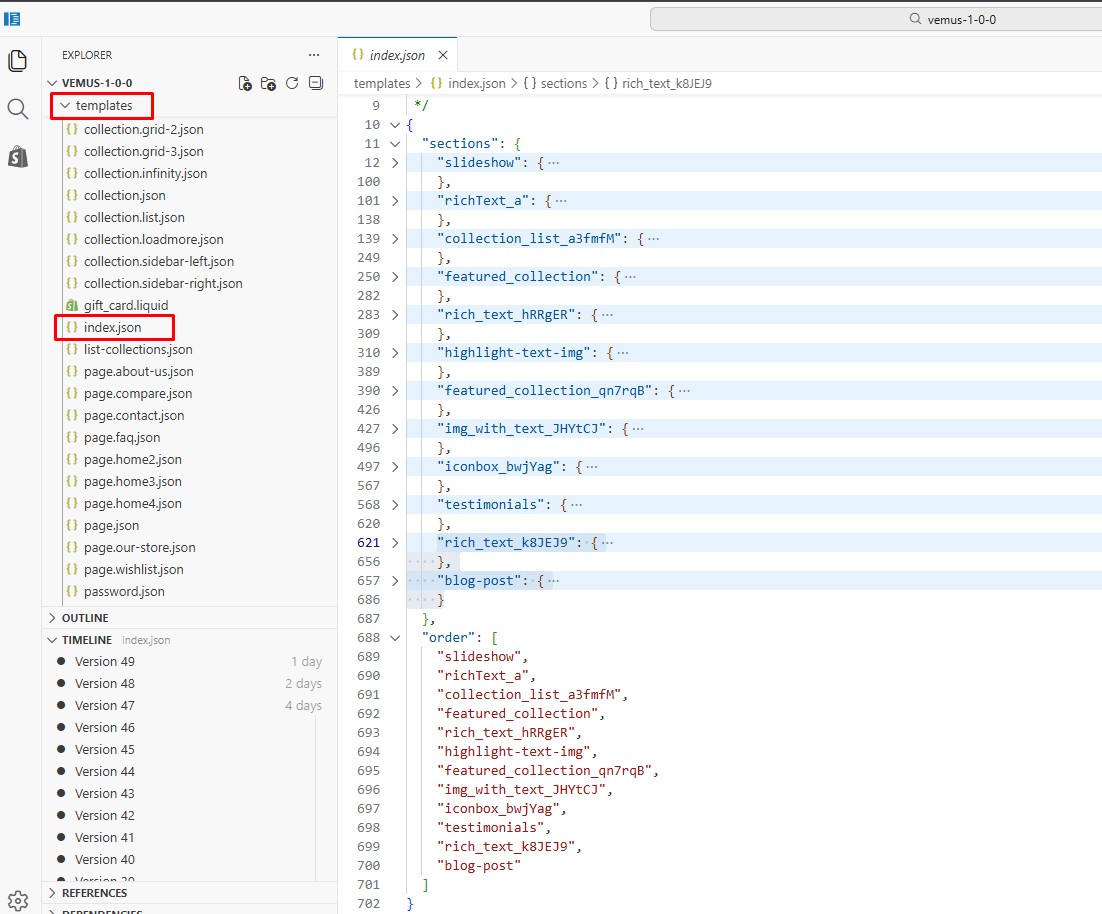
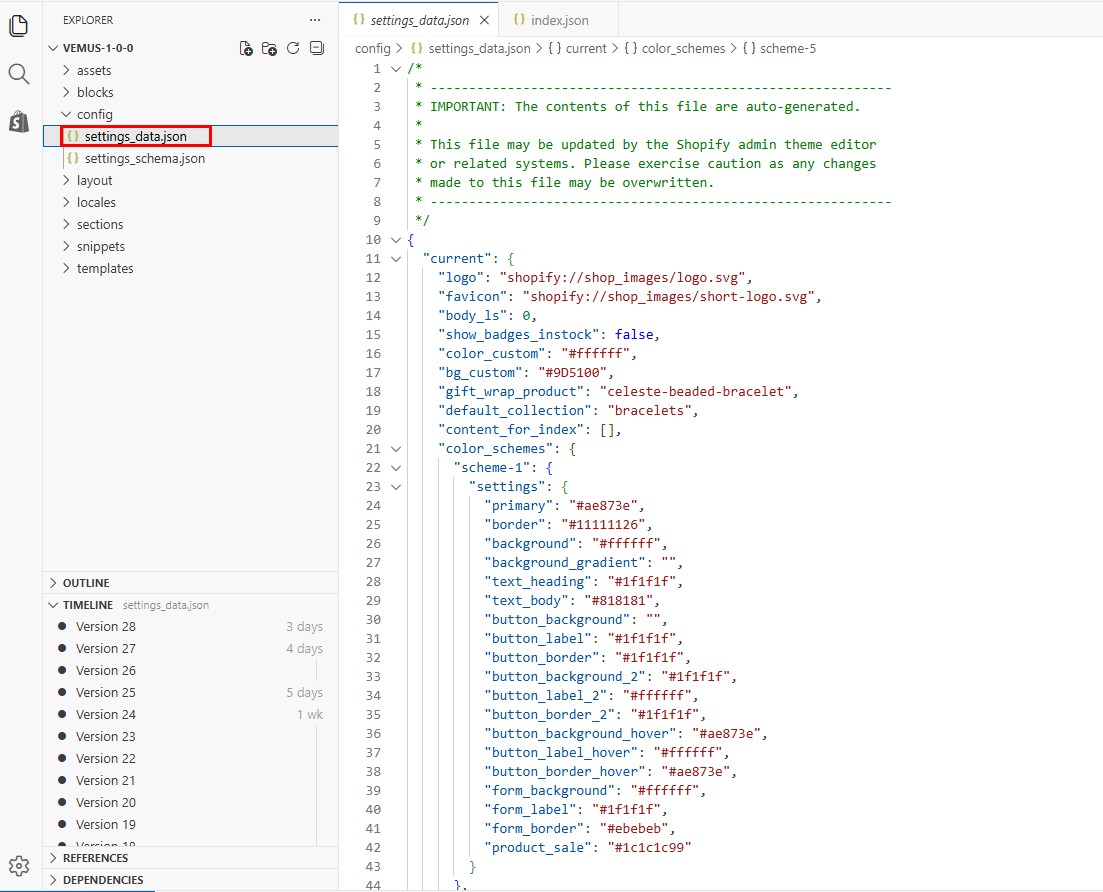
Vemus relies on the third-party apps listed below to support specific enhanced functionalities. These apps are not bundled with the theme by default. To use those features, you will need to install each required app manually from the Shopify App Store.
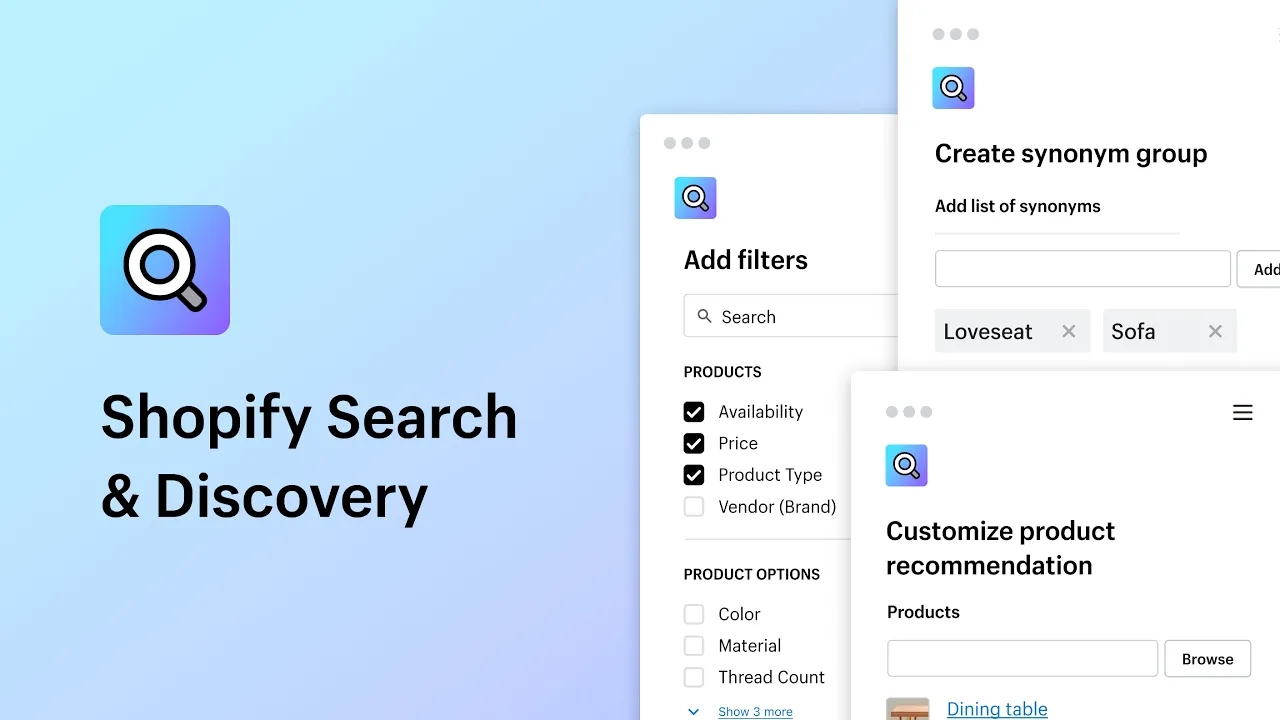
A great shopping experience starts with simple search and seamless discovery. Customize search, filtering, and product recommendations to enhance your products' relevance and boost sales. Use the Shopify Search & Discovery app to deliver results for every search and increase average order value with customized recommendations on any product page. Additionally, employ analytics to gain insights into how customers navigate your store, helping shoppers find exactly what they’re looking for.
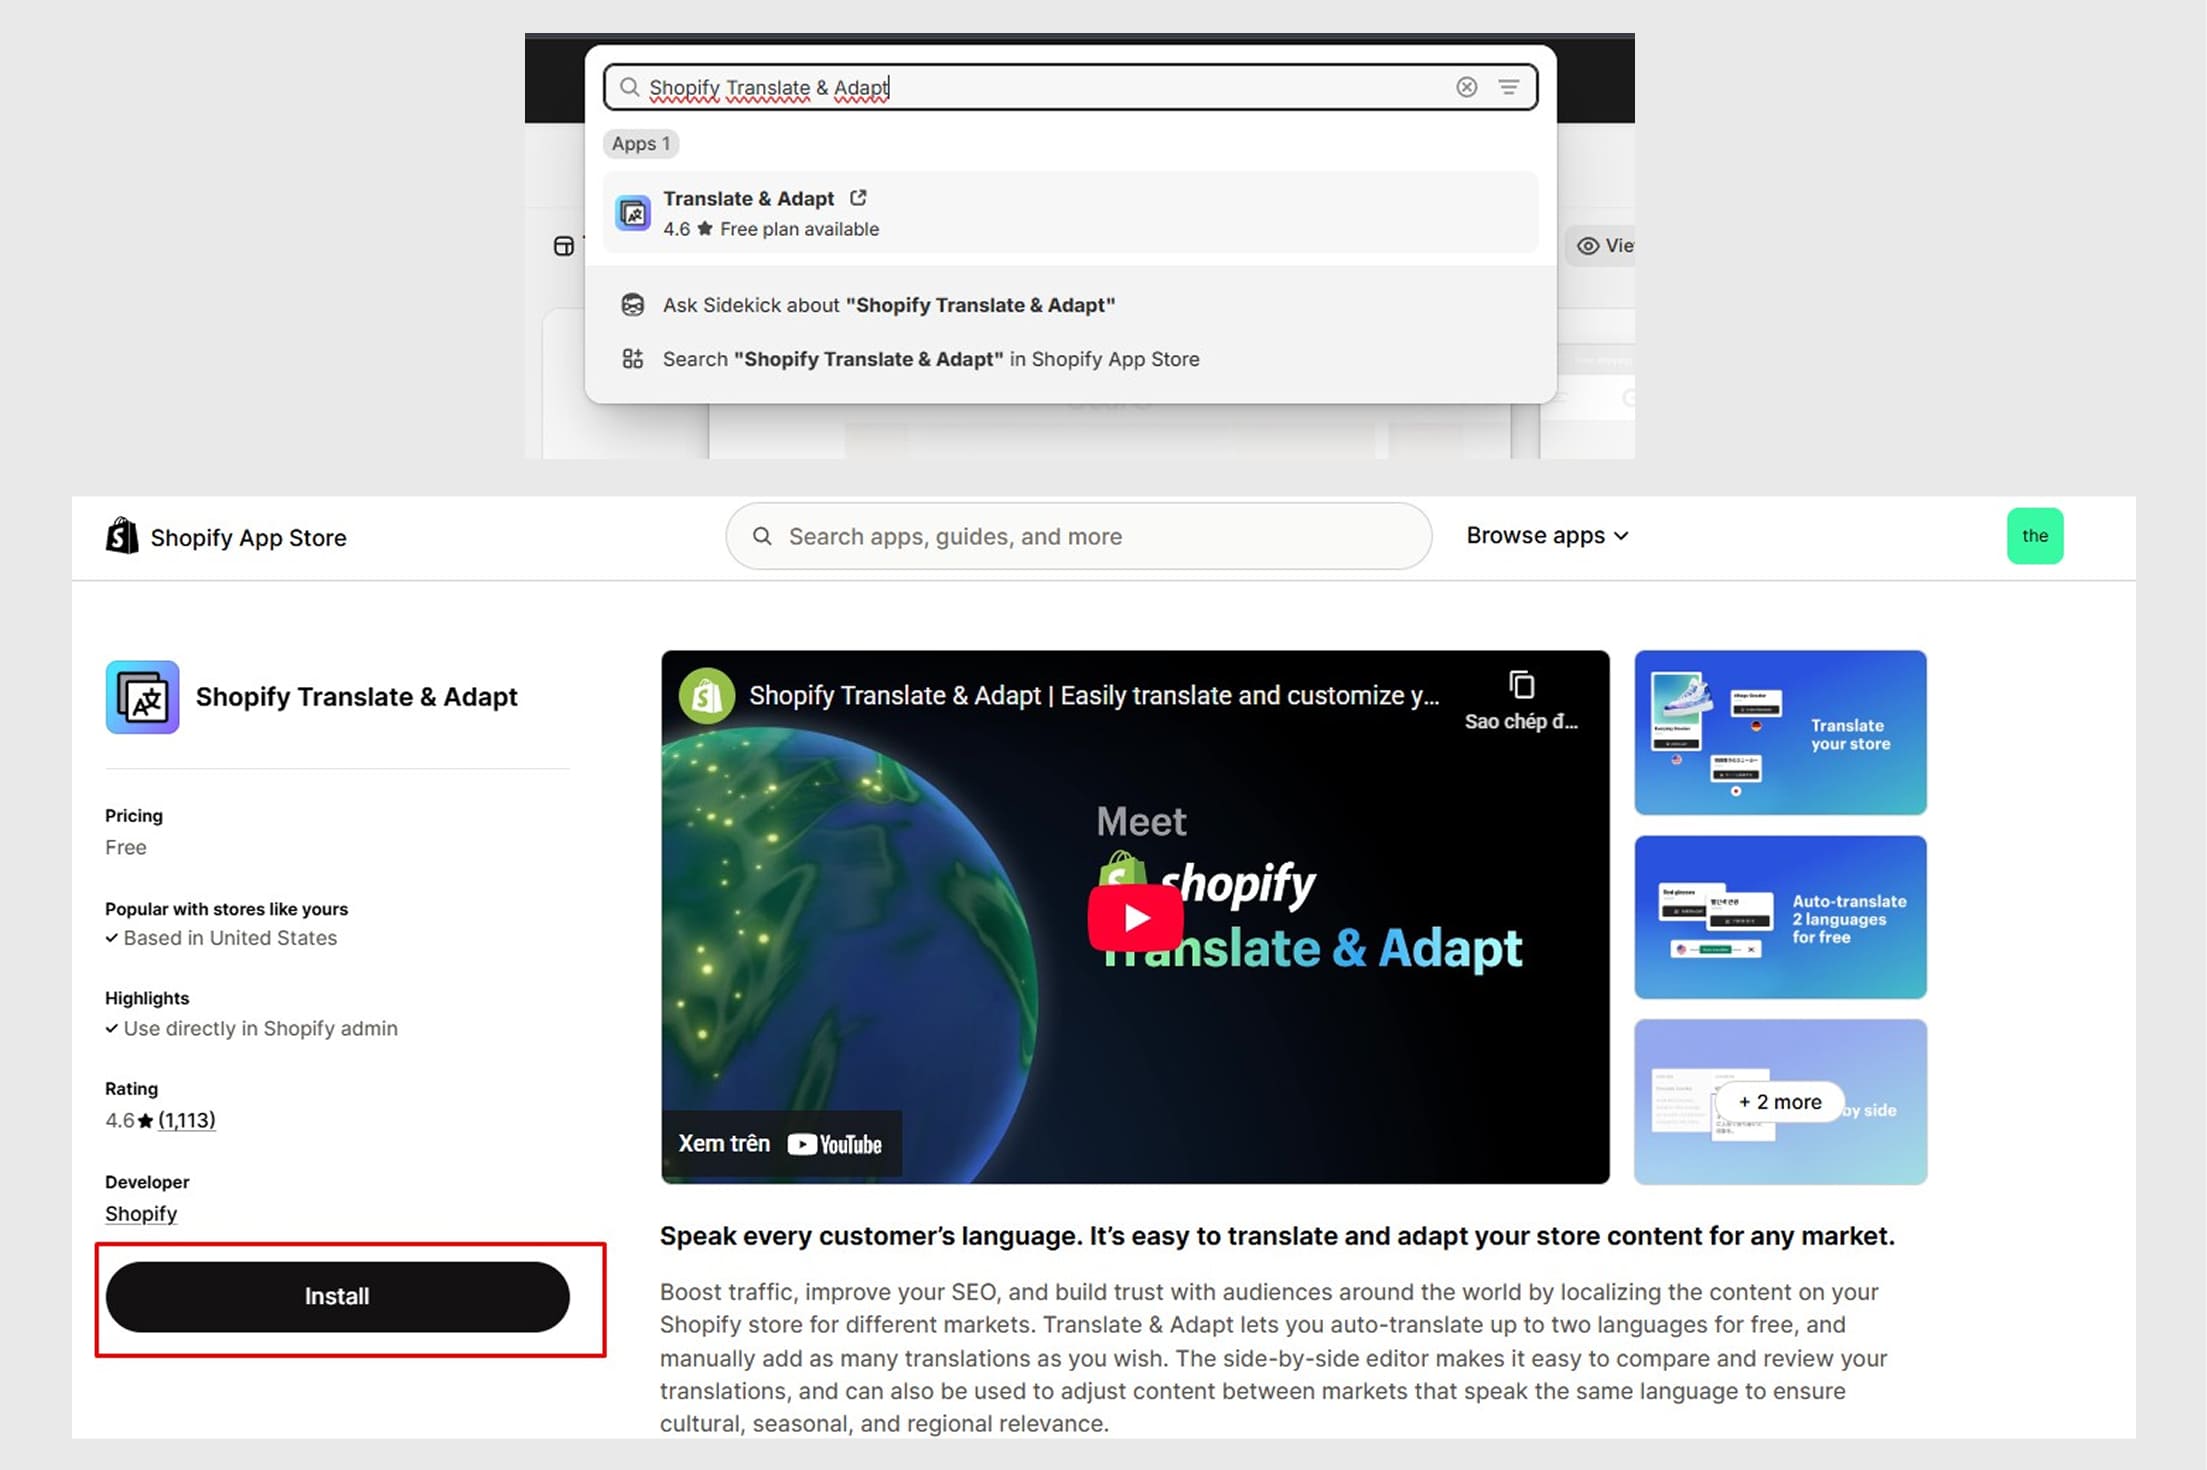
Translate & Adapt lets you auto-translate up to two languages for free, and manually add as many translations as you wish. The side-by-side editor makes it easy to compare and review your translations, and can also be used to adjust content between markets that speak the same language to ensure cultural, seasonal, and regional relevance.
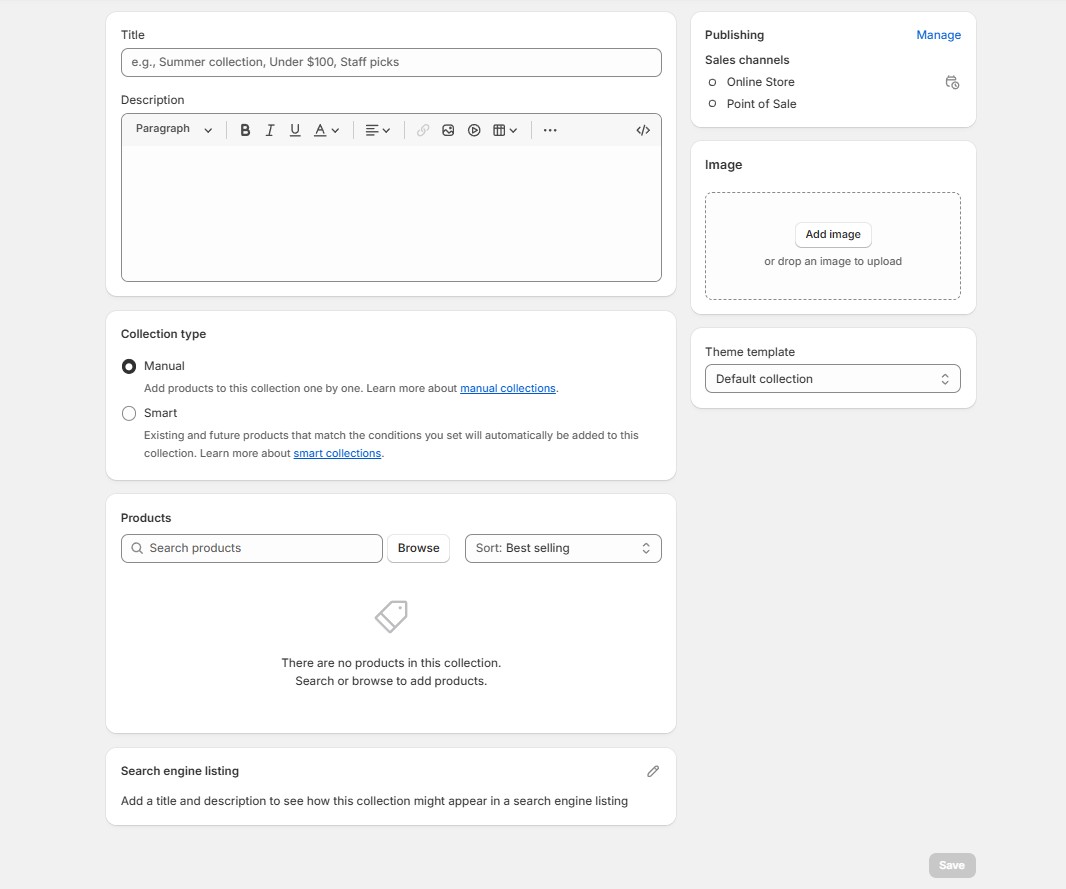
Collections in Shopify allow you to group products into categories, making it easier for customers to browse and find items they’re looking for. You can create collections manually by selecting specific products, or automatically using conditions such as tags, price, vendor, or product type. Once created, collections can be displayed on your homepage, menus, or any page throughout your store. Properly organized collections not only improve navigation but also enhance the overall shopping experience.
Go to Products > Collections in your Shopify admin and click Create collection. Enter a title, description,image, choose product and save

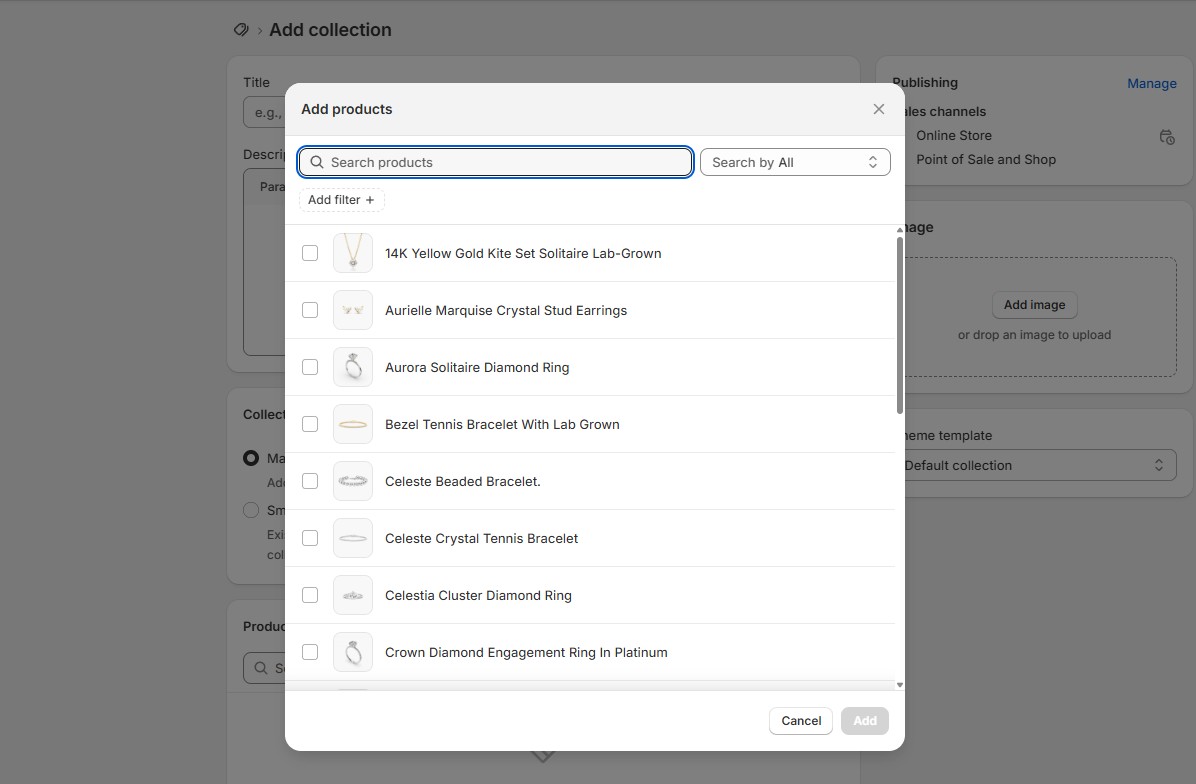
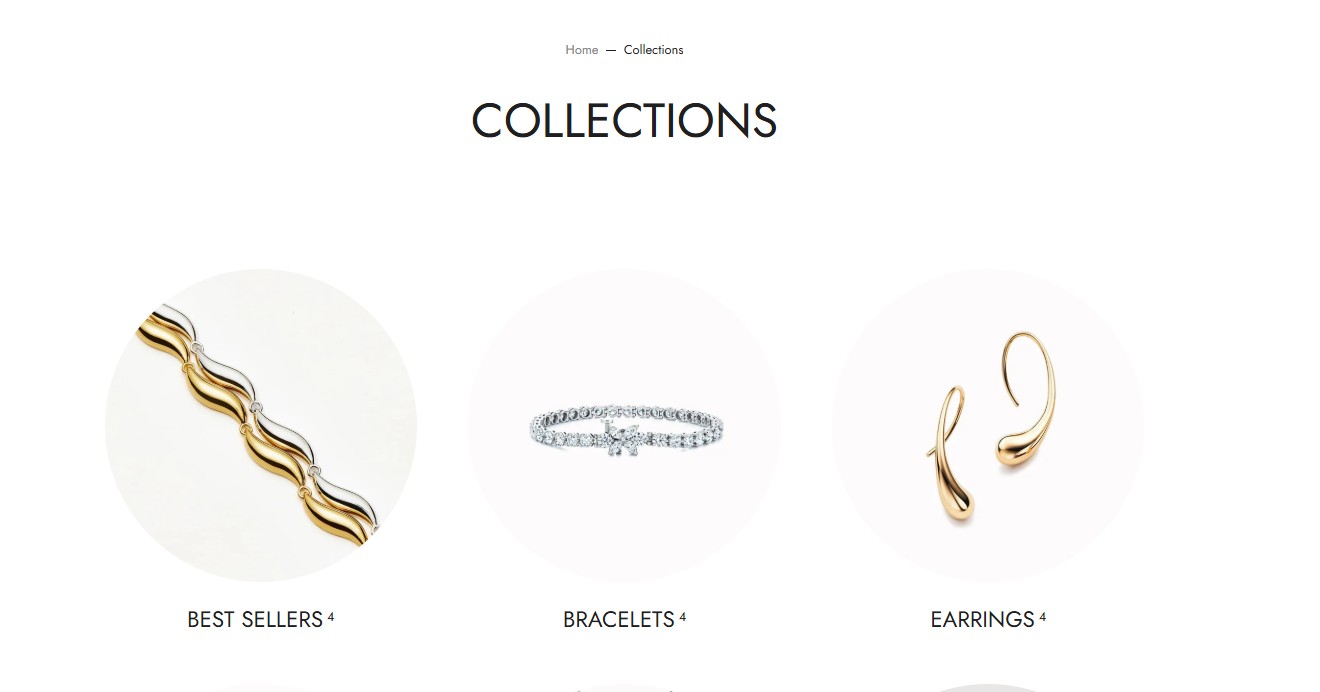
You can show collections on your homepage, add them to your navigation menu, or link them in any page section that supports collections.
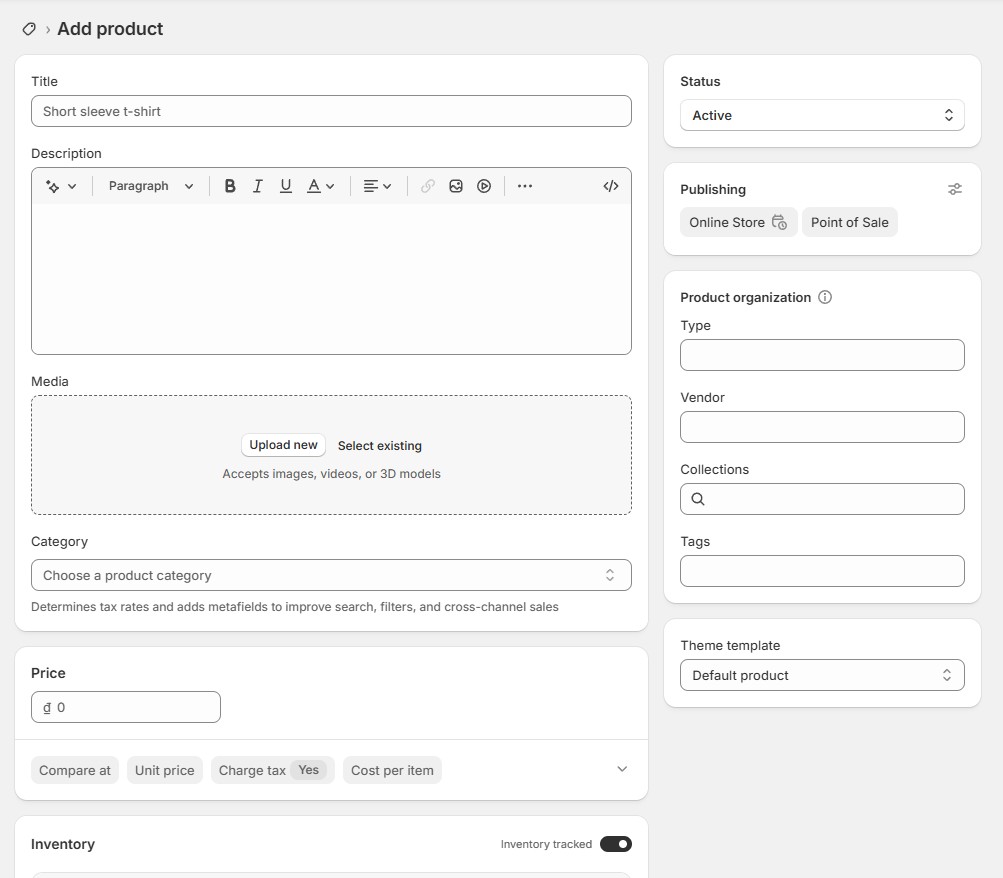
Products are where you manage all the items in your Shopify store. Here, you can add product titles, descriptions, images, pricing, inventory, and variants such as size or color. Proper product management helps keep your store organized and makes shopping easier for customers.
You can add products one by one directly inside Shopify:

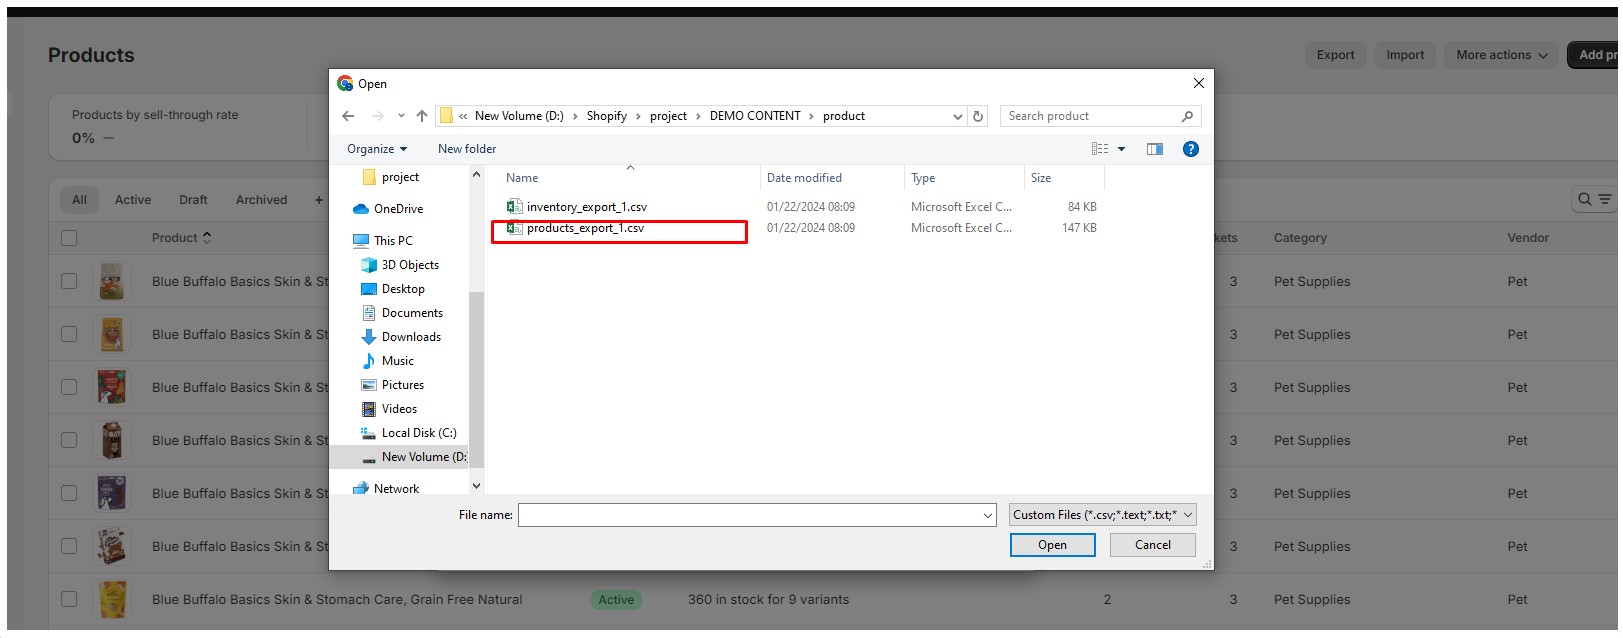
Shopify allows you to import multiple products at once using a CSV file.

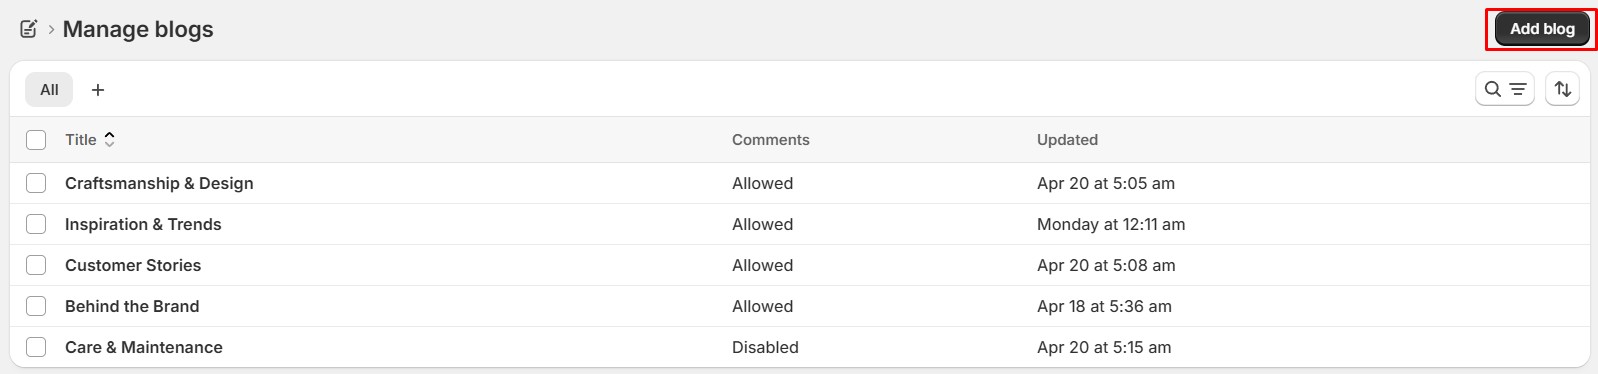
In Shopify, a Blog is a built-in content feature that allows you to publish articles and organize them into different categories. Each blog can contain multiple posts, and you can create as many blogs as your store needs.
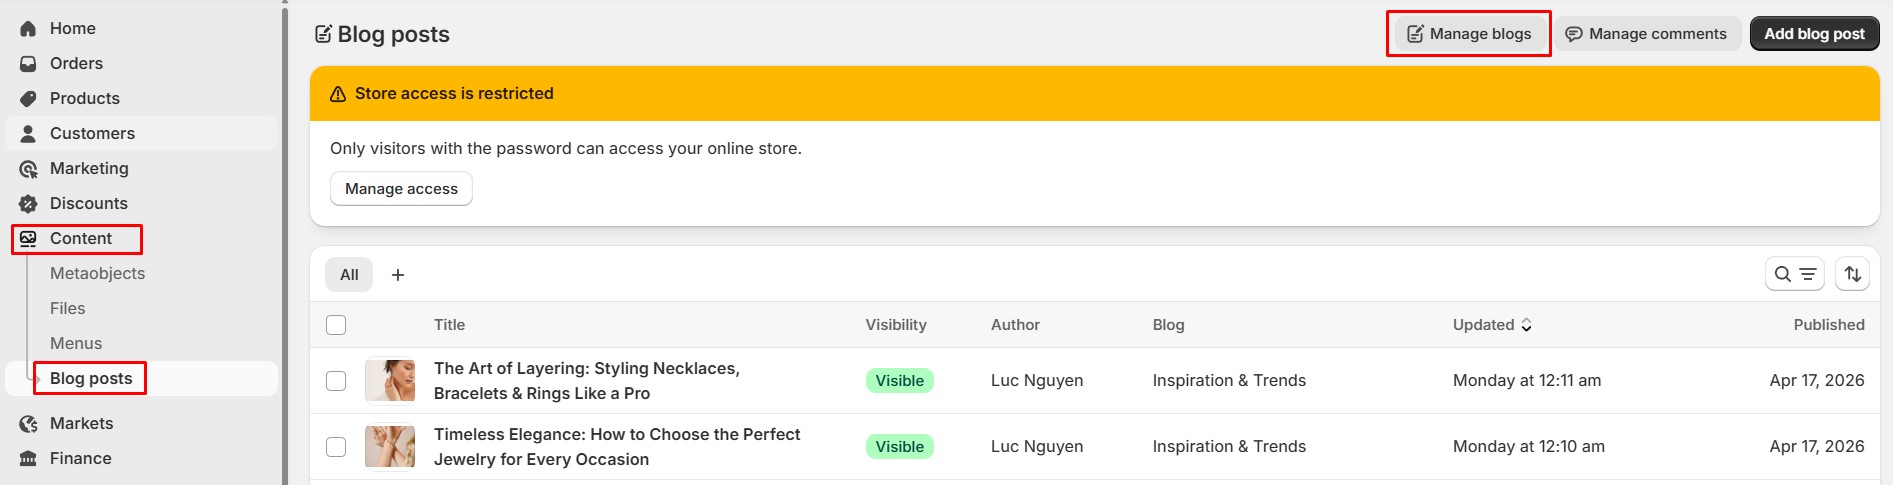
Go to: Online Store → Content → Blog posts
In the top-right area, click: Manage blogs
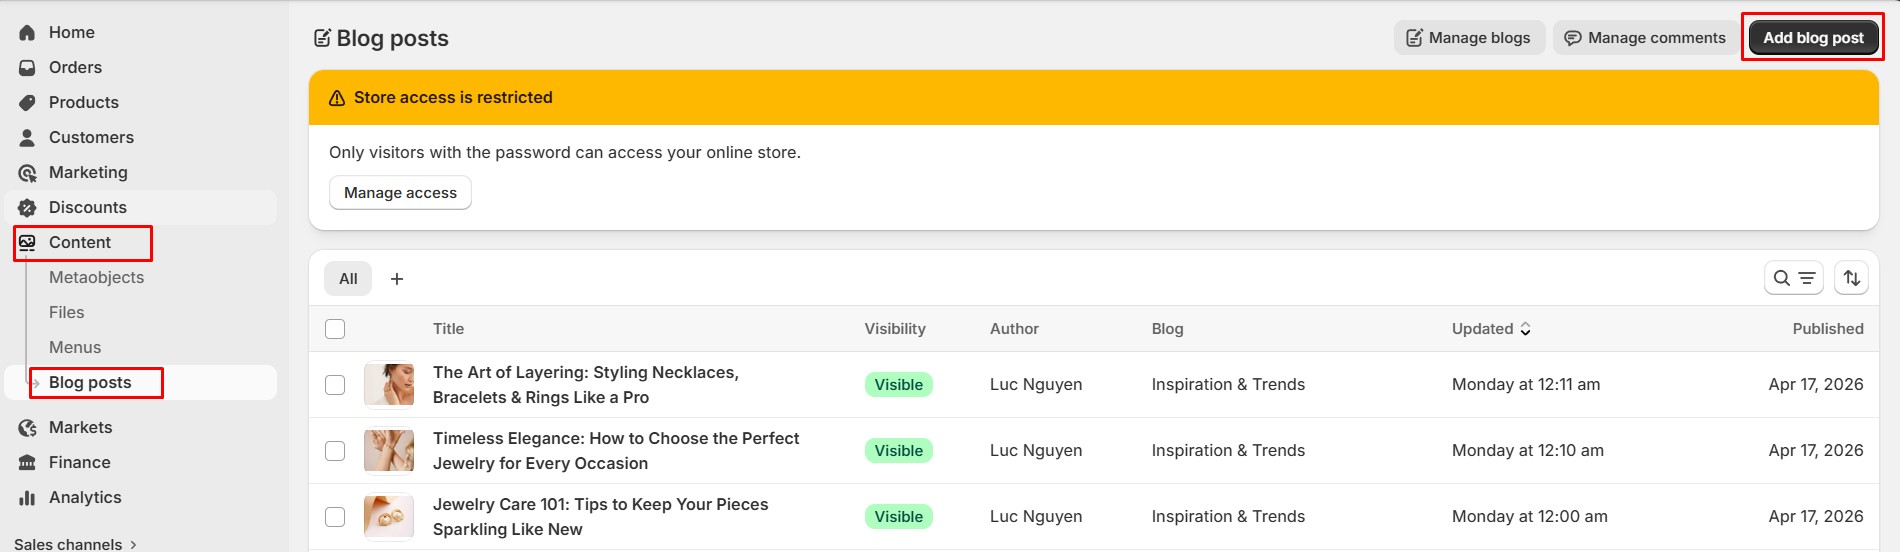
Go to: Online Store → Content → Blog posts
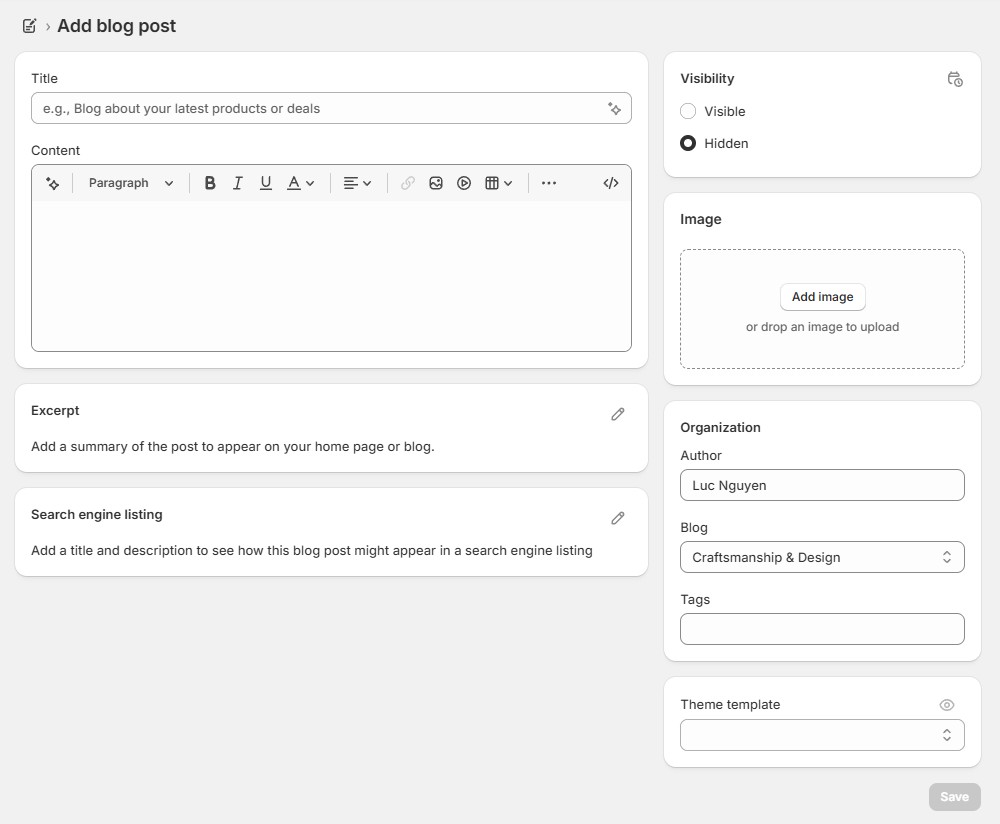
In the top-right area, click: Add blog post
The first, you need read about menu here: Menus and Links

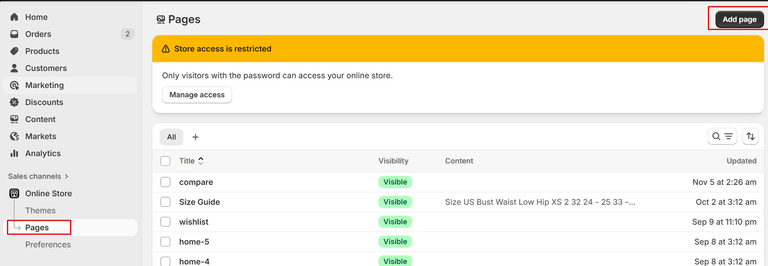
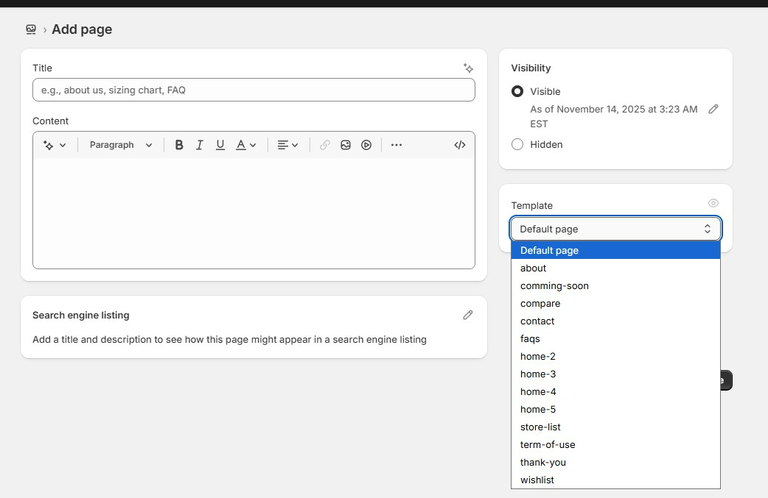
When you first install the theme, it will not include the additional pages that you may have seen in the live demo. These pages need to be created and assigned manually. Shopify allows you to create various pages for your store—such as About Us, Contact, FAQ, Policies, or any custom content required. Follow the steps below to set up and configure your pages:
Go to: Online Store > Pages → Add page.
Enter a title and add your content.
In the Theme template section, select the correct template (e.g., page, page.contact, page.faq, etc.).
This ensures the page displays like the demo.
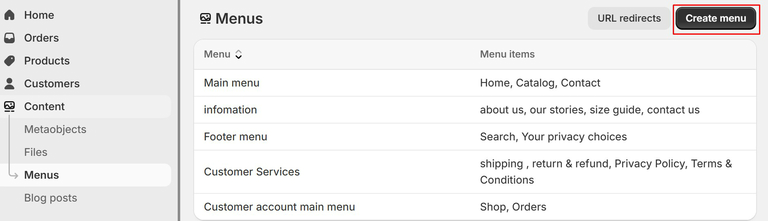
Go to Content > Menus
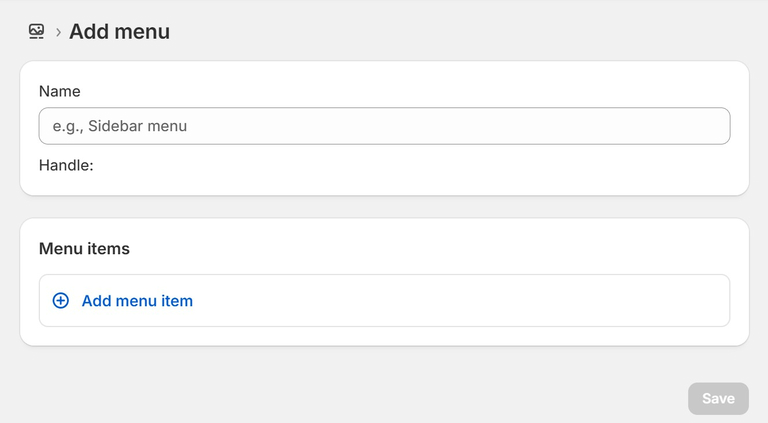
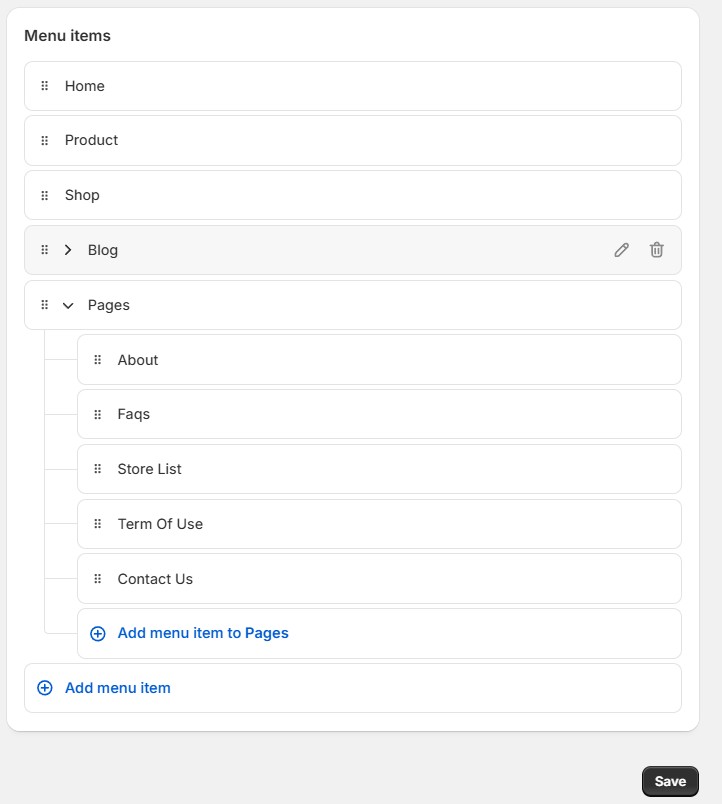
Open a menu → Add menu item → select your page → Save.
Shopify allows your store to operate in multiple languages to serve different markets. When you add a new language, all content such as products, collections, pages, blogs, navigation, and theme text can be translated manually or automatically using the Shopify Translate & Adapt app.
Below is the standard process for adding and activating new languages in Shopify.
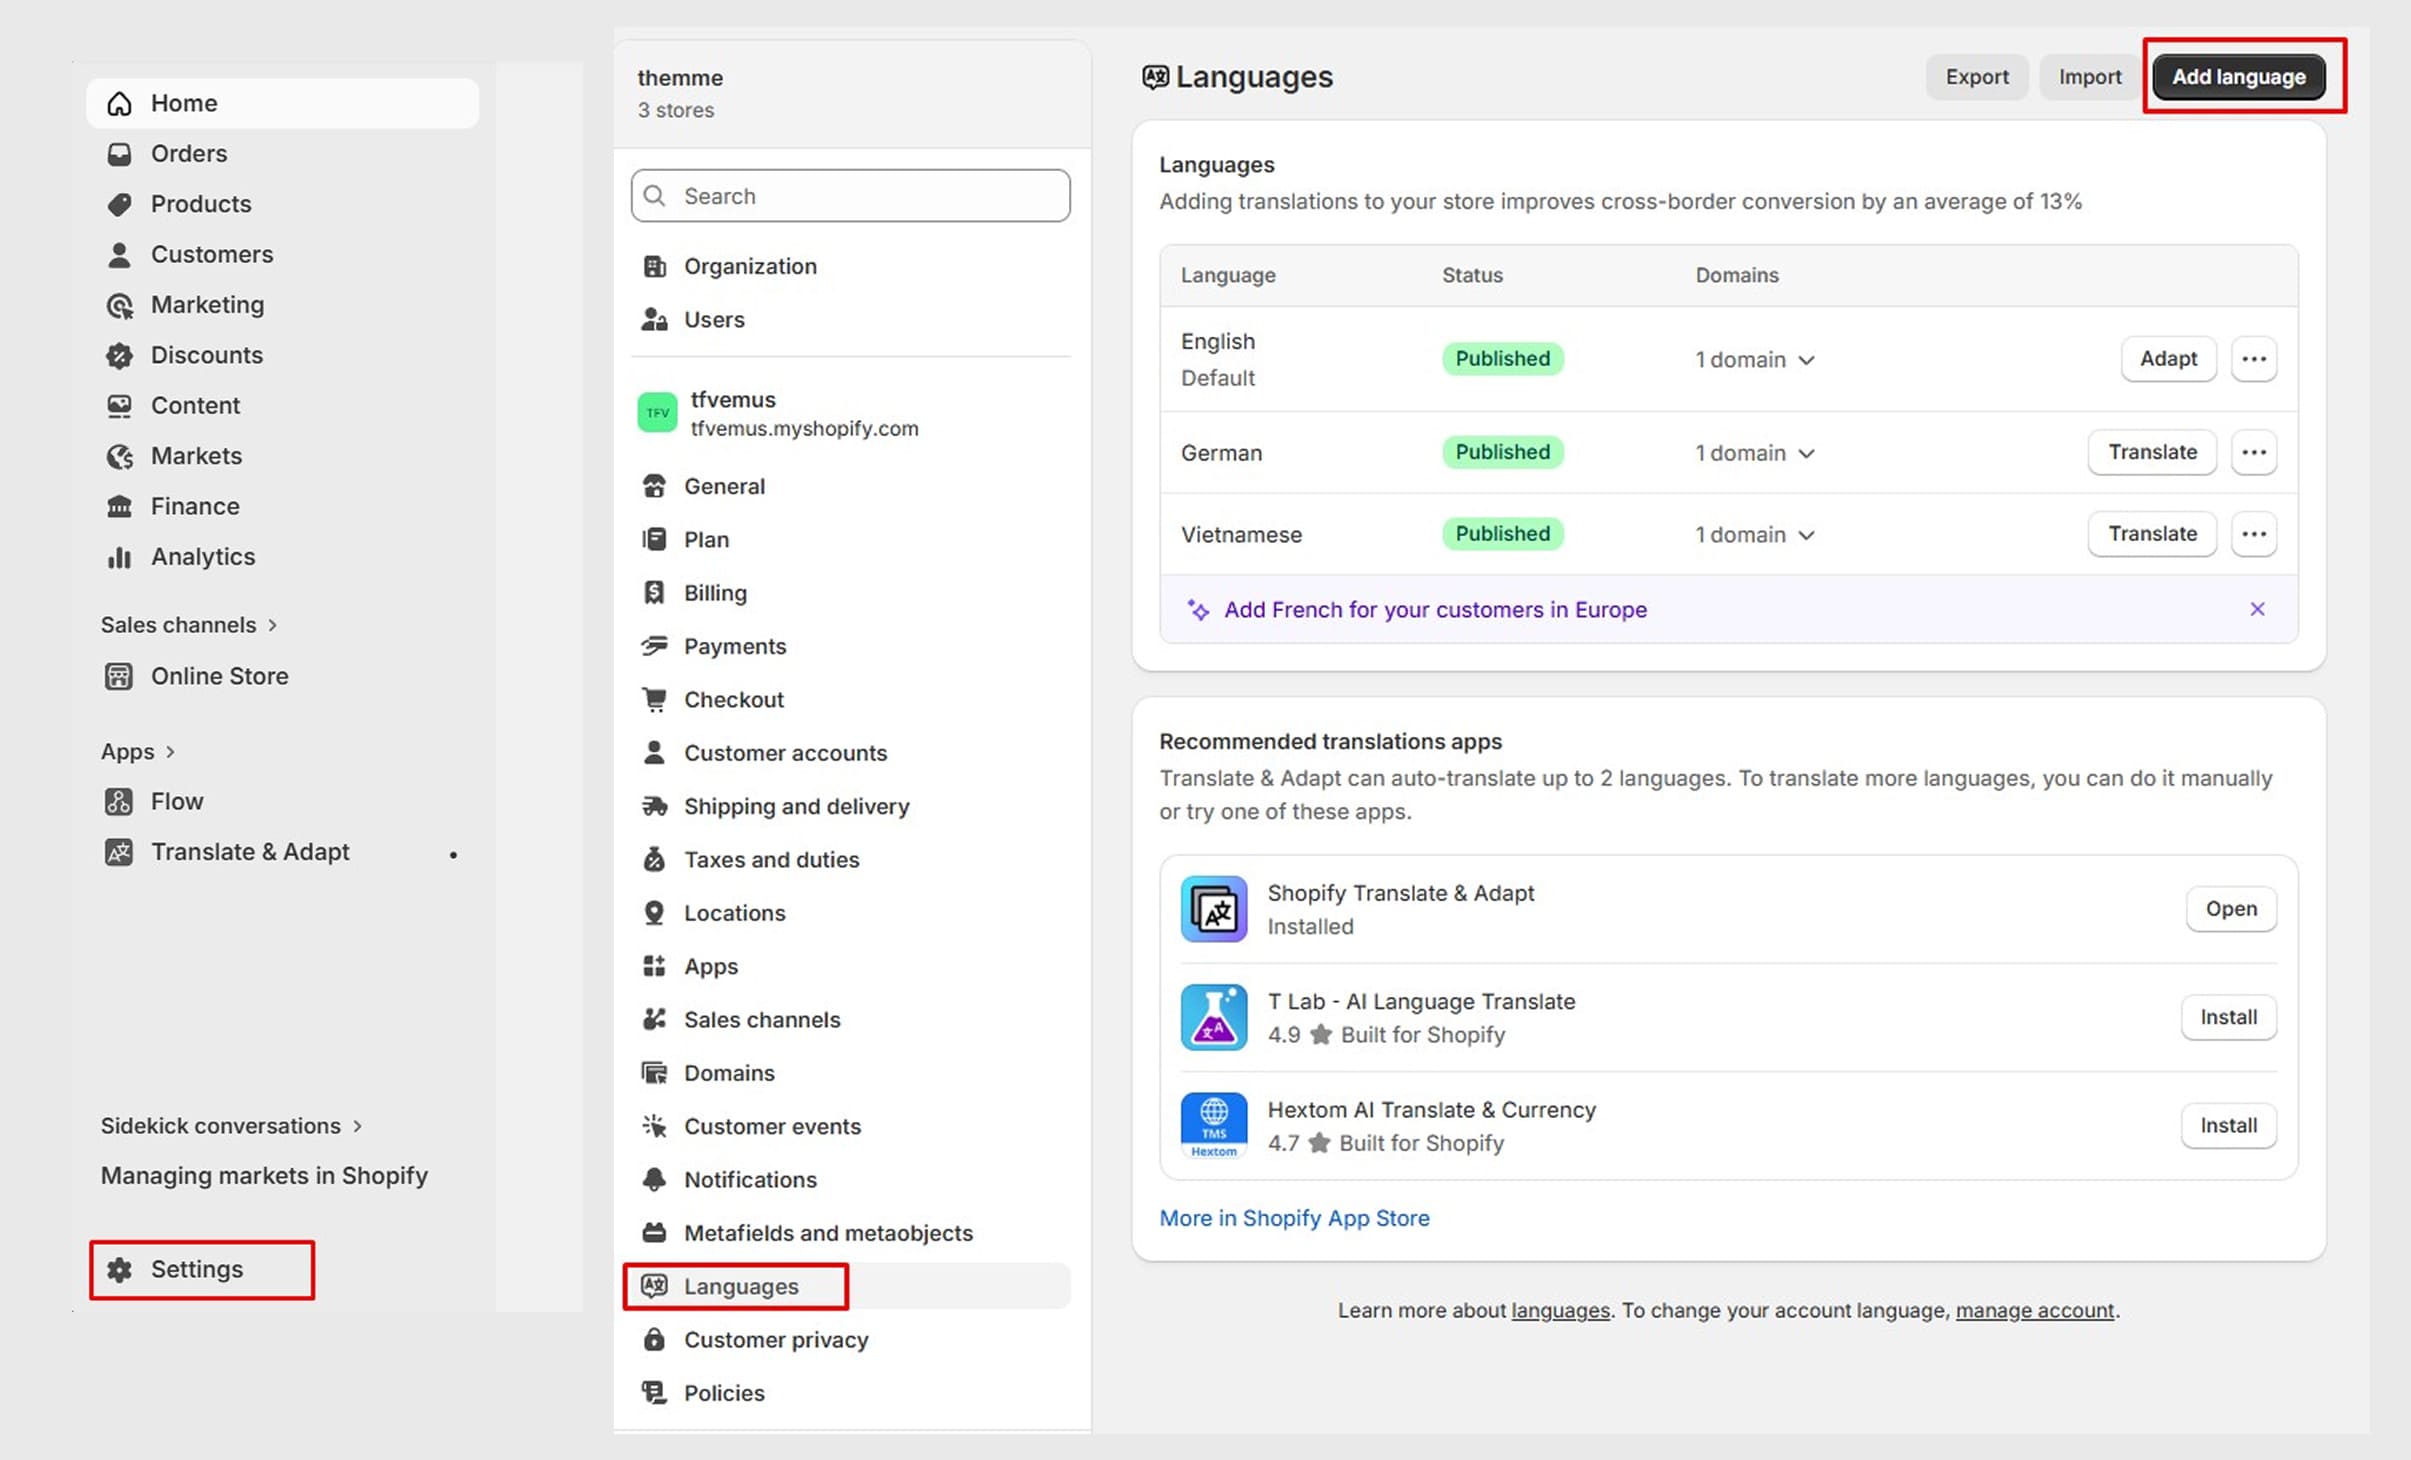
Go to: Settings → Languages
Here you can see all active languages and add new ones.
Click Add language → select the language you want to enable (e.g., French, German, Japanese).
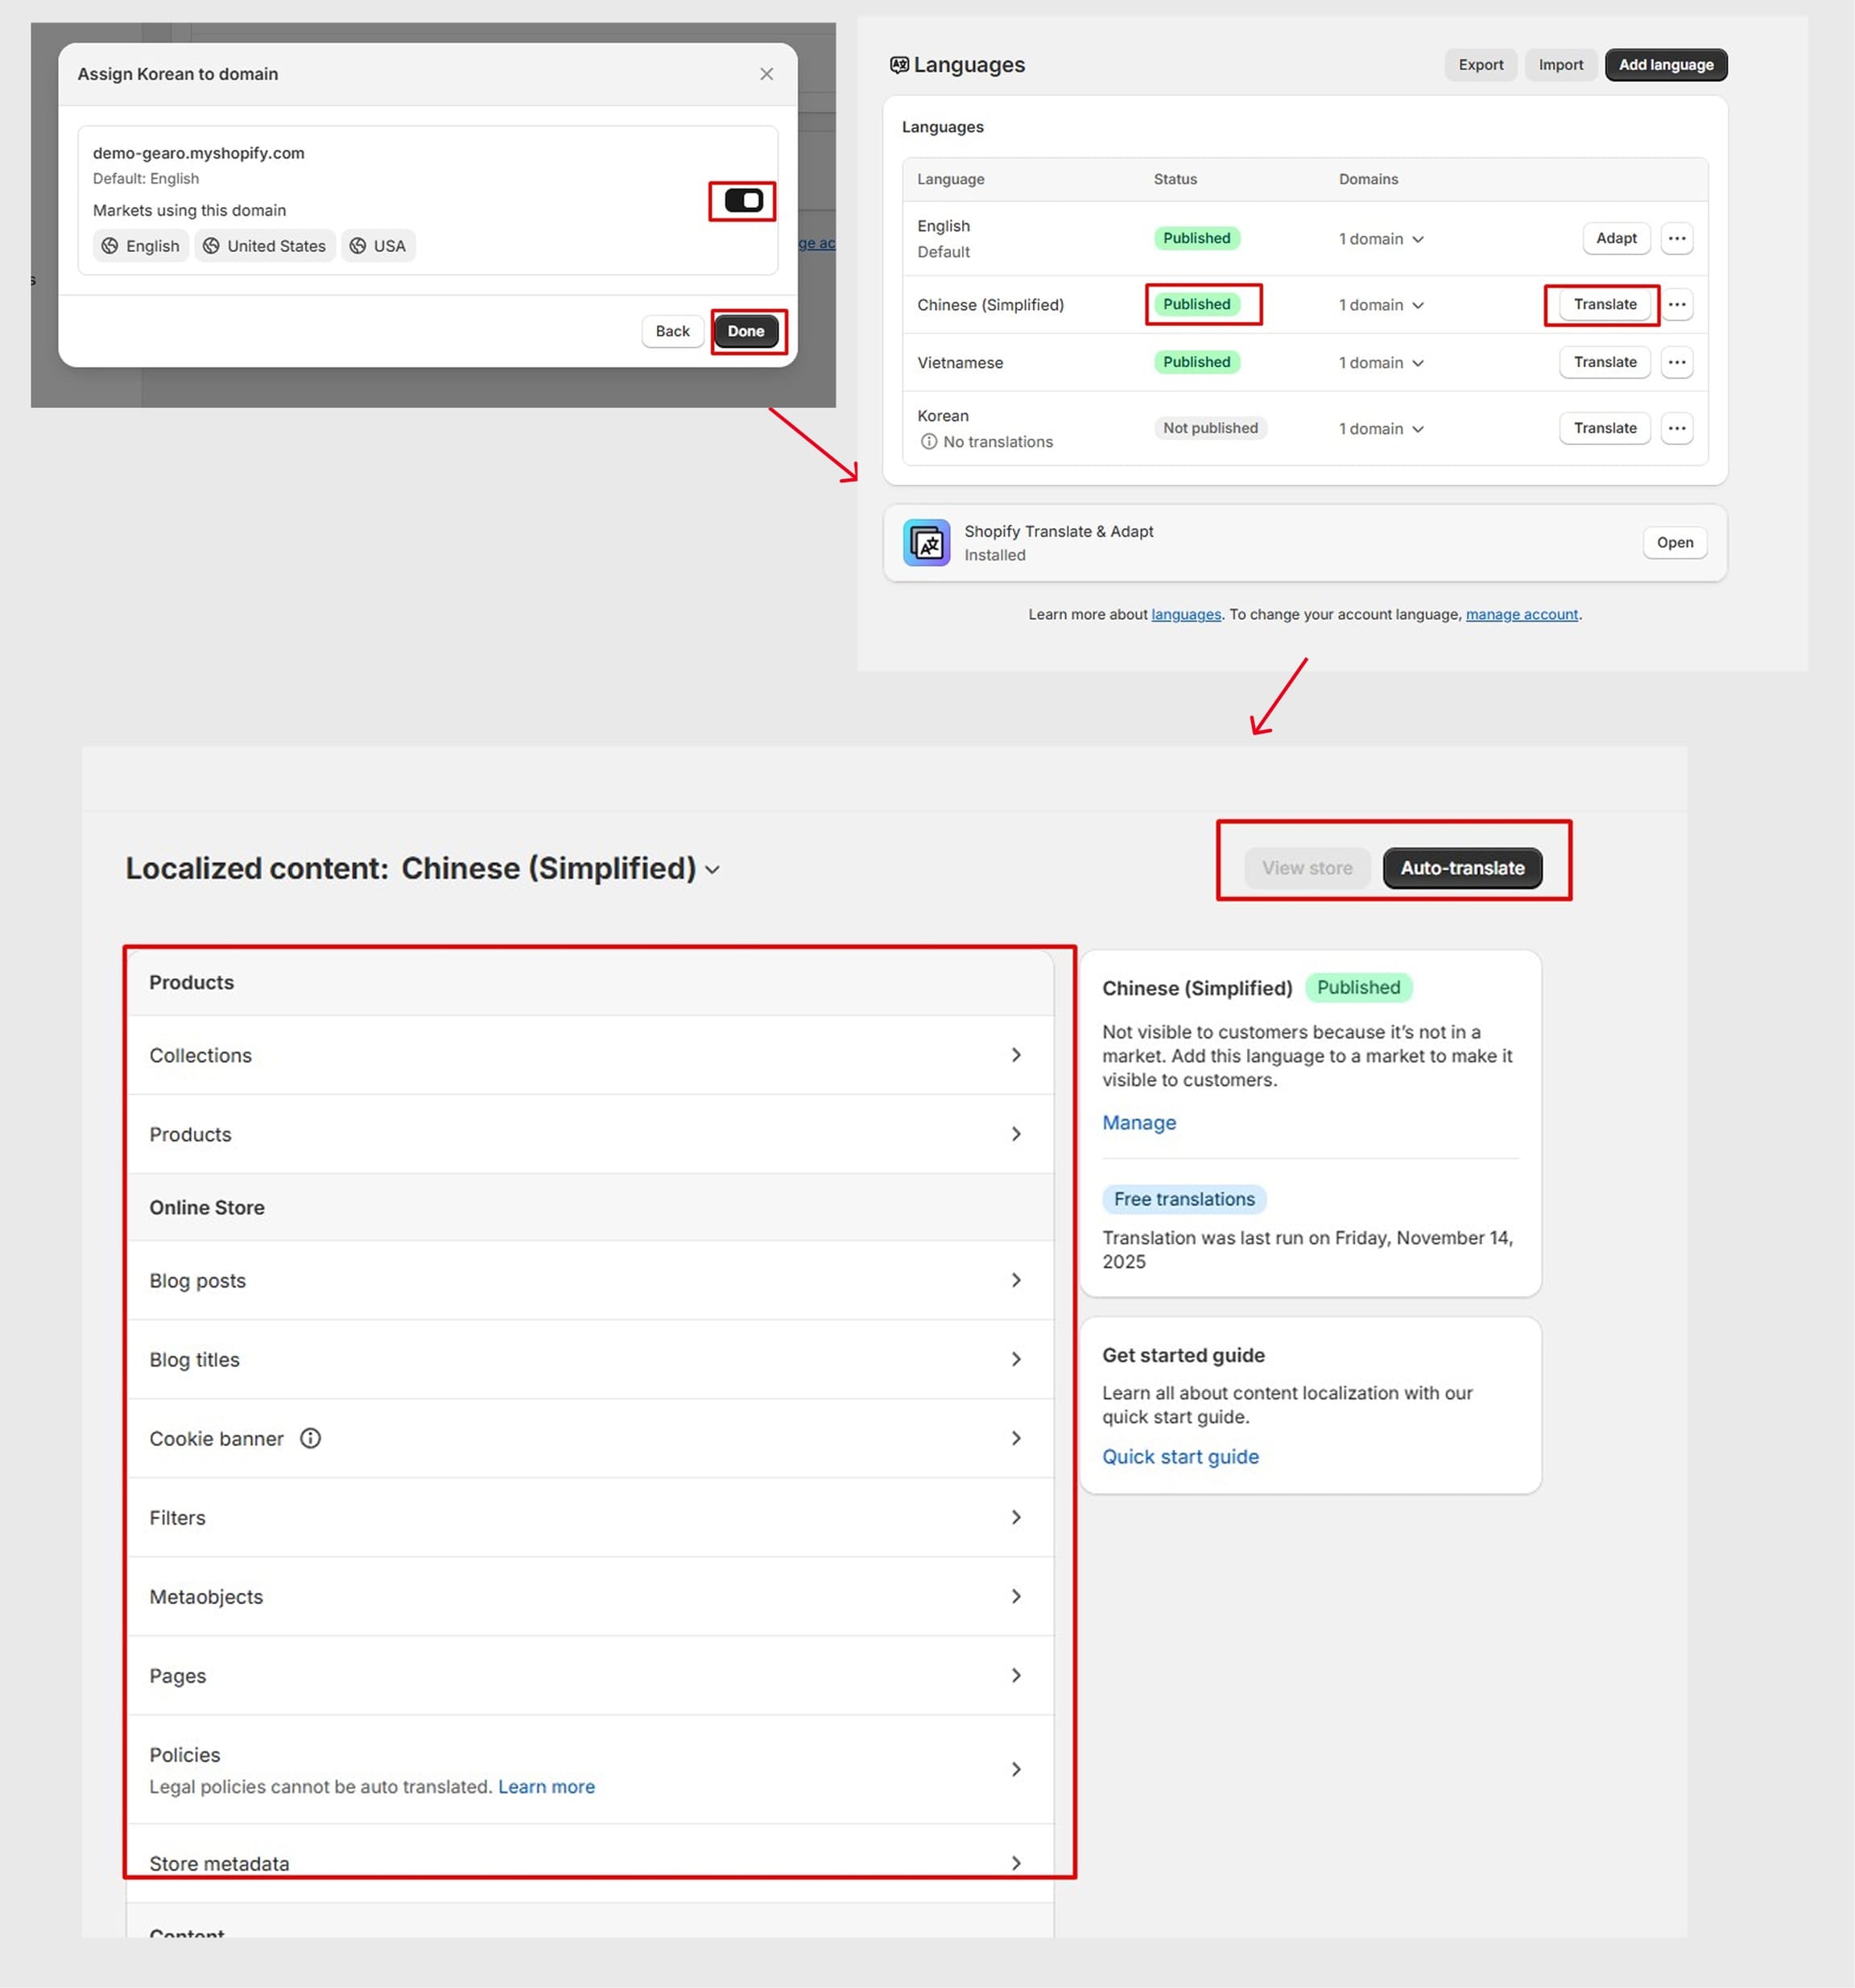
The language will be added to your list but will not appear on the storefront until you publish it.
To translate your store’s content, you need to install:
This app allows you to:
Open the Shopify Translate & Adapt app → choose the language you want to translate.
You can translate:
You may use automatic translation first and then adjust the text manually.
If you haven’t installed the app yet, please follow the instructions below to set it up.
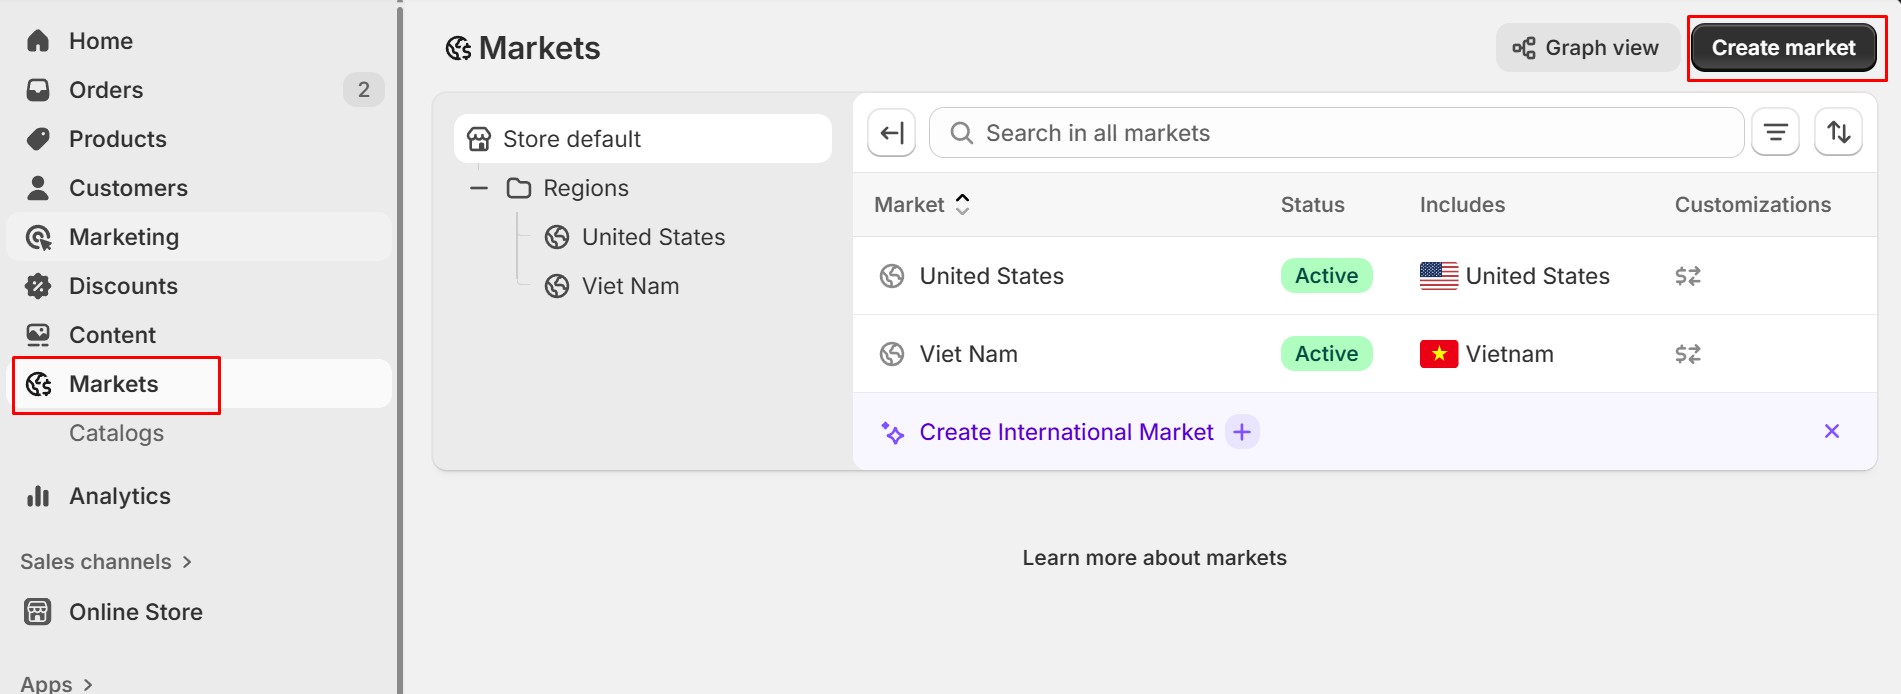
Shopify Markets allows you to organize and manage how your store sells to different countries or regions. Each Market can include one or multiple countries, and it inherits the store’s default settings such as currency, catalog, domain, and languages. You can later customize these settings to create a localized experience for customers in that regio
This is where all your markets are managed.
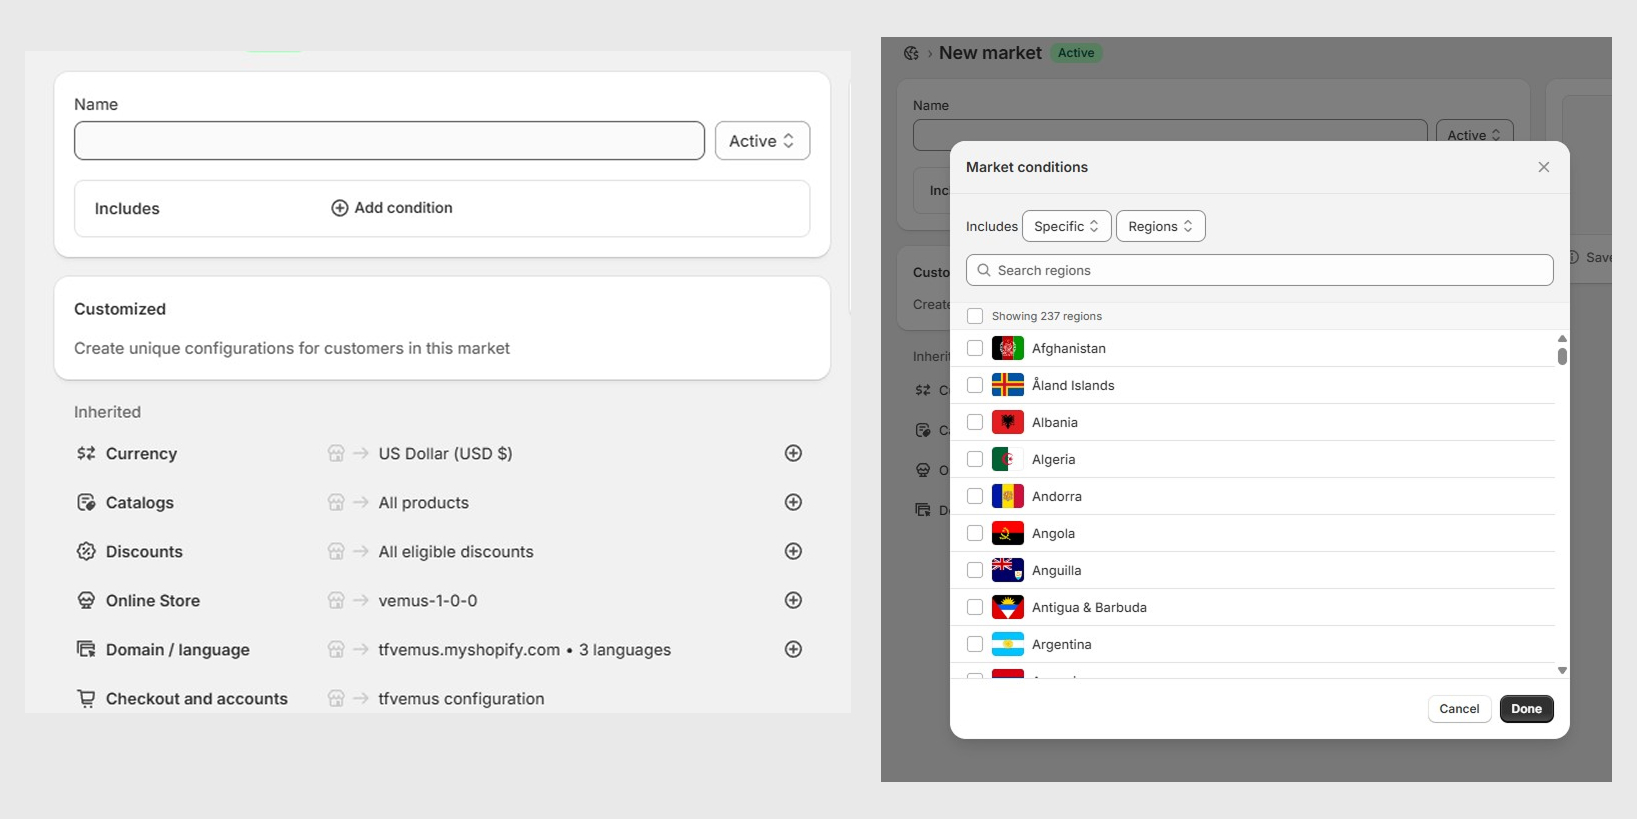
Shopify will open the New Market setup screen (like the one shown in your image).
Fill in the Name field to label your Market.
Example: Vietnam, Asia, Europe, Wholesale, etc.
Click Add condition under Includes, then choose the countries that belong to this Market.
The Market will automatically inherit the default settings from your main store, including:
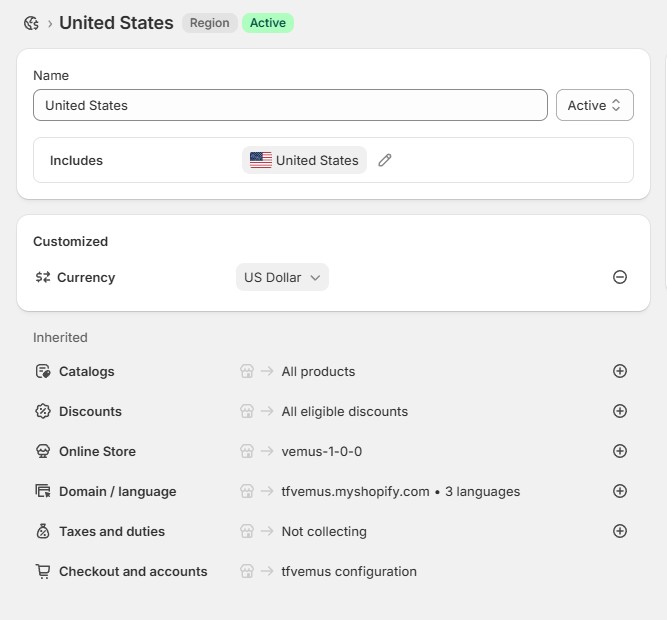
These settings can be customized later by clicking the ( + ) icon after saving the Market.
Once saved, the Market will appear in your Markets list. You can then open it to further customize currency, domain, language, pricing, and other settings if needed.
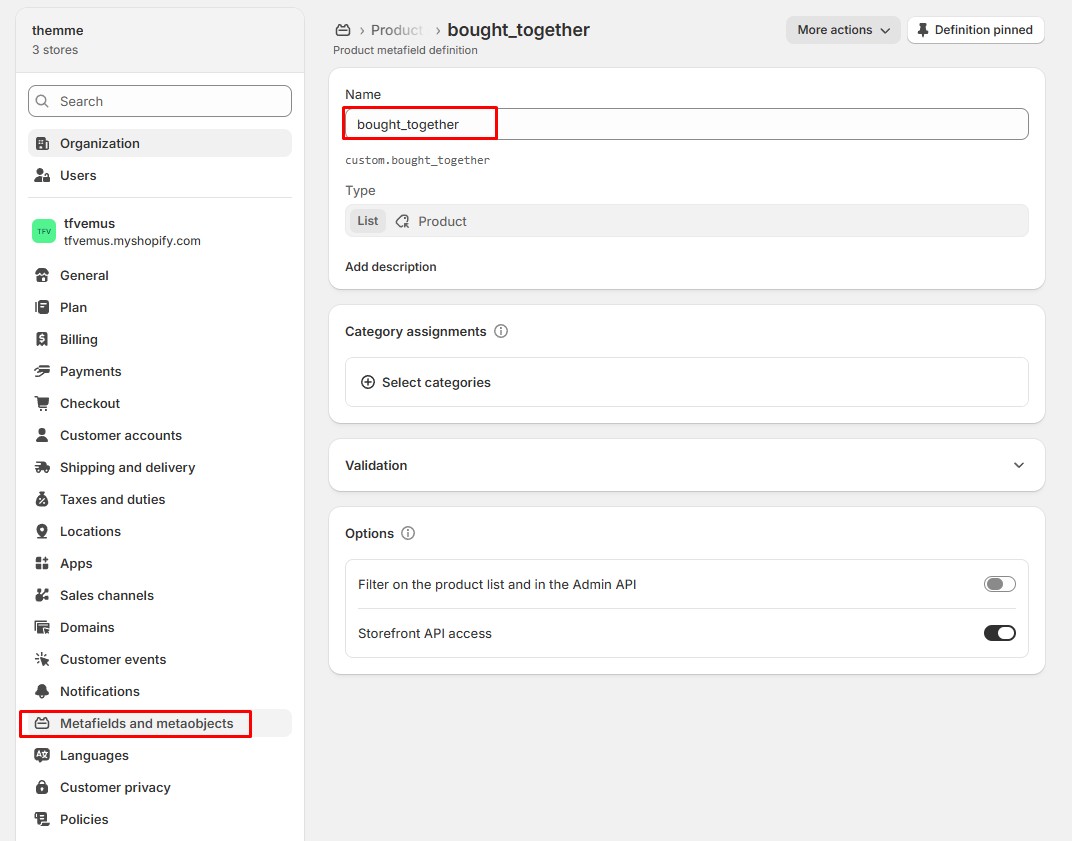
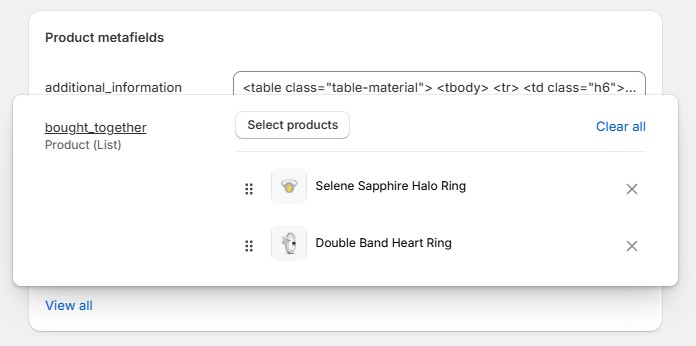
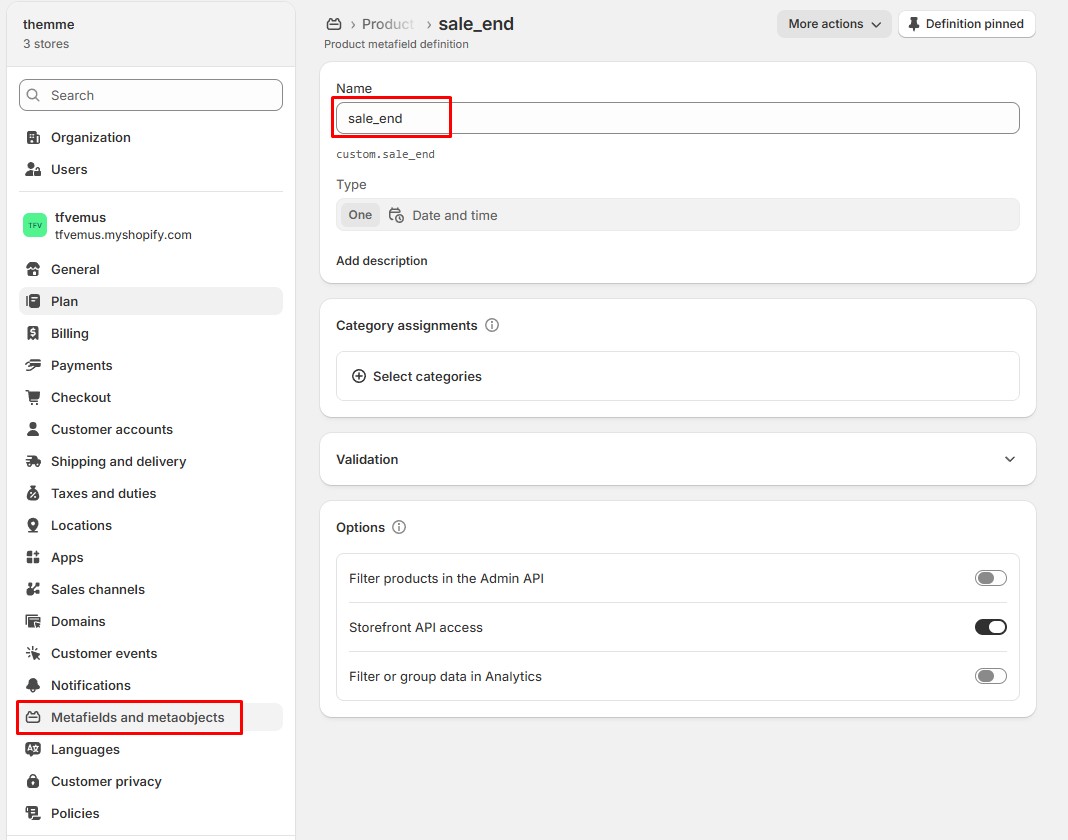
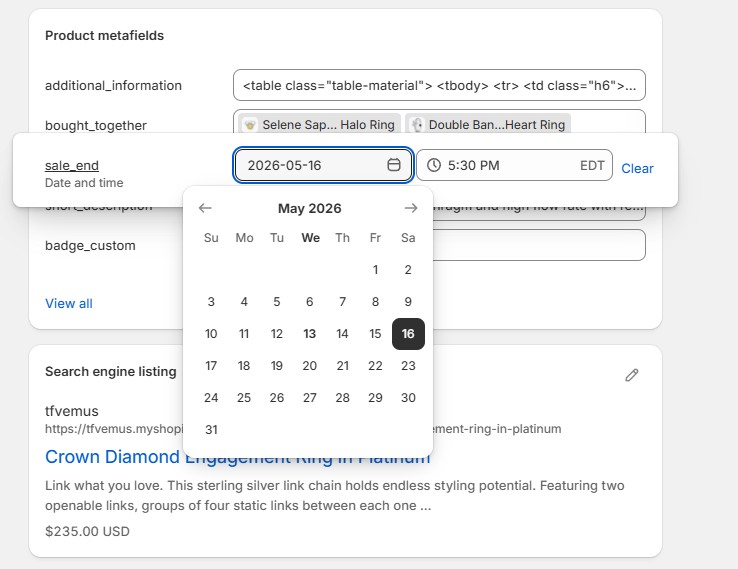
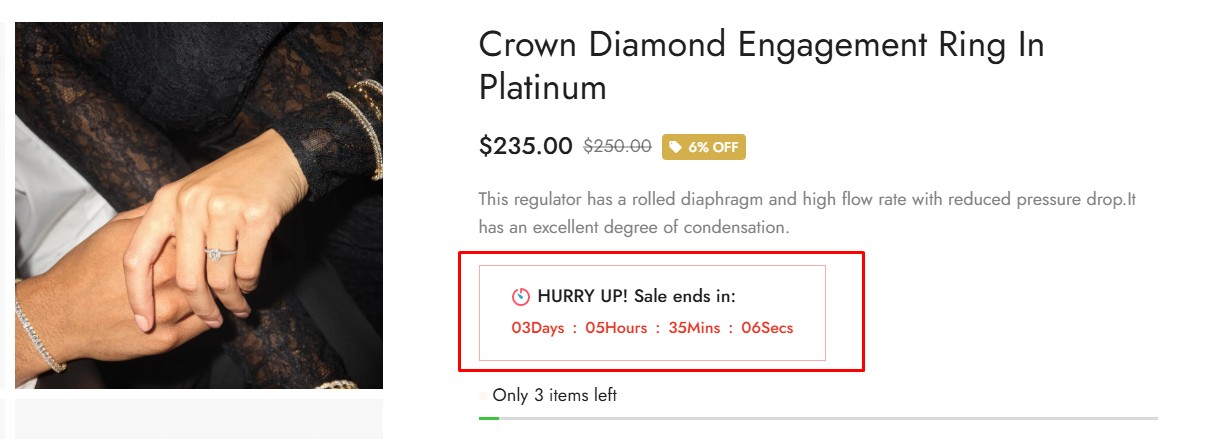
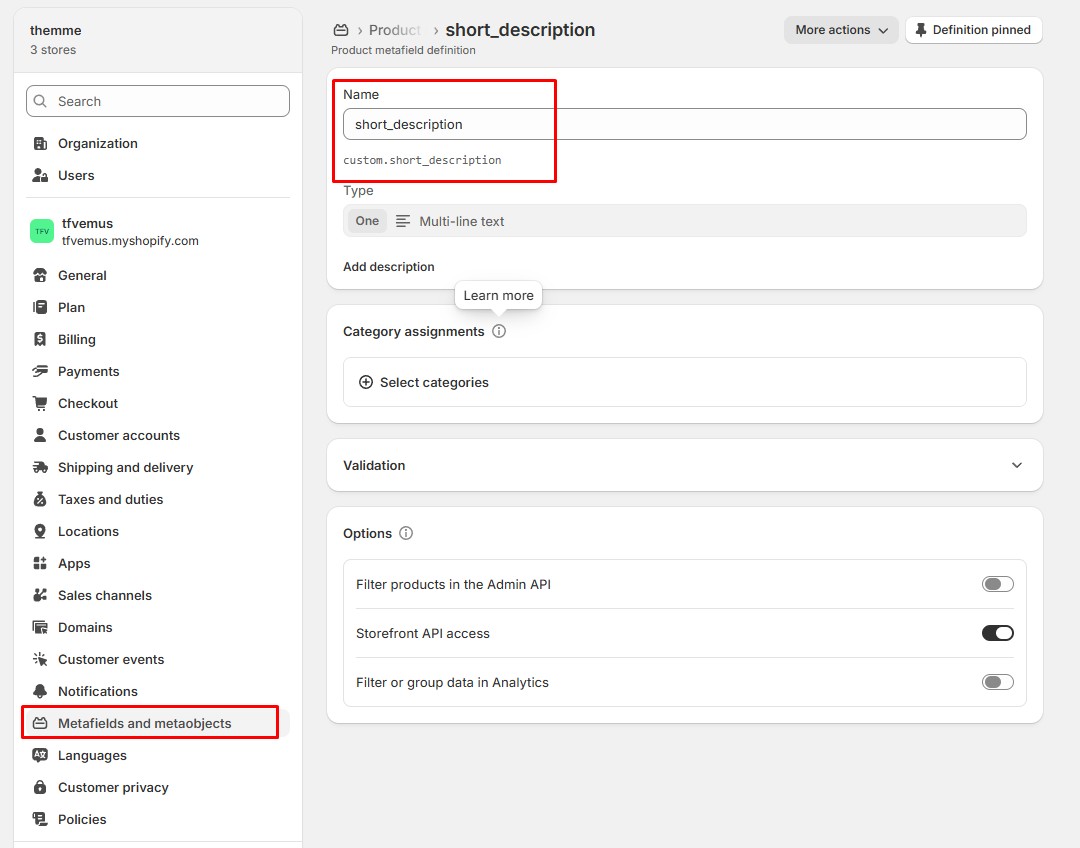
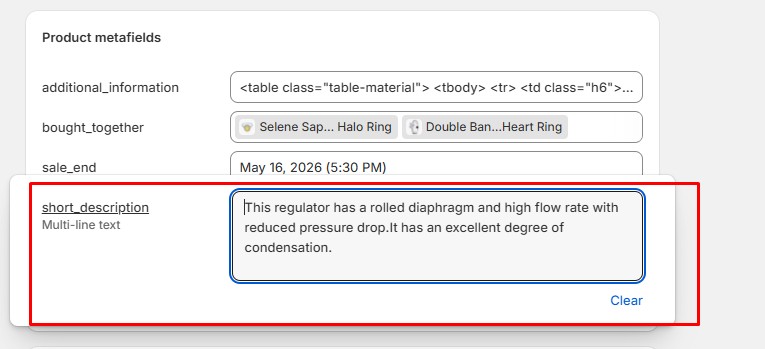
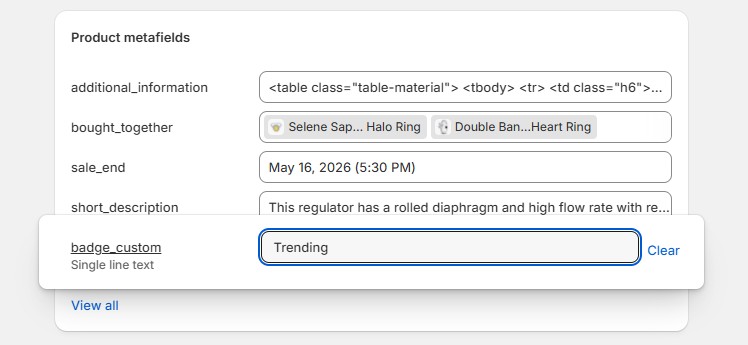
You can learn more about metafields by checking the detailed documentation here: Link
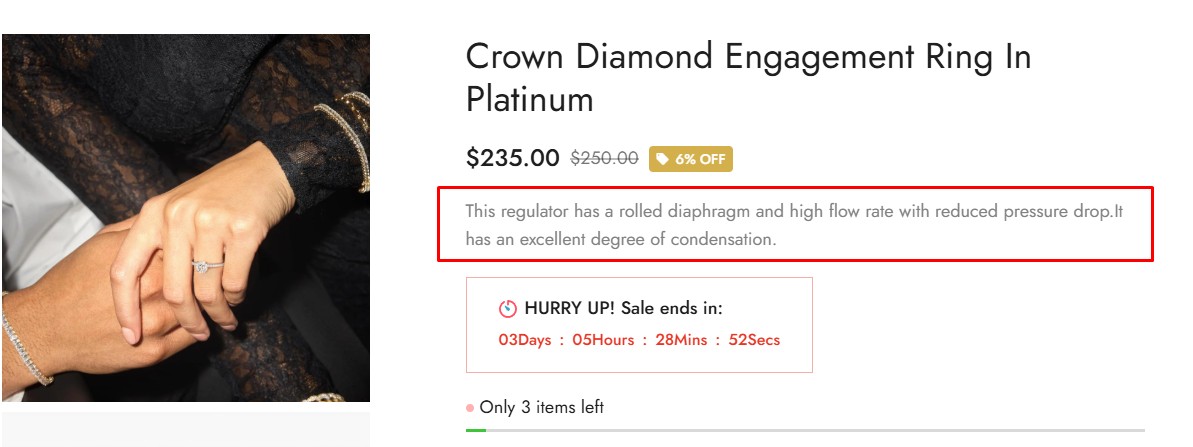
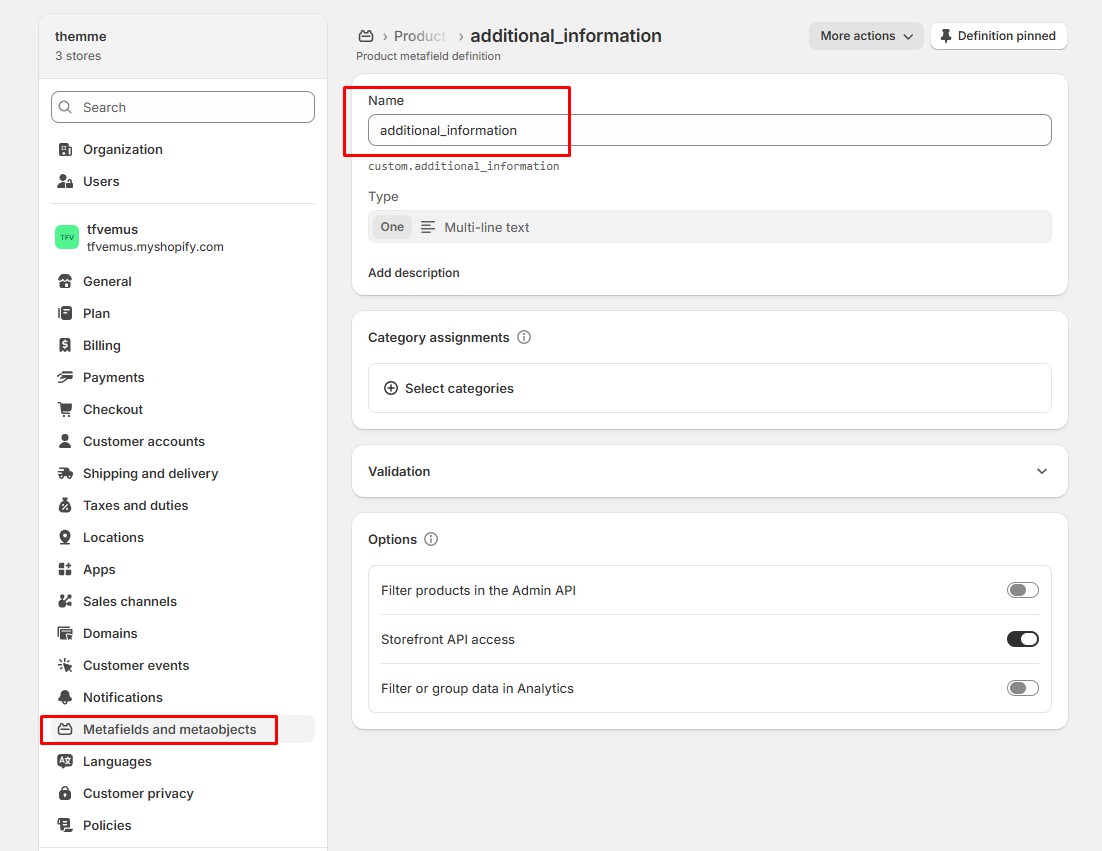
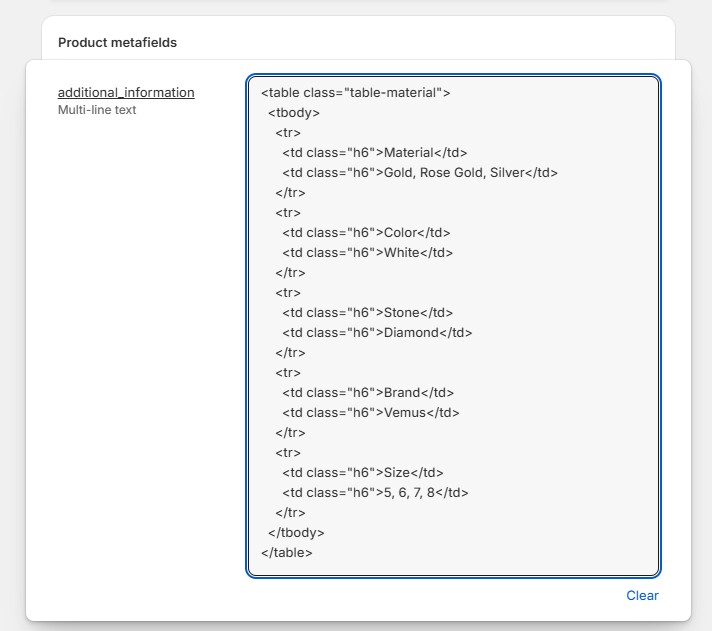

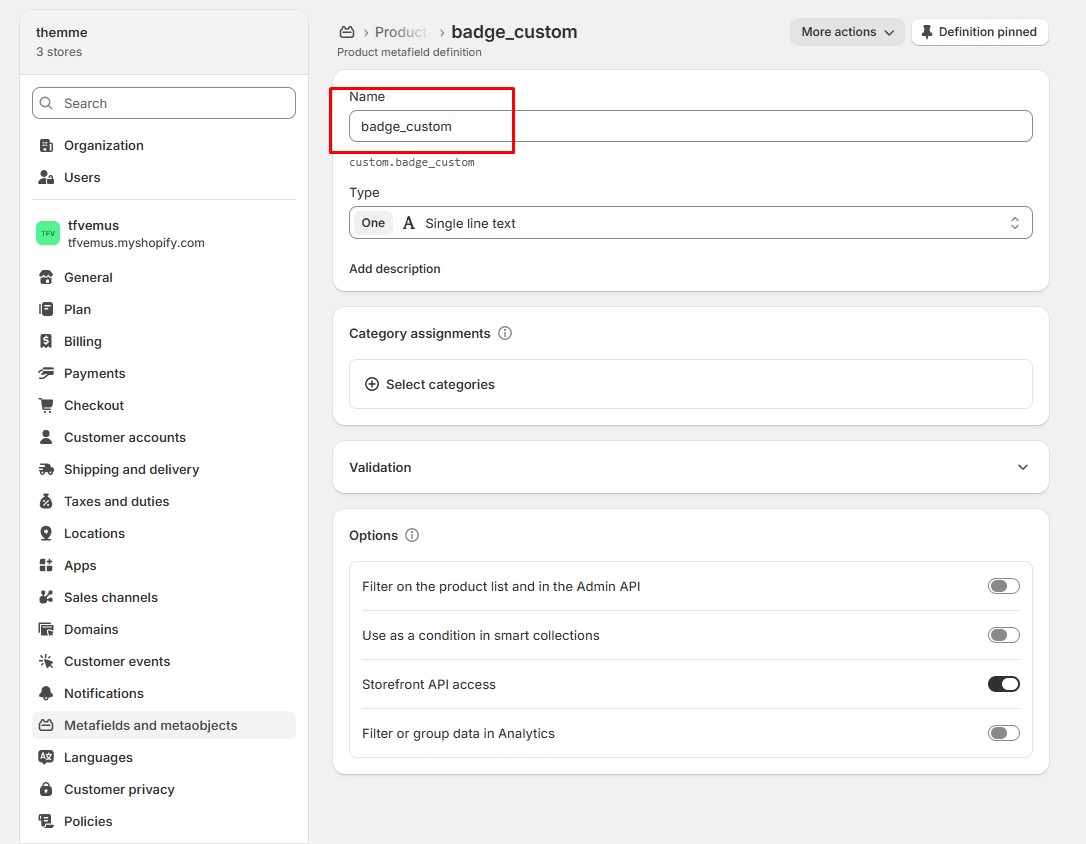
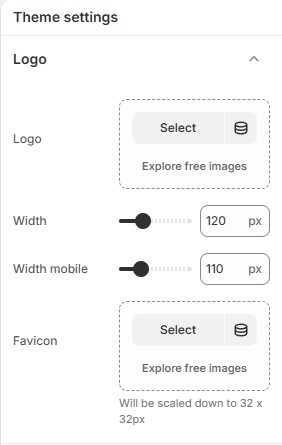
In the Logo area, you can upload the main image representing your brand.
The Favicon is the small icon that appears on the browser tab.
In this section, you can:
A favicon helps improve brand recognition when users open multiple tabs.
Color schemes are preset color groups that you can apply to different sections of your Shopify theme. You can create multiple schemes (Scheme 1, Scheme 2, etc.).
You can read more about color schemes here.
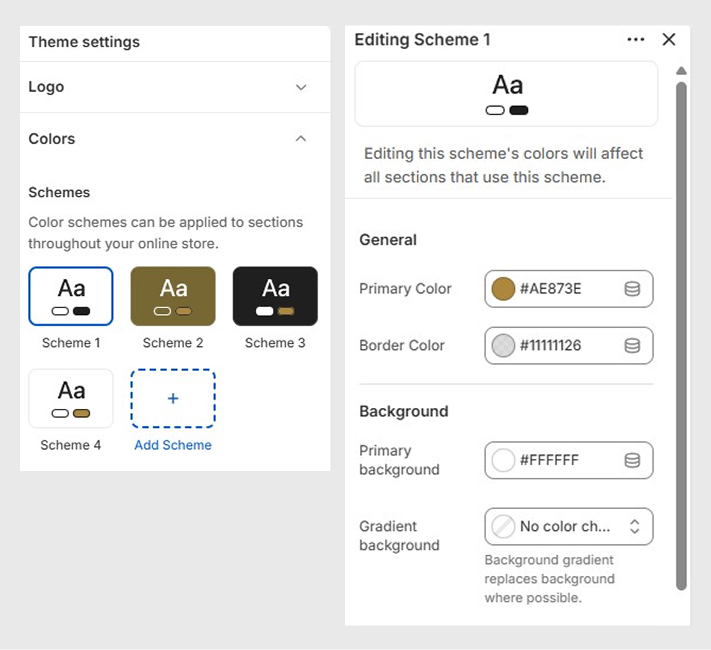
Each color scheme can include settings for:
Changes made to a scheme will automatically affect all sections using that scheme.
Typography settings allow you to control the fonts and text styles used throughout your store.
You can select multiple font families and apply them to body text and headings. Customize font size, weight, line height, and letter spacing to match your brand style and improve readability.
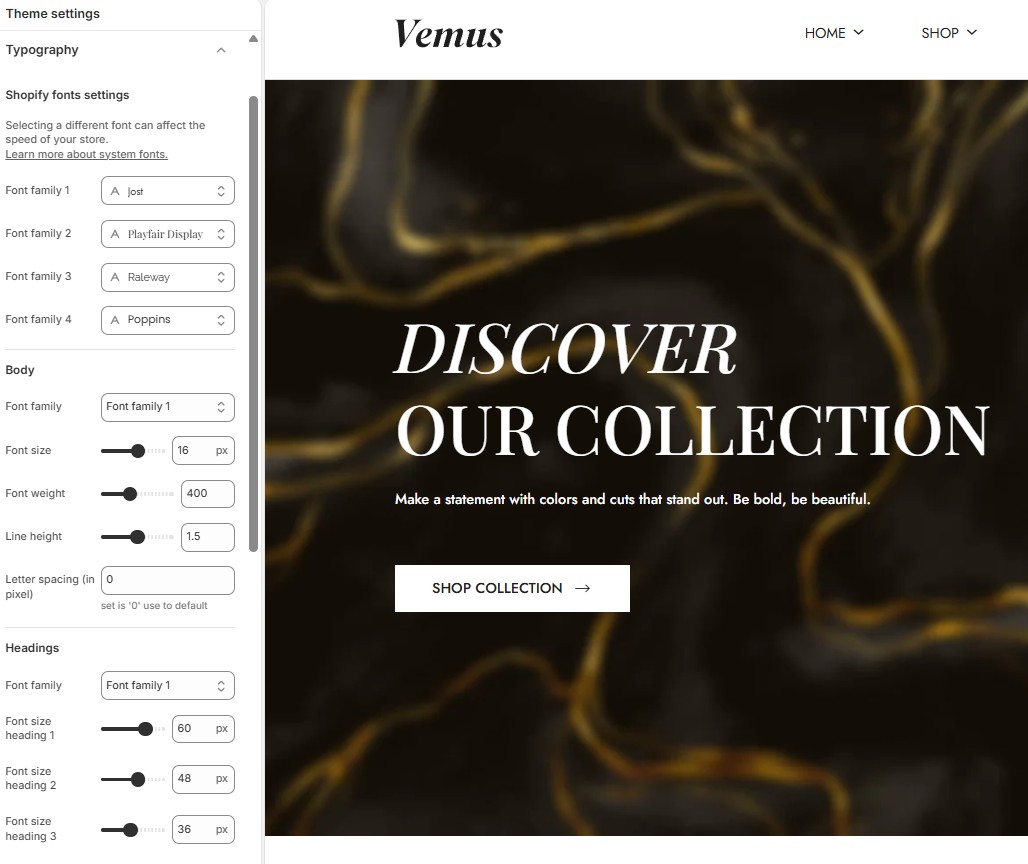
Changes will automatically apply to all sections using these typography settings.
Layout settings allow you to control the overall width and spacing of your store layout.
Set the maximum page width for container layouts, and adjust the left & right offset spacing (padding) for full-width sections to create better visual balance across different screen sizes.
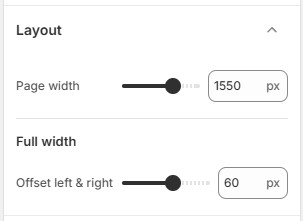
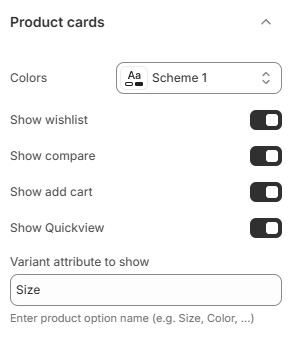
Product card settings allow you to customize the appearance and features of product items across collection pages and product grids.
Choose a color scheme and control optional actions such as wishlist, compare, add to cart, and quickview. You can also define which product variant attribute should be displayed on product cards.
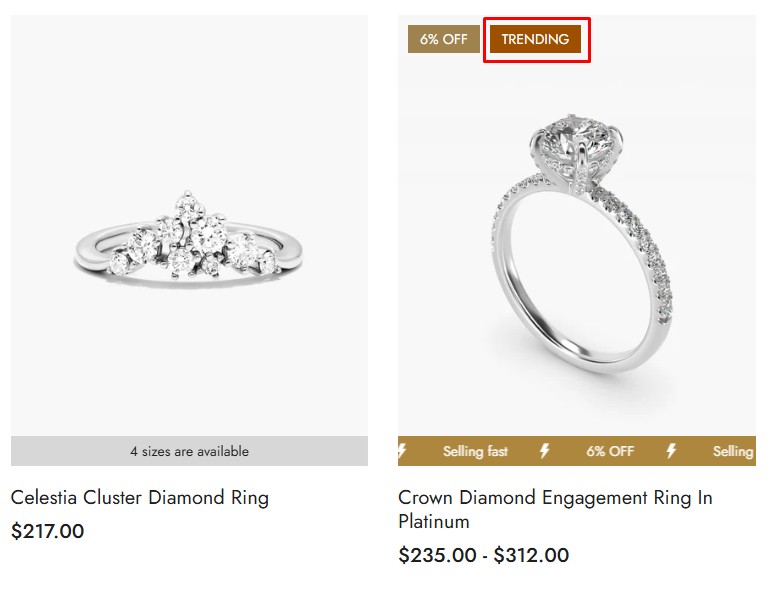
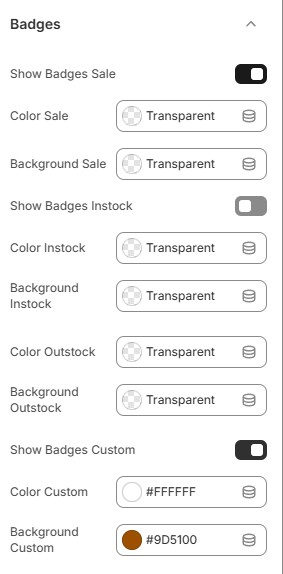
Badge settings allow you to manage the visibility and colors of product status labels displayed on product cards.
Customize badges such as Sale, Instock, Outstock, and Custom badges to better highlight product availability and promotions.
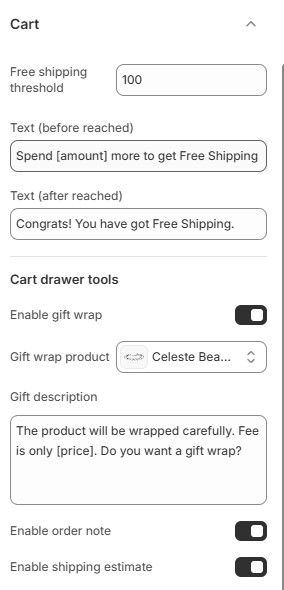
Cart settings allow you to customize the shopping cart experience and additional cart drawer features.
Set a free shipping goal with custom messages, and enable optional tools such as gift wrap, order notes, and shipping estimates to improve customer convenience.
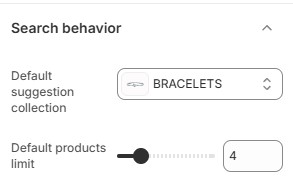
Search behavior settings allow you to customize the default content displayed in predictive search results.
Select a default suggestion collection and control the maximum number of products shown in the search dropdown.
This section allows you to connect your store with your social media platforms by adding the URLs to your official accounts. Once added, the theme will display these links in areas such as the header, footer, and social icon sections—depending on the layout.
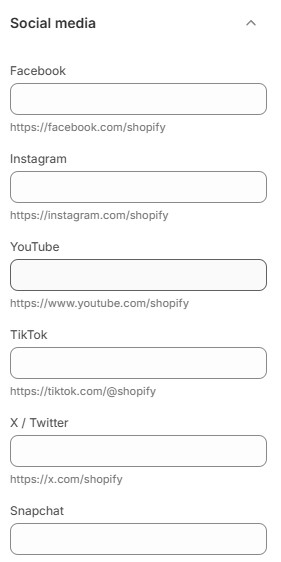
Simply enter the full URL of each social media profile your store uses.
If a field is left blank, the icon for that platform will not appear on the storefront.
Enter your Facebook Page URL.
Example: https://www.facebook.com/xxxx
Enter your Instagram profile URL.
Example: https://www.instagram.com/xxxx
Add a link to your YouTube channel.
Example: https://www.youtube.com/xxxx
Add your official TikTok profile link.
Example: https://www.tiktok.com/xxxx
Enter your Twitter/X profile URL.
Example: https://x.com/xxxx
Insert your Snapchat profile link.
Example: https://www.snapchat.com/xxxx
Add your Pinterest account link.
Example: https://www.pinterest.com/xxxx
Enter your Tumblr blog or profile URL.
Example: https://www.tumblr.com/xxxx
Add your Vimeo profile or channel link.
Example: https://vimeo.com/xxxx
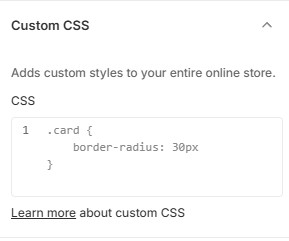
The Custom CSS section allows you to add your own CSS code and apply styling changes across your entire Shopify online store. This feature is useful for advanced customizations that are not available through the standard theme settings.
The Announcement bar lets you display important messages, promotions, or contact information at the top of your store. You can add multiple announcement blocks and customize the layout, style, and carousel behavior.
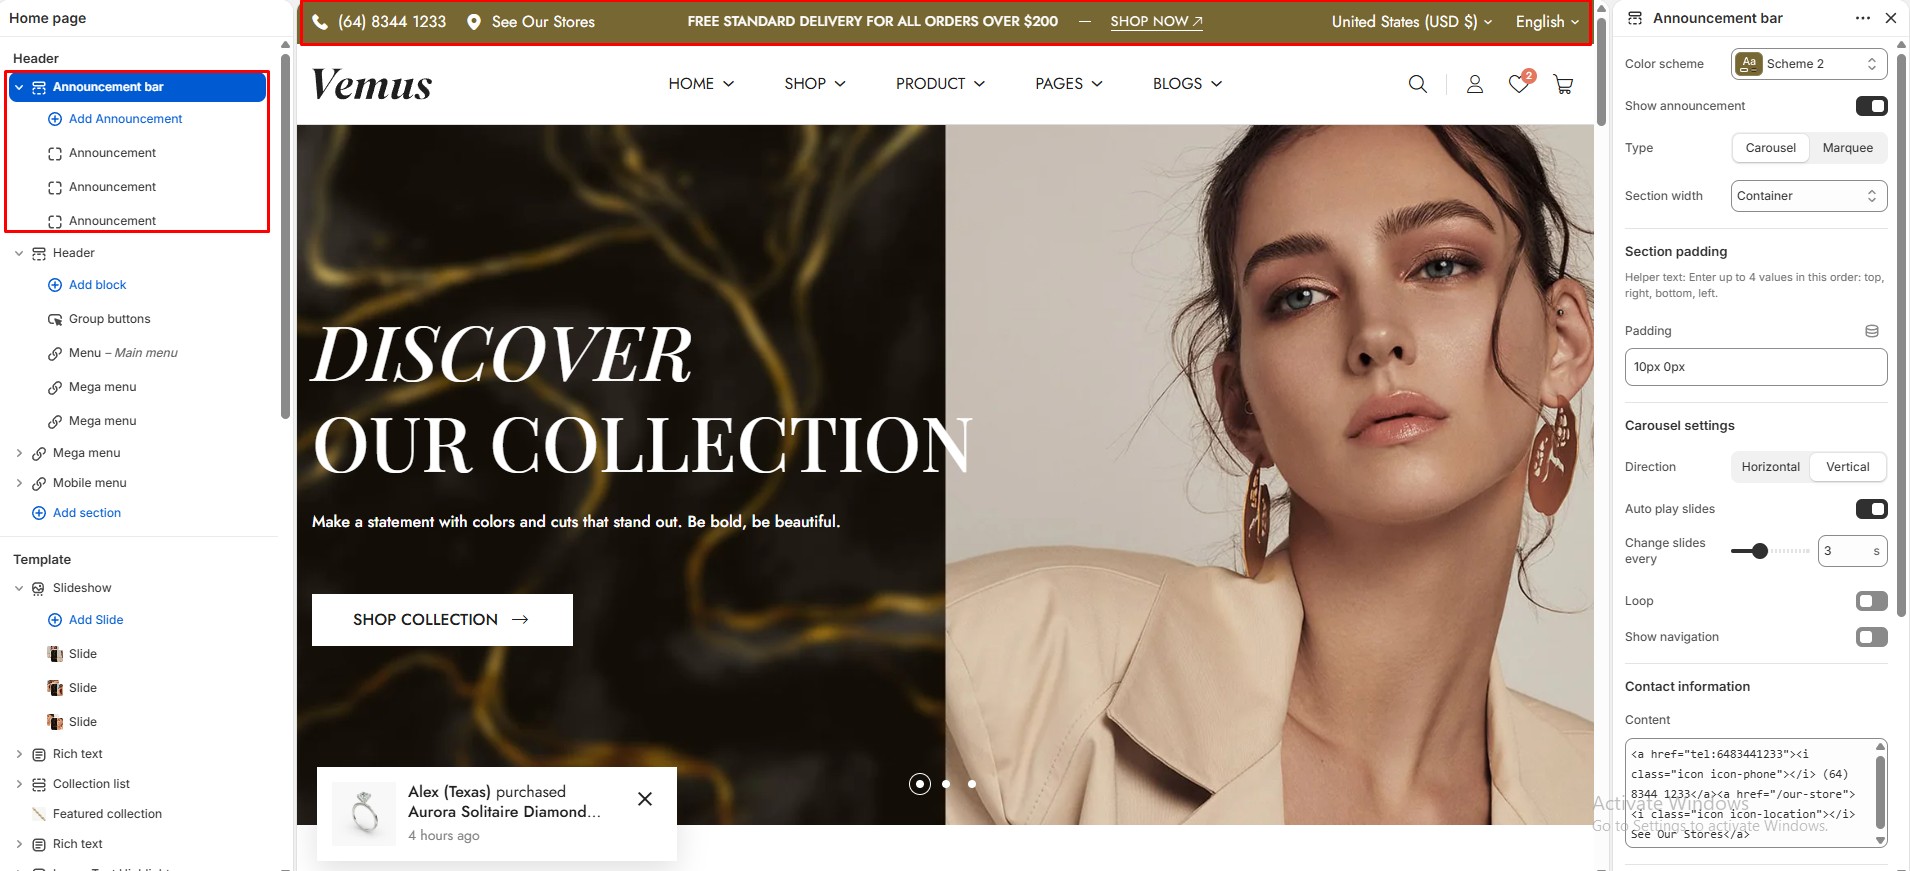
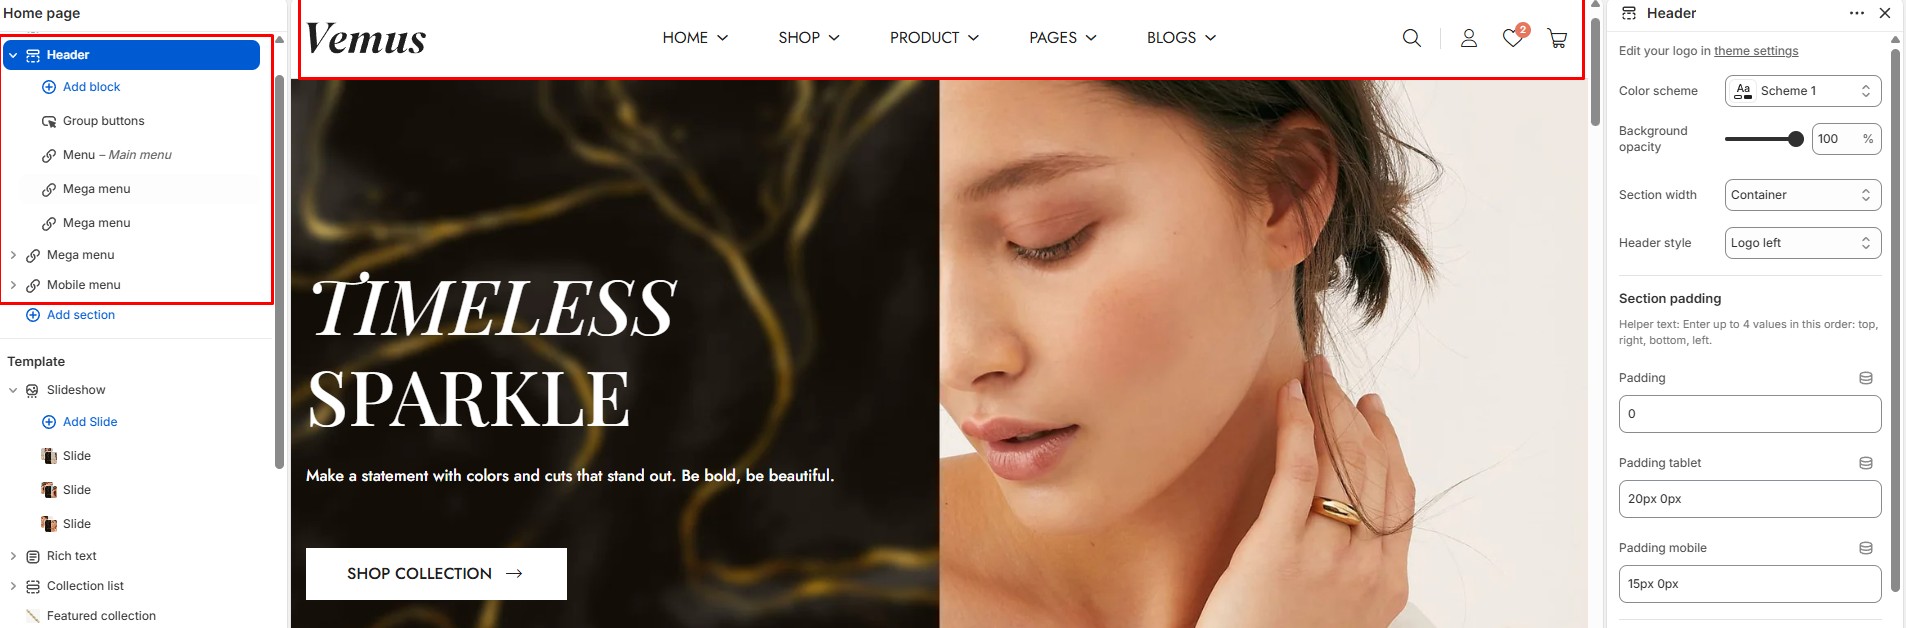
The Header section controls your store navigation, logo, menu layout, and header styling.
You can customize the header layout, spacing, color scheme, and manage navigation blocks such as menus, mega menus, mobile menus, and action buttons.
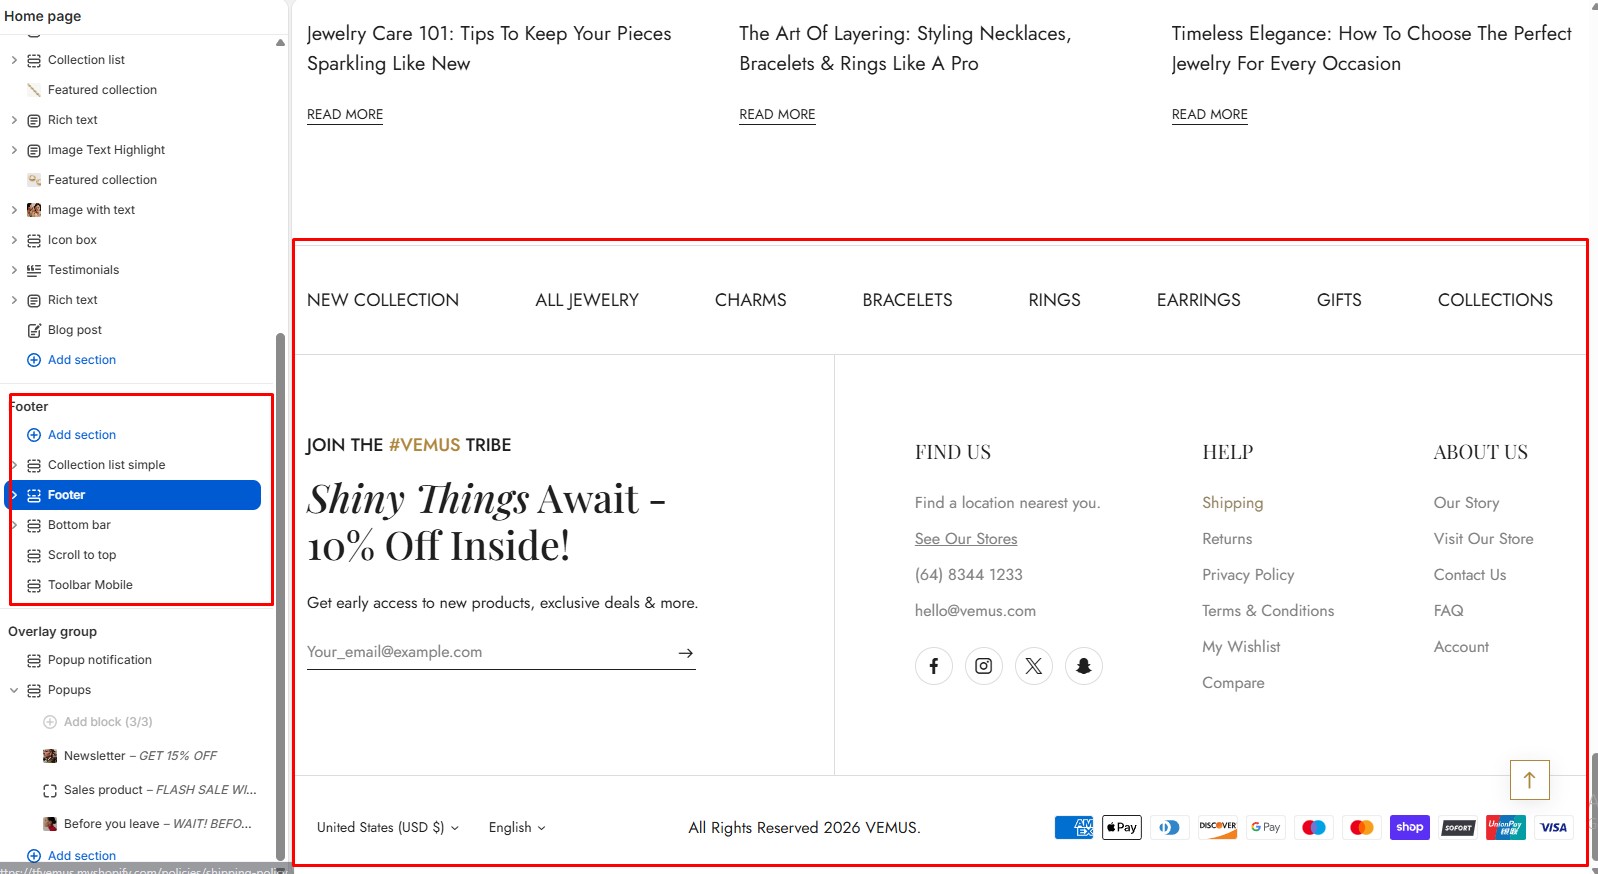
The Footer section displays store information, navigation links, newsletter signup, social media icons, and additional footer content at the bottom of your store.
You can manage footer blocks, customize layouts, and organize important links and contact information for better customer accessibility.
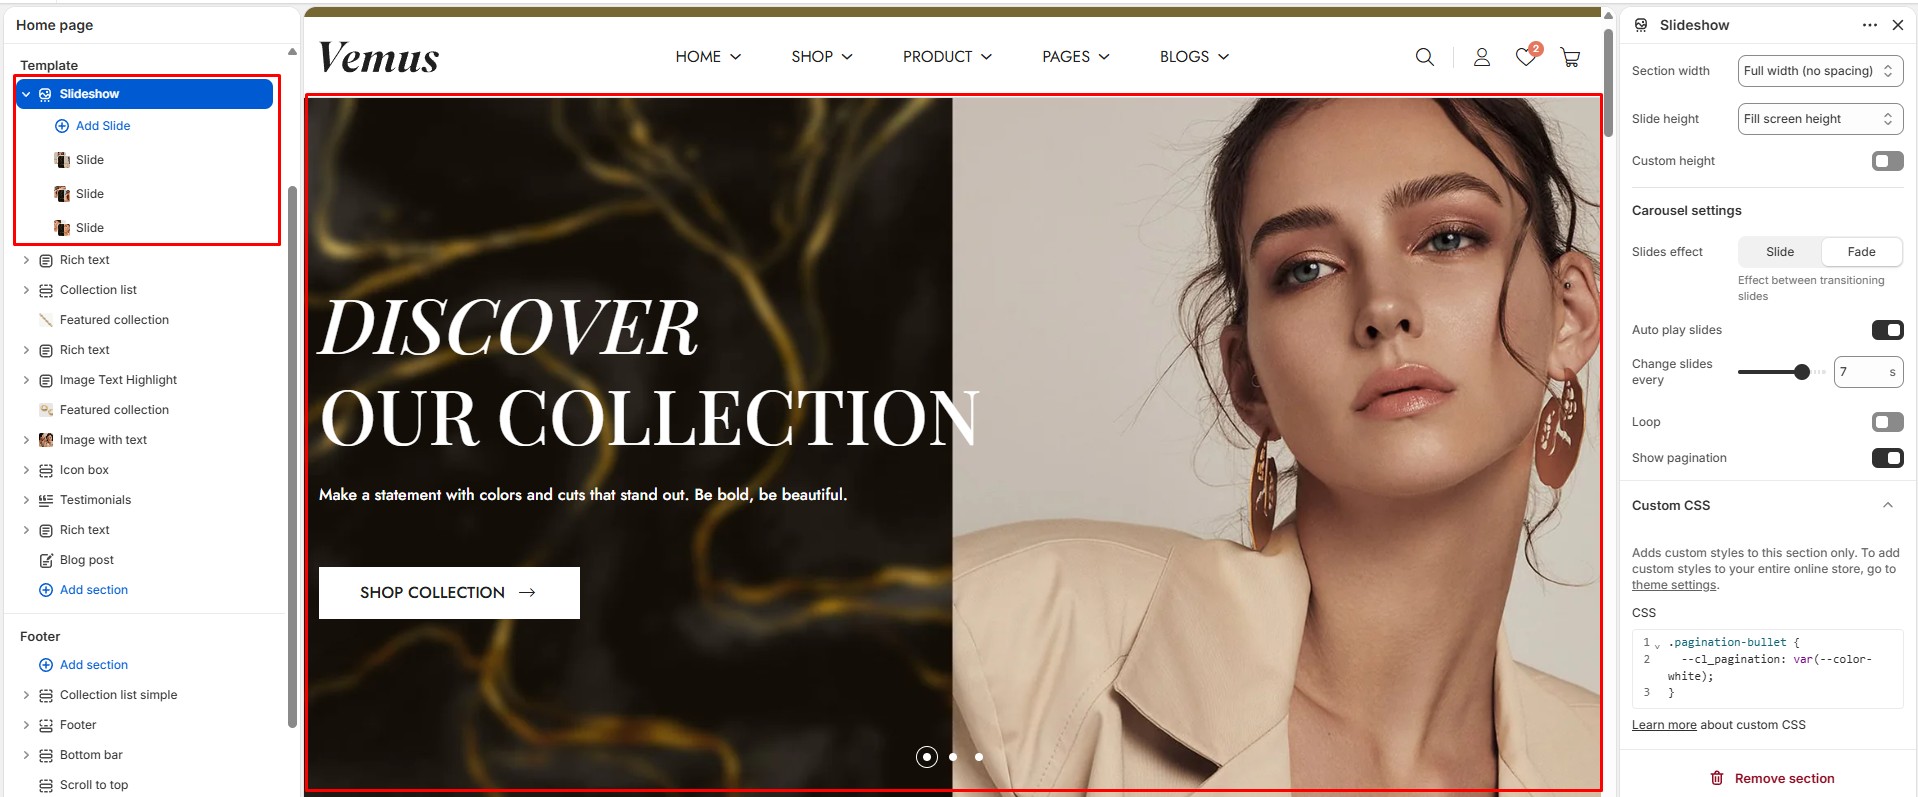
The Slideshow section lets you display multiple banner slides to highlight promotions, collections, or brand content on your homepage.
You can customize the layout, slide effects, autoplay settings, and spacing. Each slide block supports images, text, buttons, and custom content positioning for flexible banner designs.
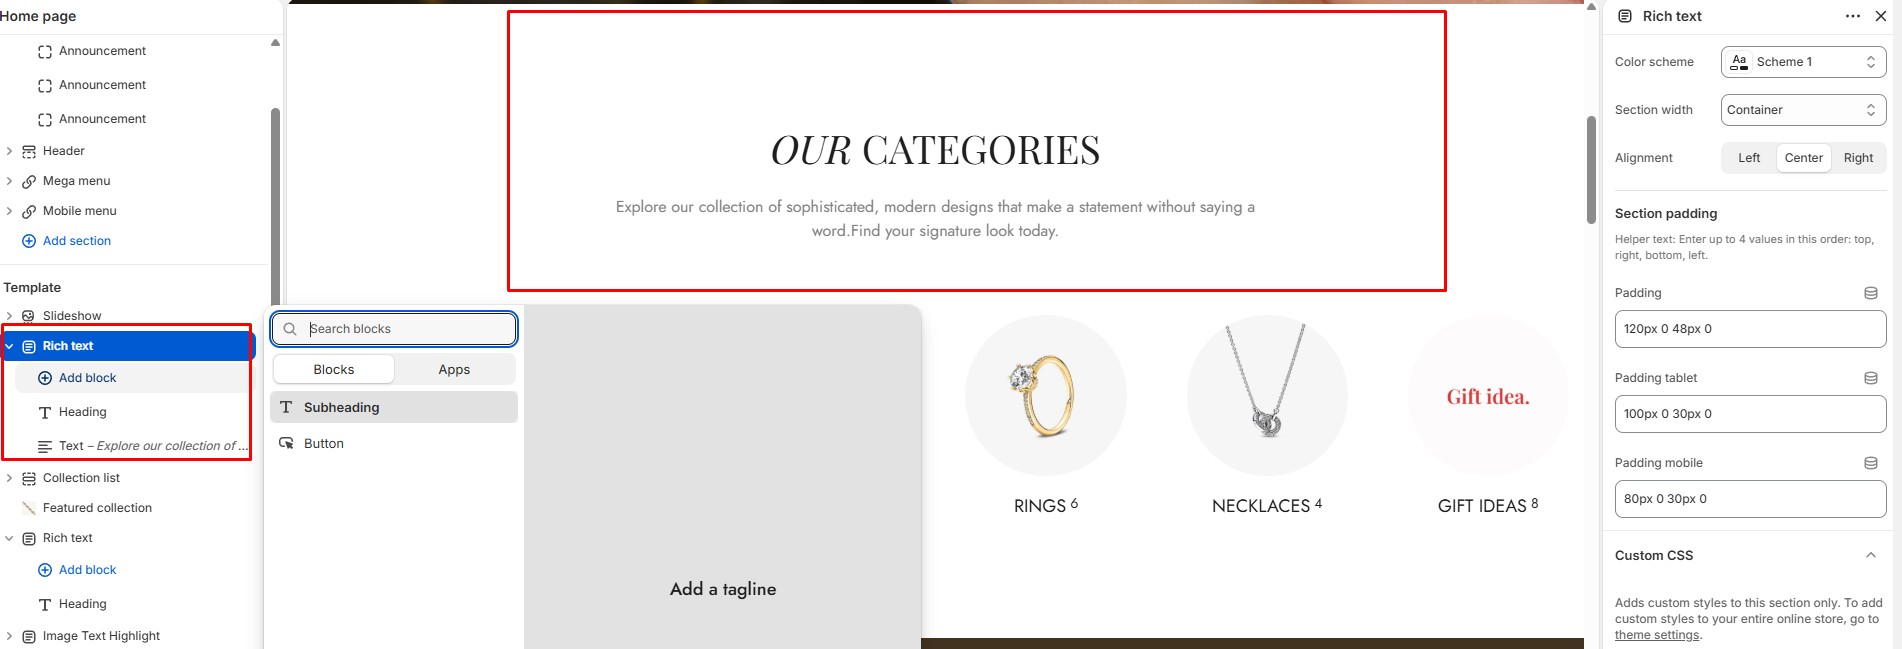
The Rich text section allows you to display simple content such as headings, text, buttons, and taglines with flexible alignment and spacing options. It is ideal for introducing collections, promotions, or brand messages between sections.
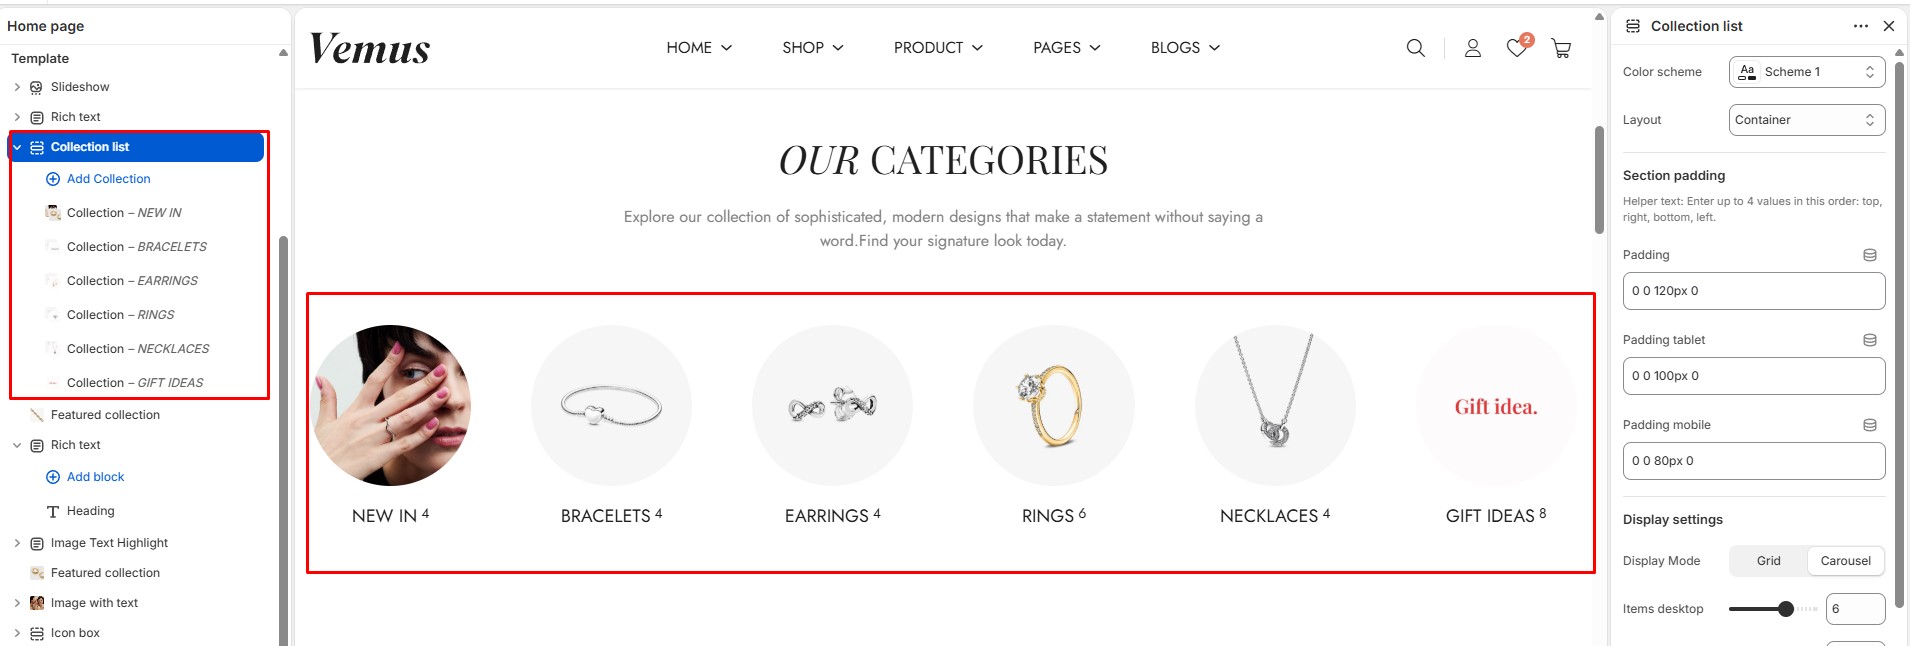
The Collection list section allows you to showcase multiple collections in a simple grid or carousel layout. Each collection block supports collection images, titles, and product counts to help customers explore categories more easily.
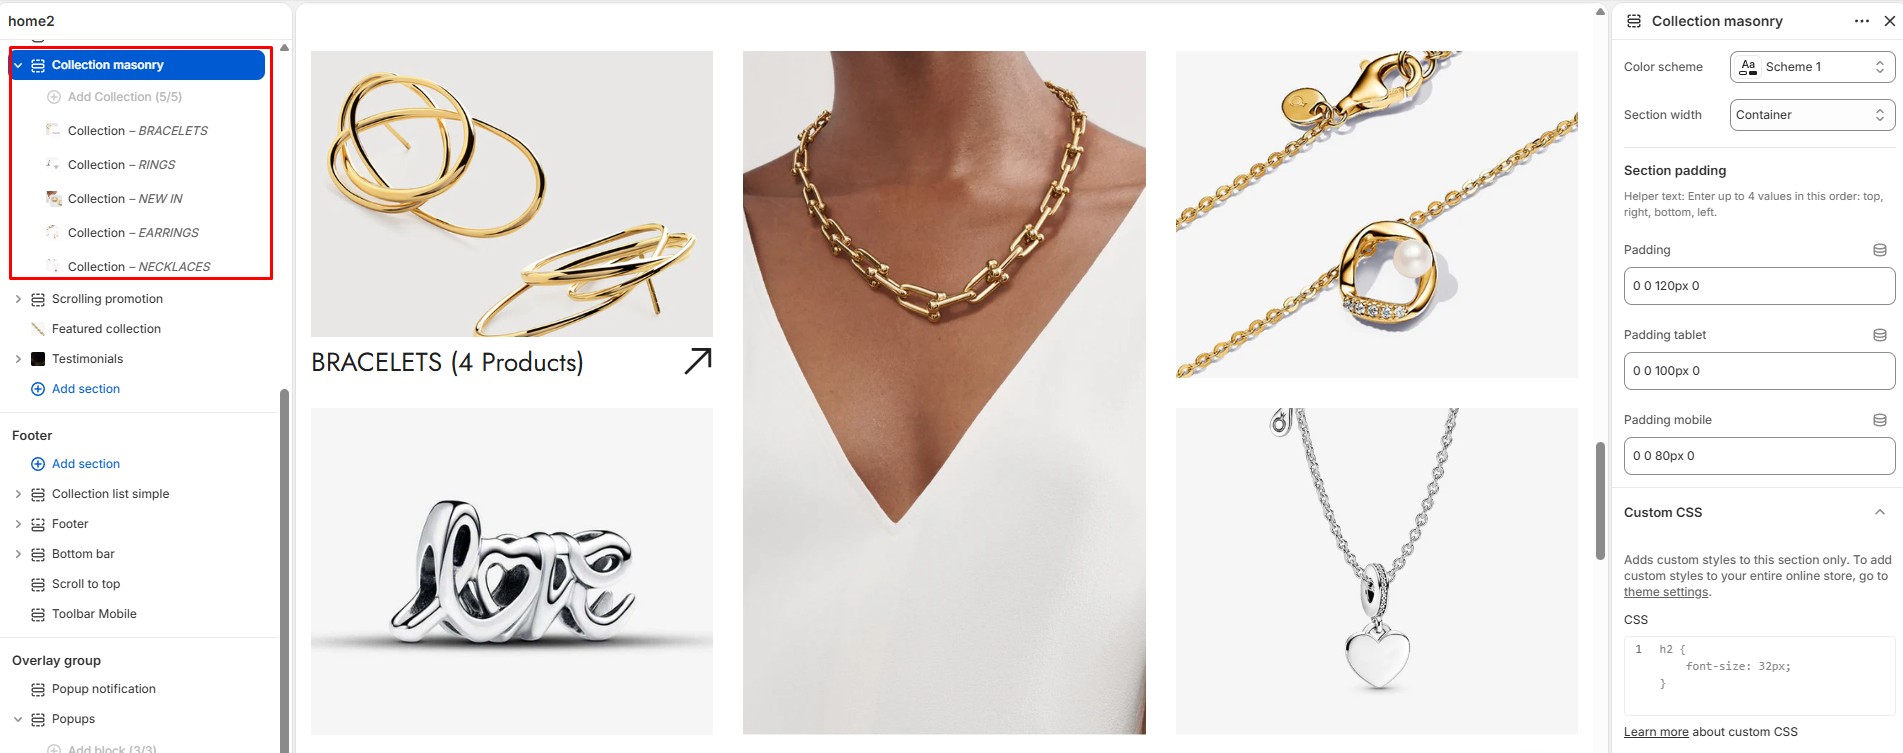
The Collection masonry section displays collections in a creative masonry layout with different image sizes for a more dynamic and modern look. Each collection block supports custom images, collection links, and promotional content.
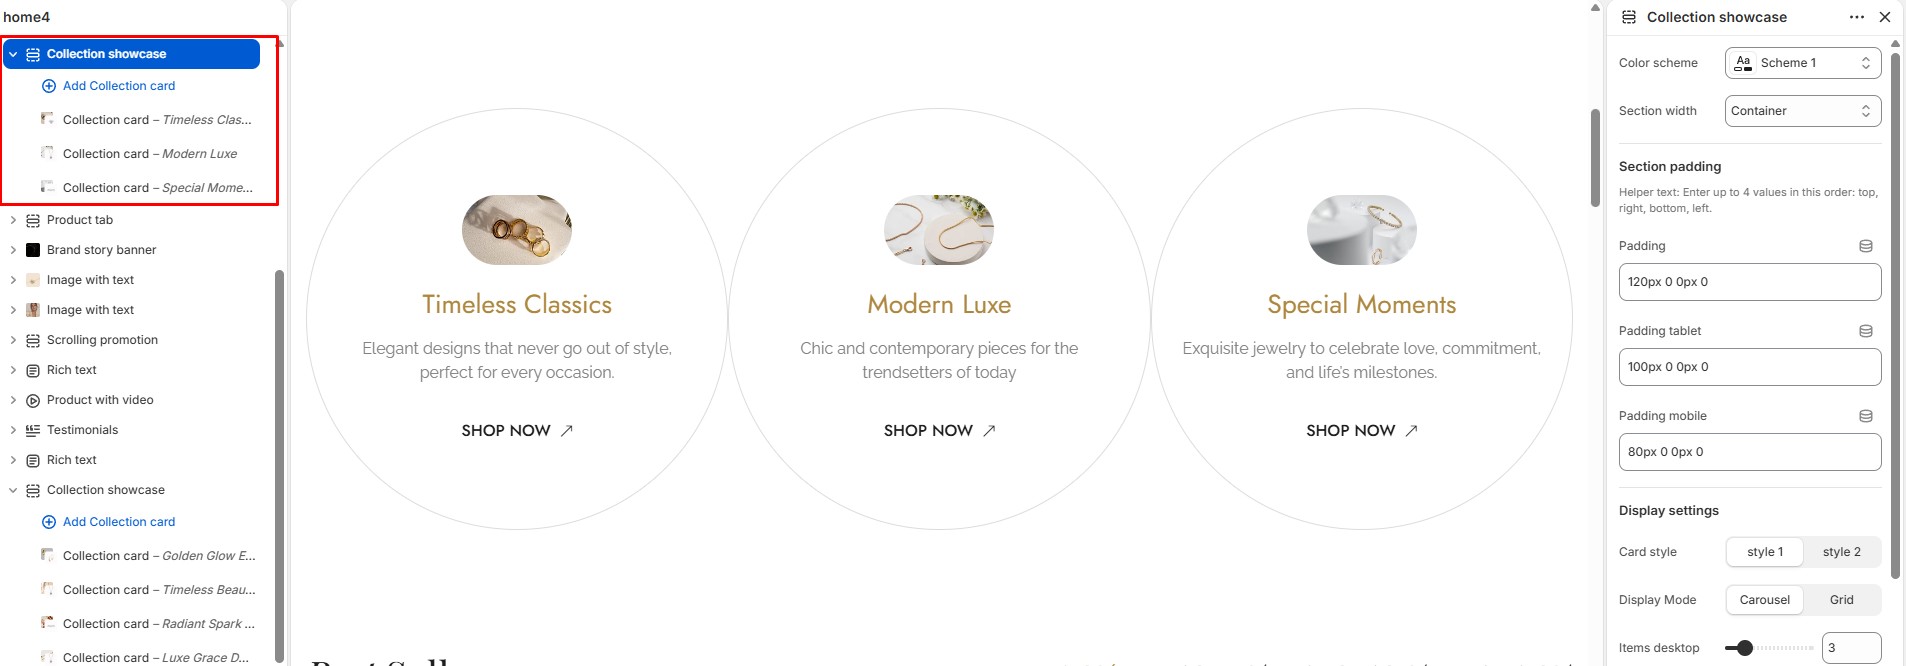
The Collection showcase section highlights featured collections with stylish card layouts, descriptions, and call-to-action buttons. It is ideal for promoting special categories or curated collections.
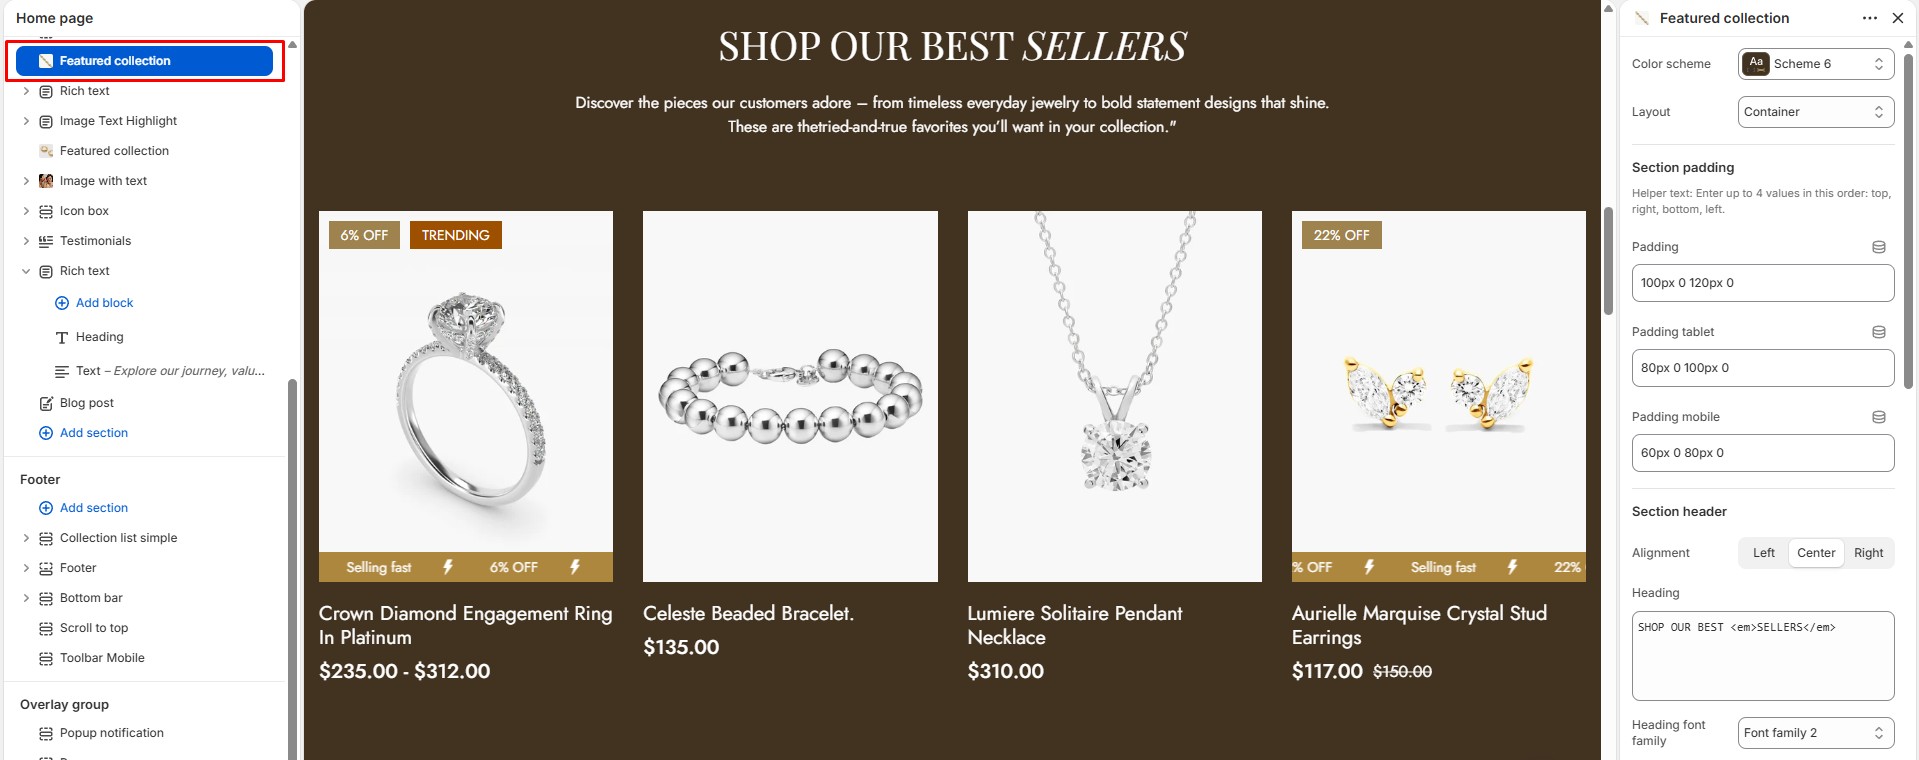
The Featured collection section displays products from a selected collection in a grid or carousel layout. It is commonly used to showcase best sellers, new arrivals, or featured products on the homepage.
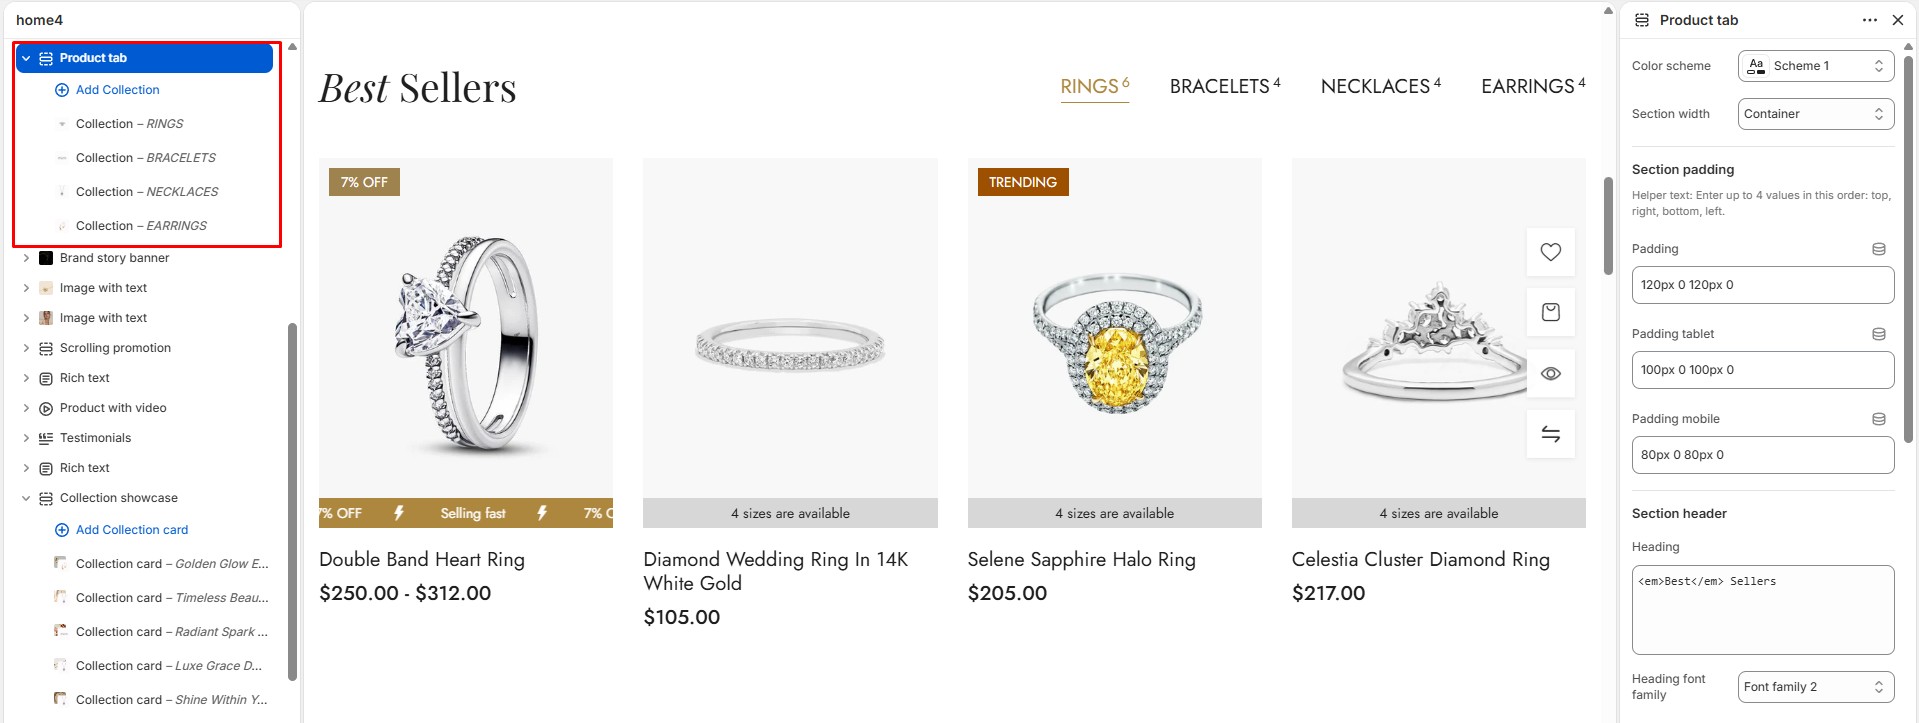
The Product tab section lets you organize multiple collections into tabs for easier product browsing. Customers can quickly switch between categories without leaving the page.
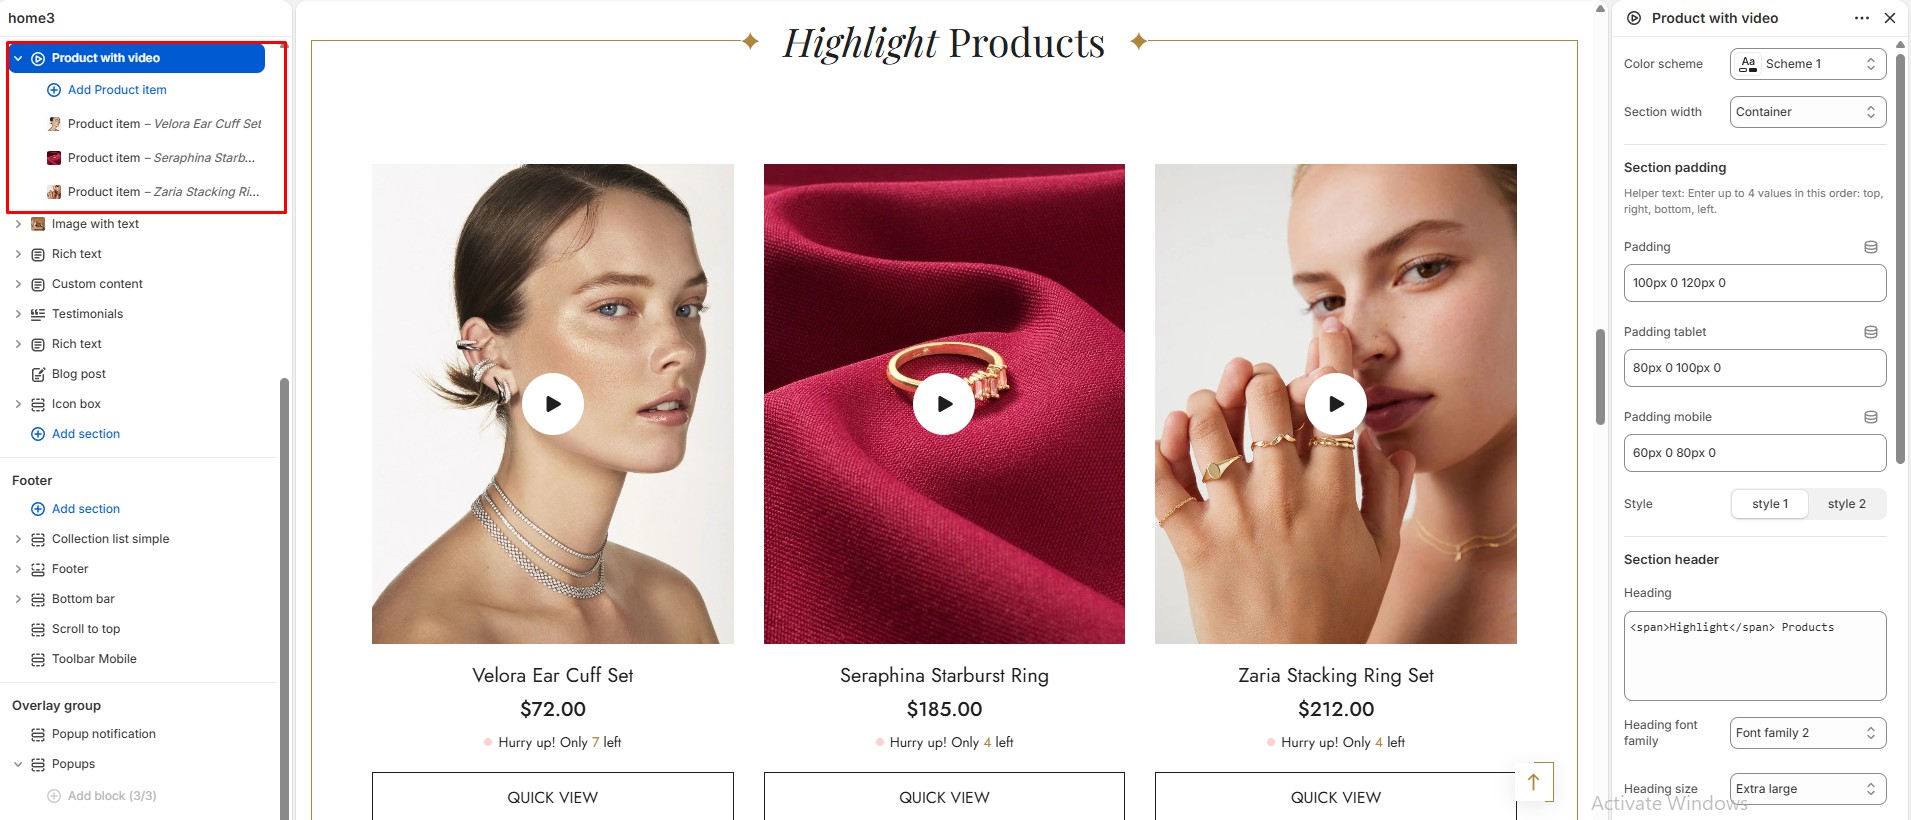
The Product with video section combines product showcases with video content to create a more engaging shopping experience. Each product block supports product information, preview videos, and quick action buttons.
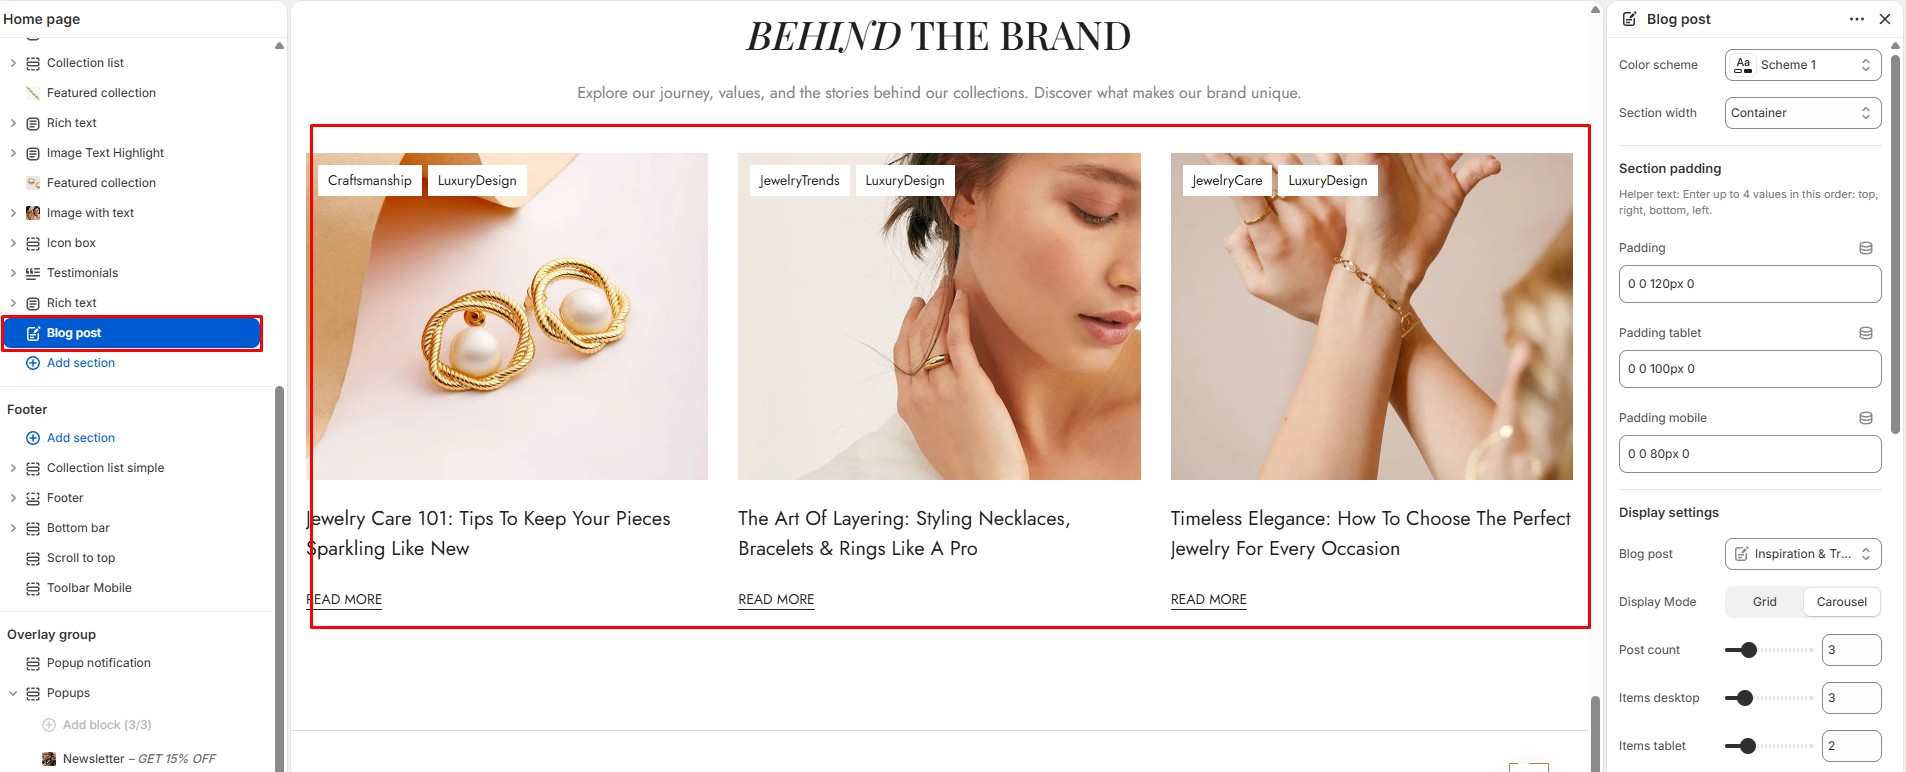
The Blog post section displays recent or featured articles from a selected blog in a grid or carousel layout. It helps you share news, styling tips, brand stories, and promotional content to keep customers engaged with your store.
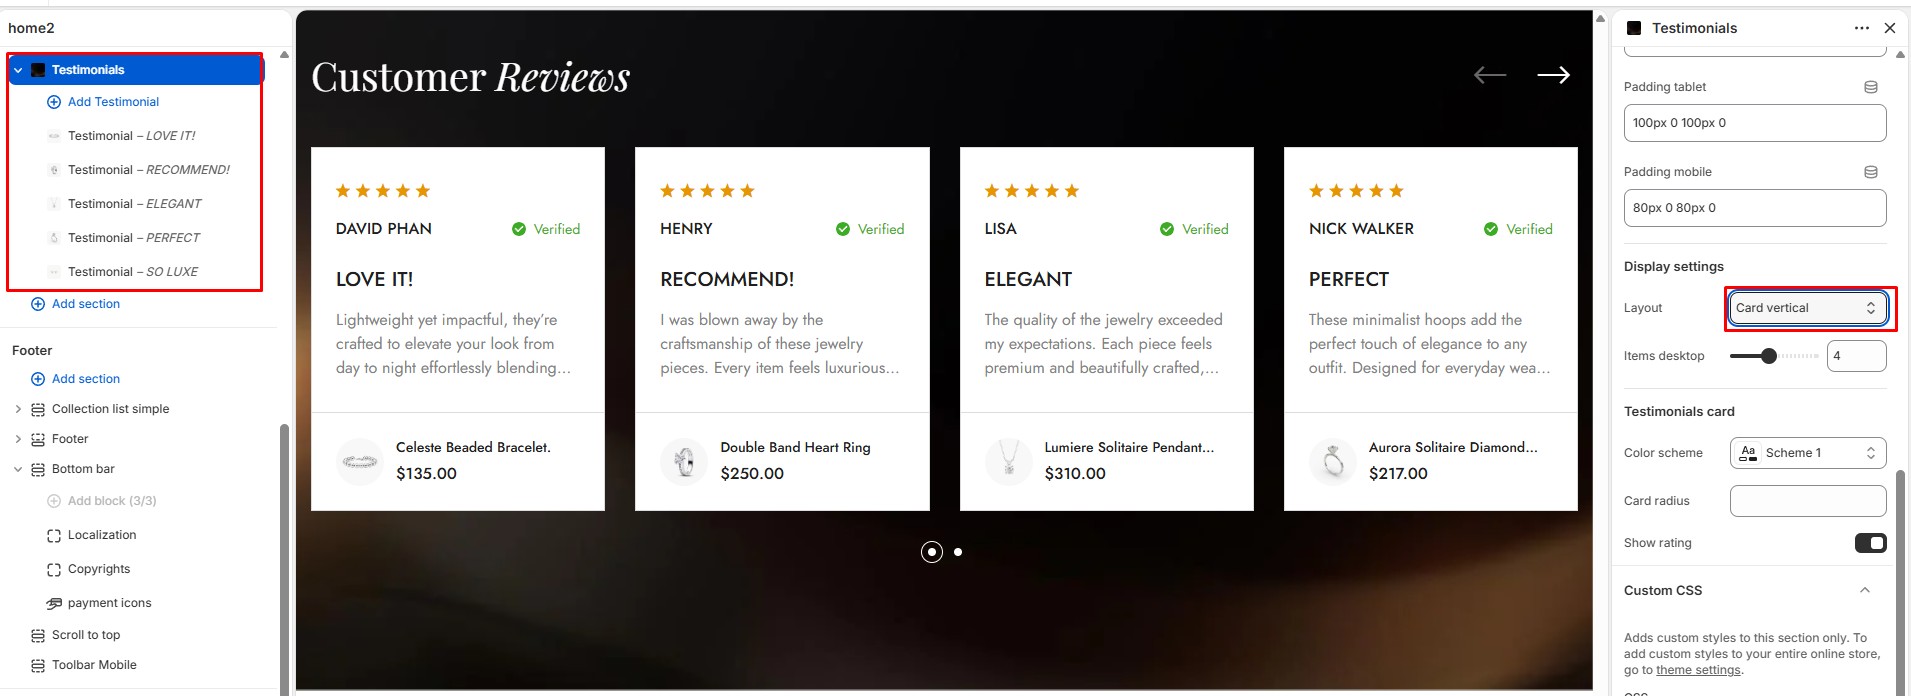
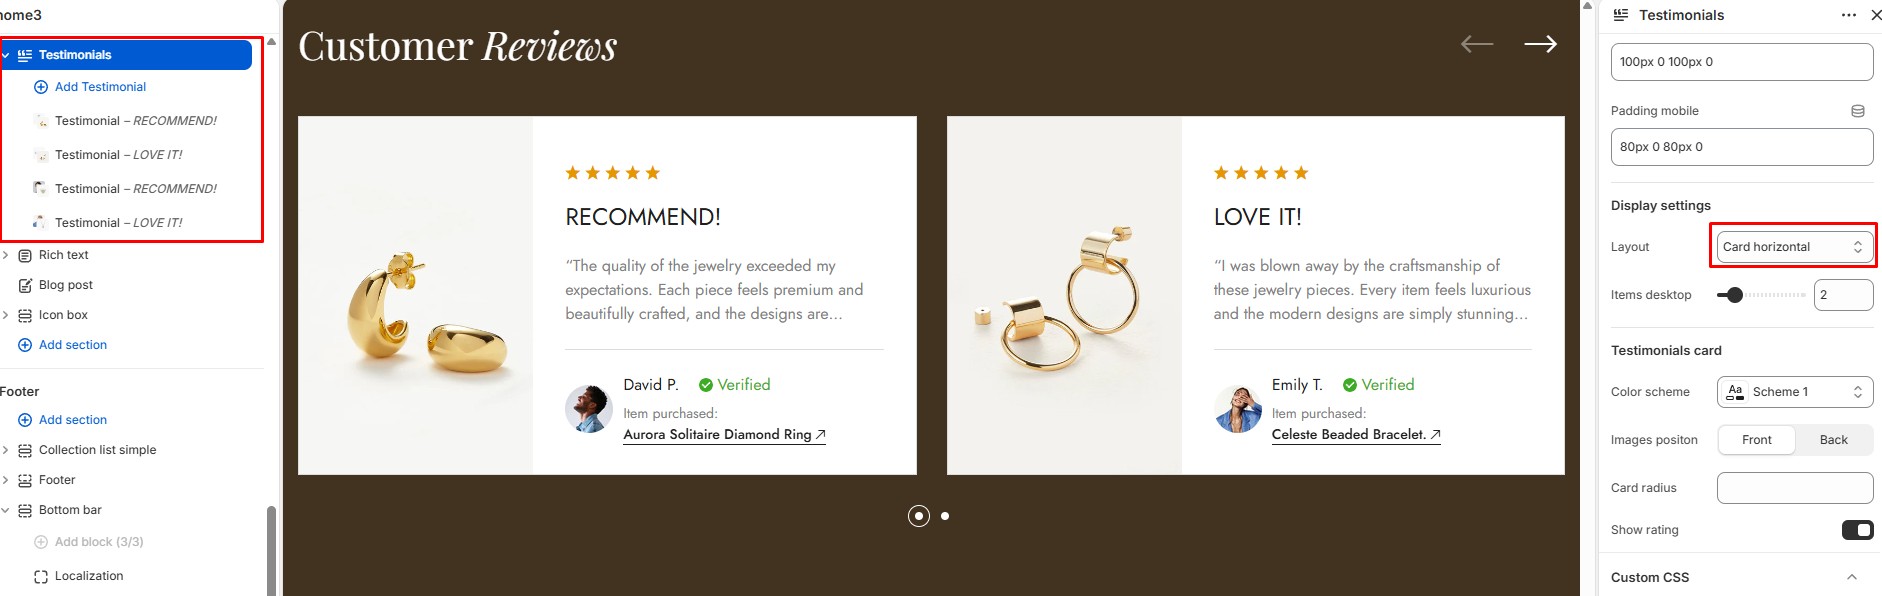
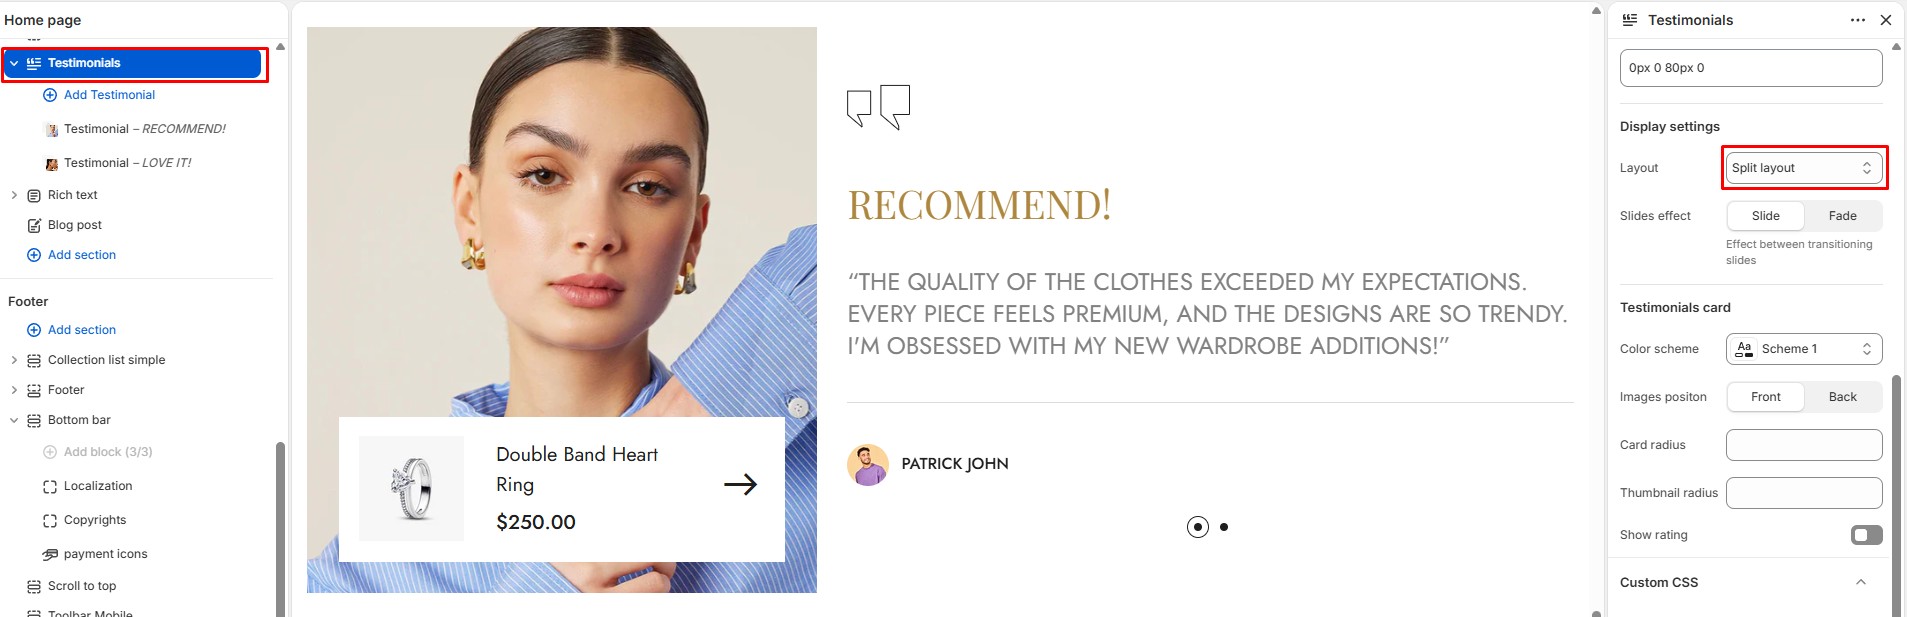
The Testimonial section helps you build credibility and trust by showcasing real feedback from your customers. Featuring testimonials on your store highlights positive experiences, strengthens social proof, and encourages new visitors to make confident purchasing decisions
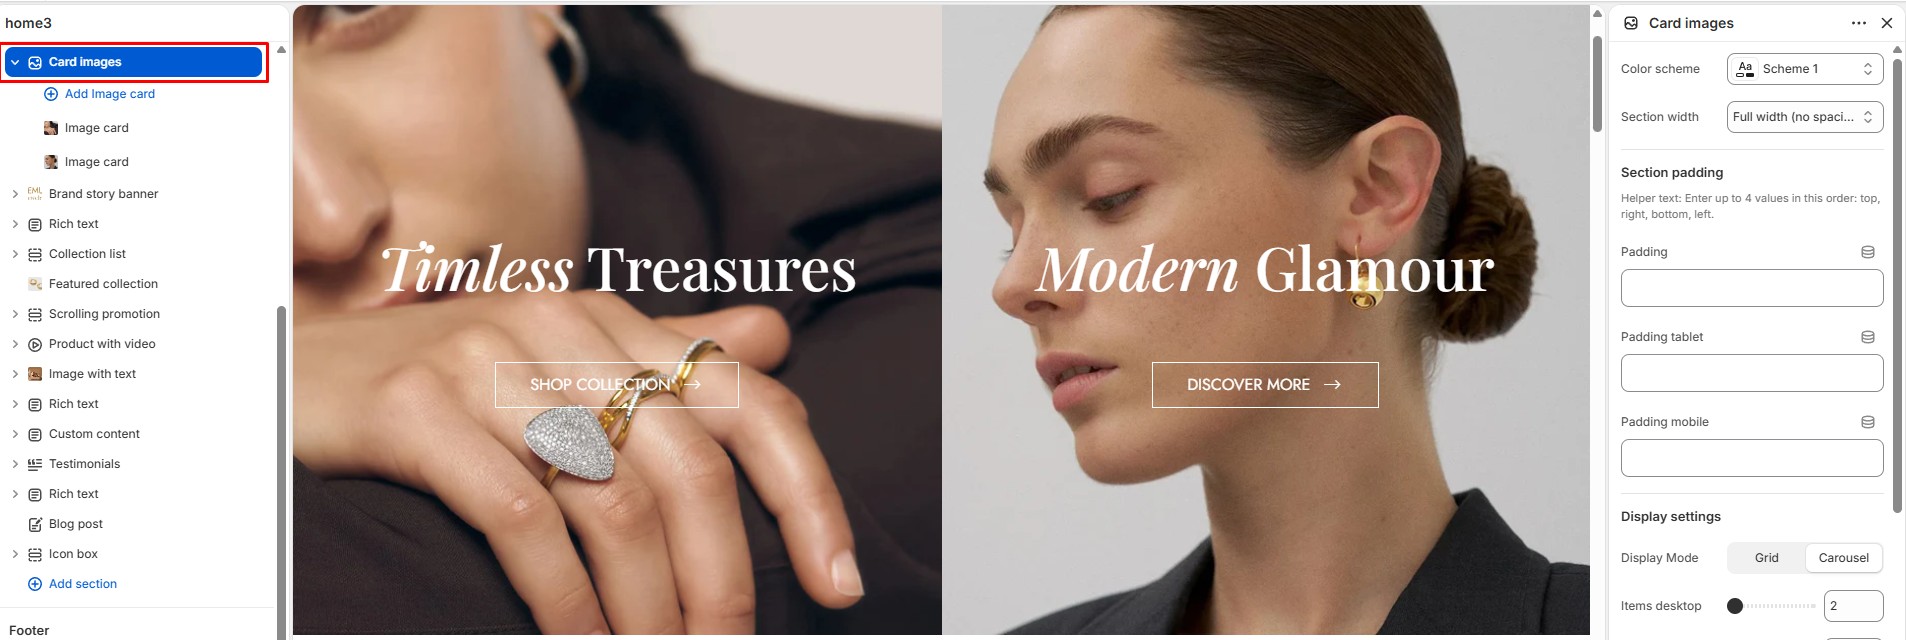
The Card images section displays promotional image cards with custom text, buttons, and links. It is ideal for highlighting collections, campaigns, or featured categories in a clean visual layout.
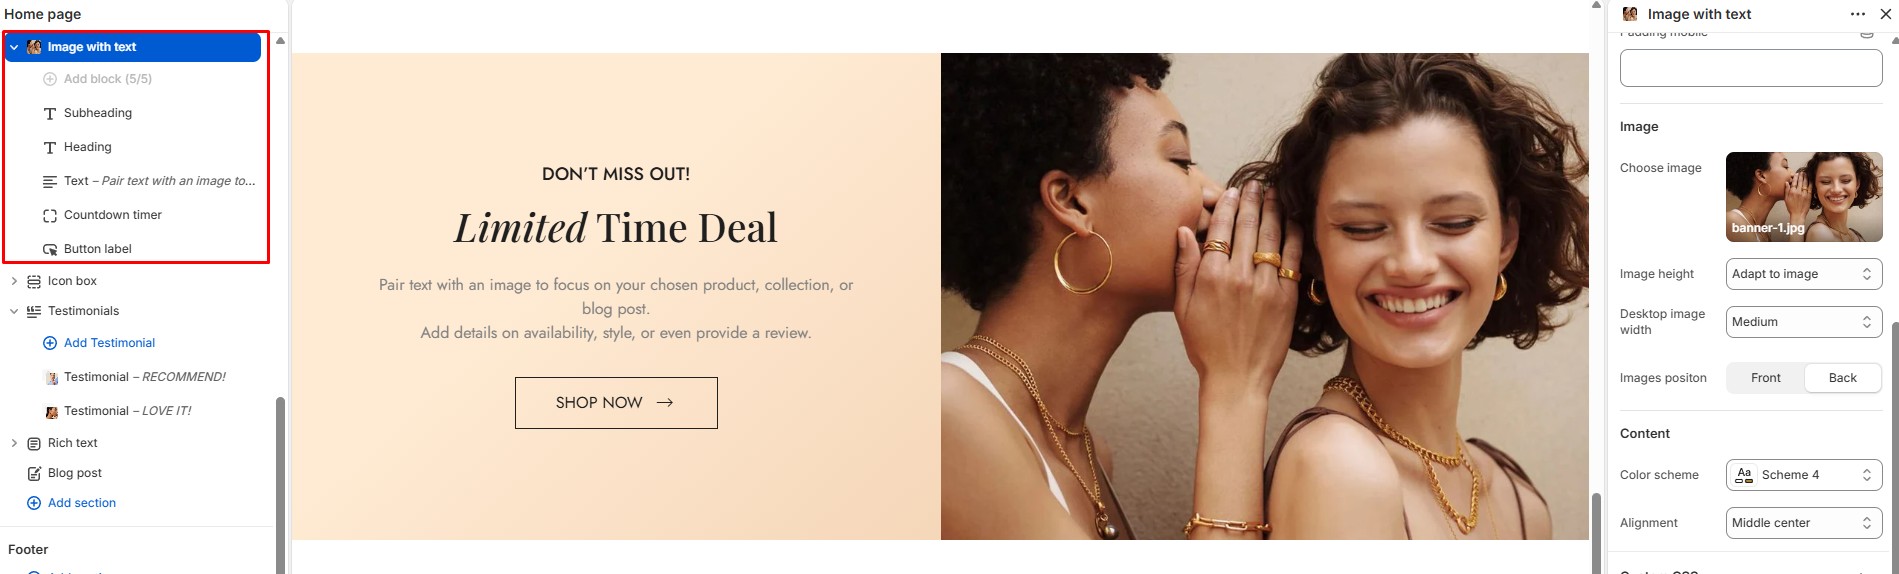
The Image with text section combines images with headings, descriptions, buttons, and optional countdown timers to create promotional or storytelling content blocks.
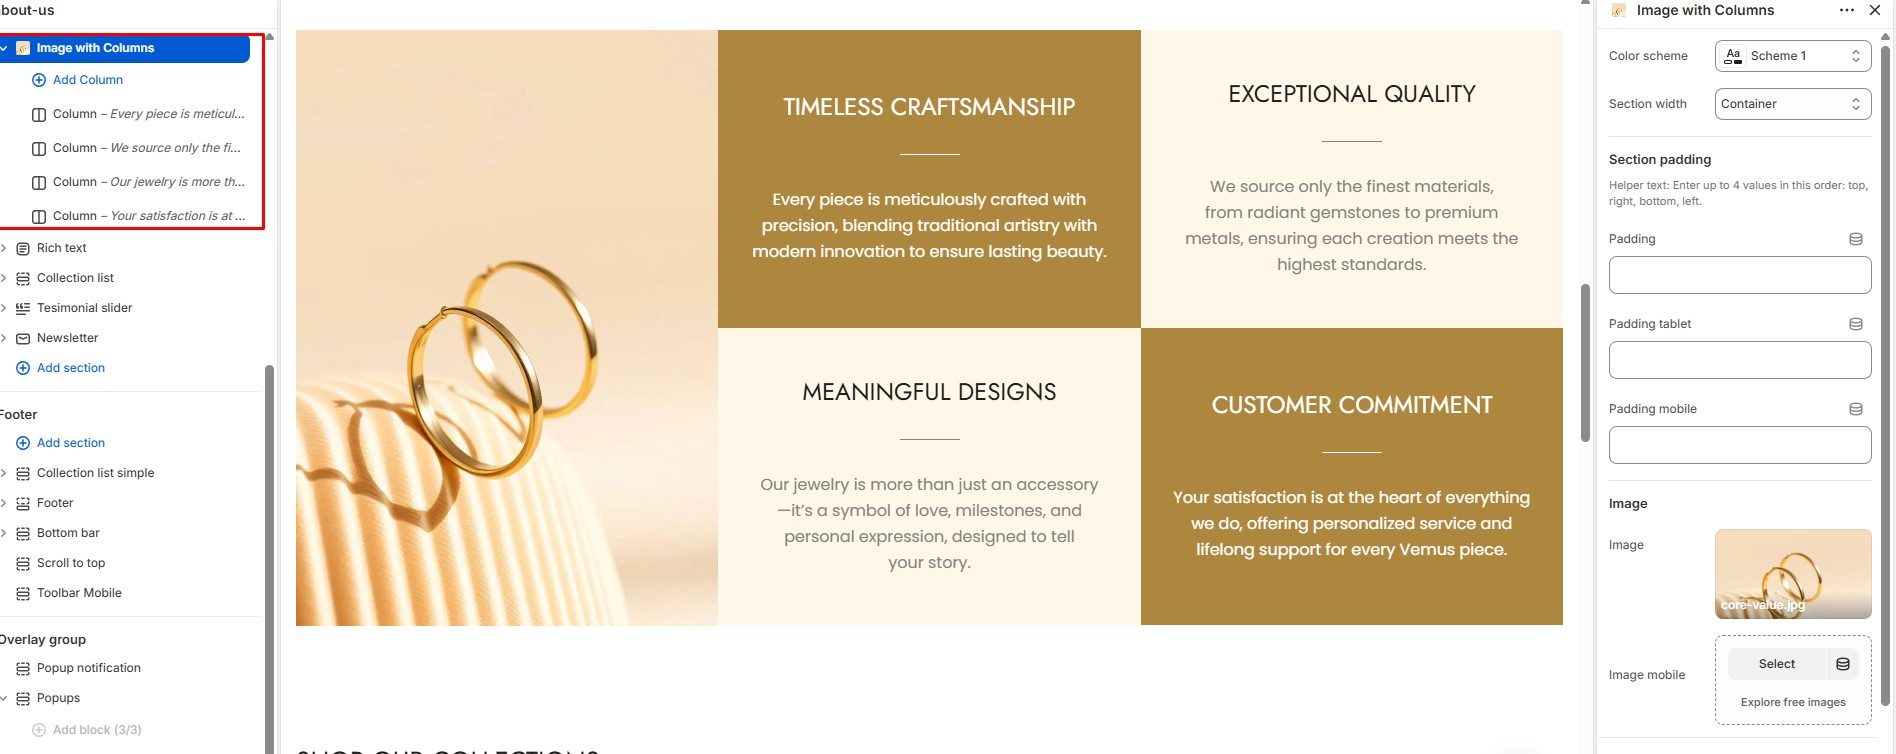
The Image with Columns section displays a featured image alongside multiple content columns. It is useful for showcasing brand values, services, features, or informational highlights.
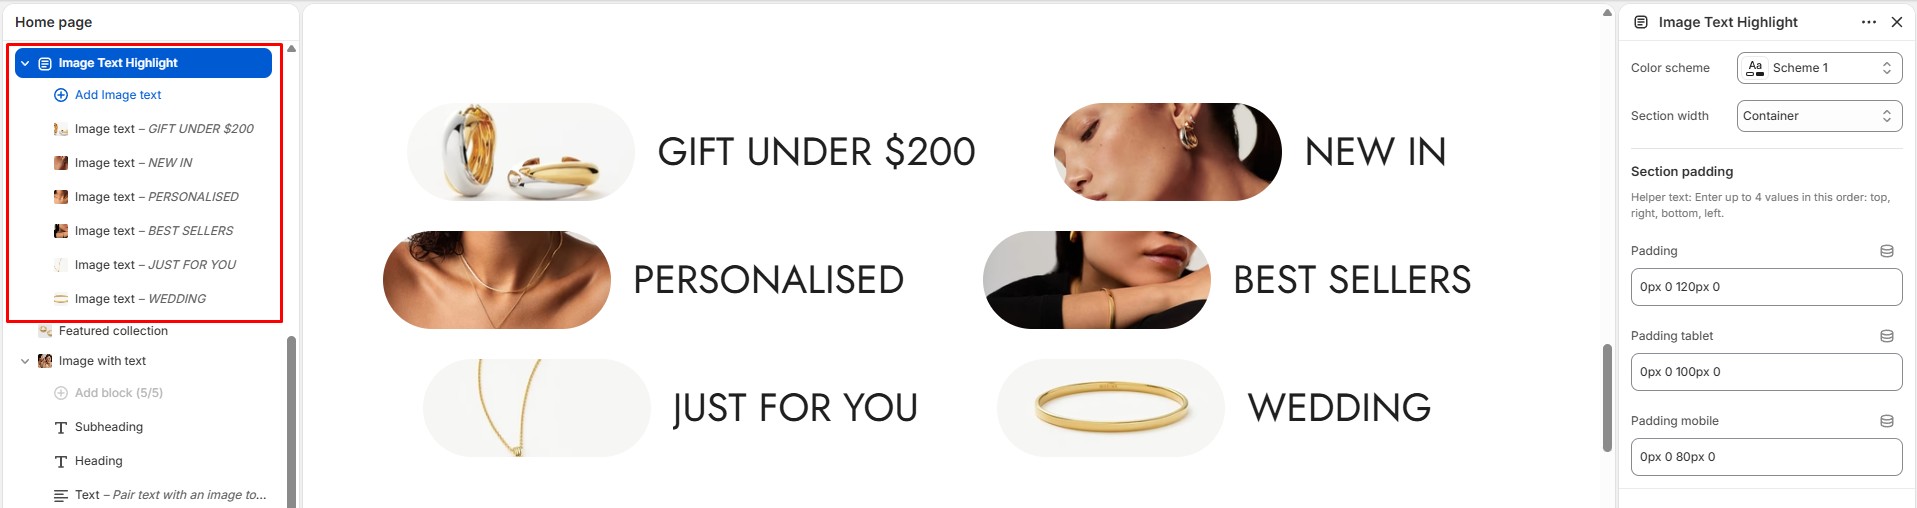
The Image Text Highlight section showcases multiple image items with highlighted text labels to promote categories, collections, or featured products in a modern visual style.
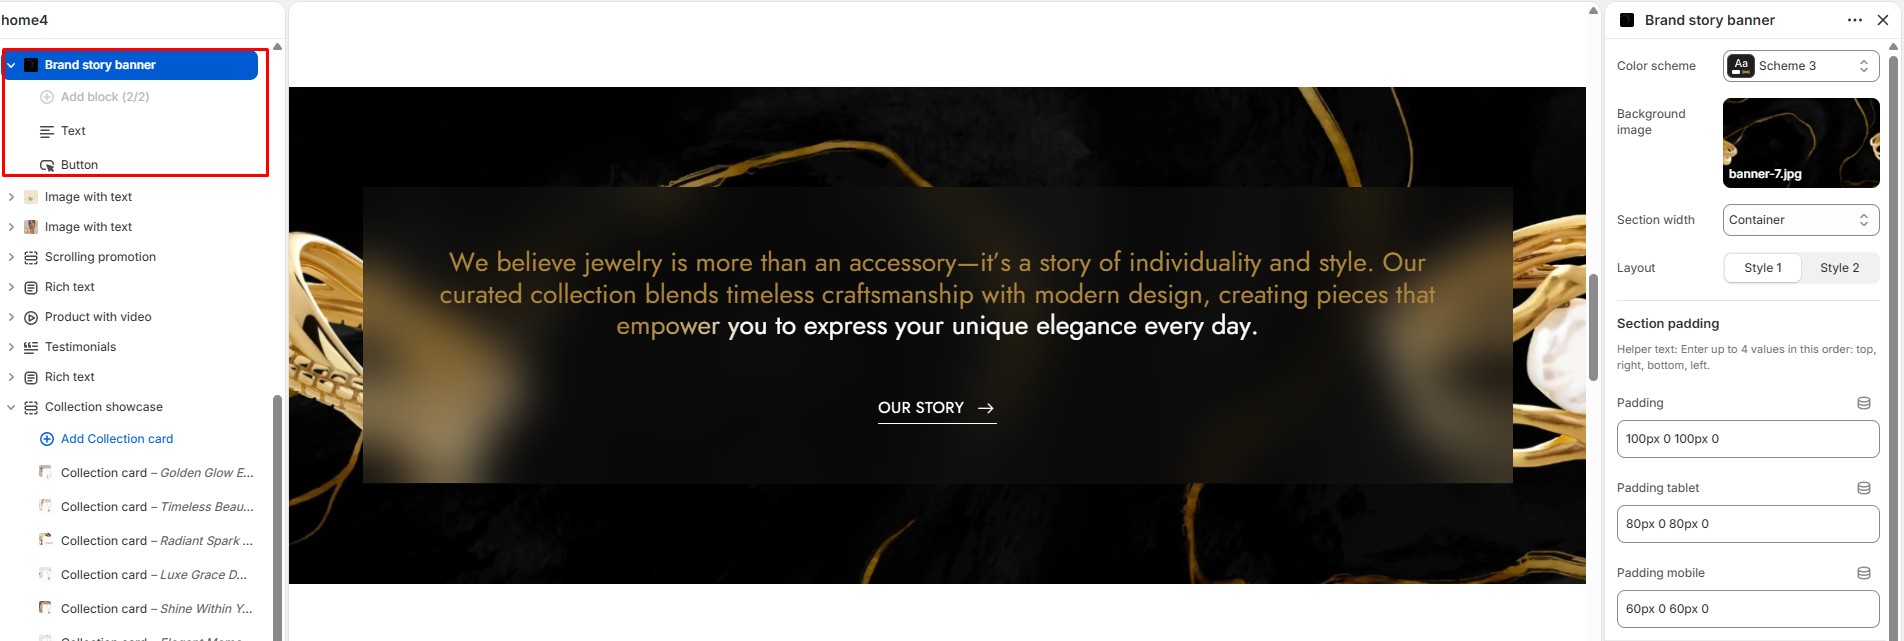
The Brand story banner section highlights your brand message with background images, text content, and call-to-action buttons to create a strong visual storytelling area.
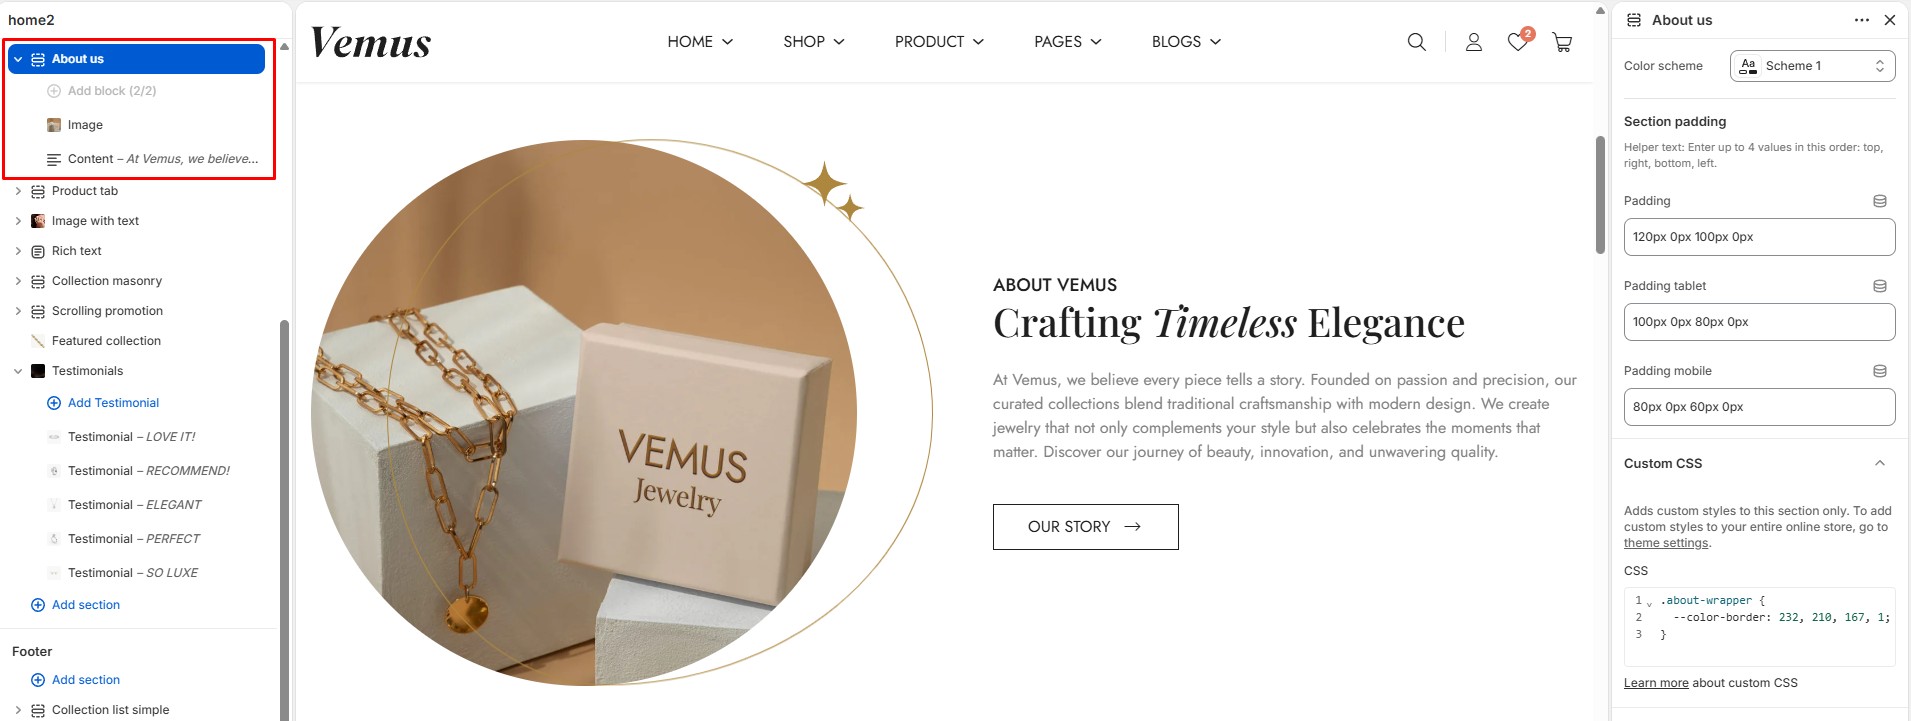
The About us section introduces your brand with images, text content, and action buttons. It is designed to share your story, values, and brand identity in a clean layout.
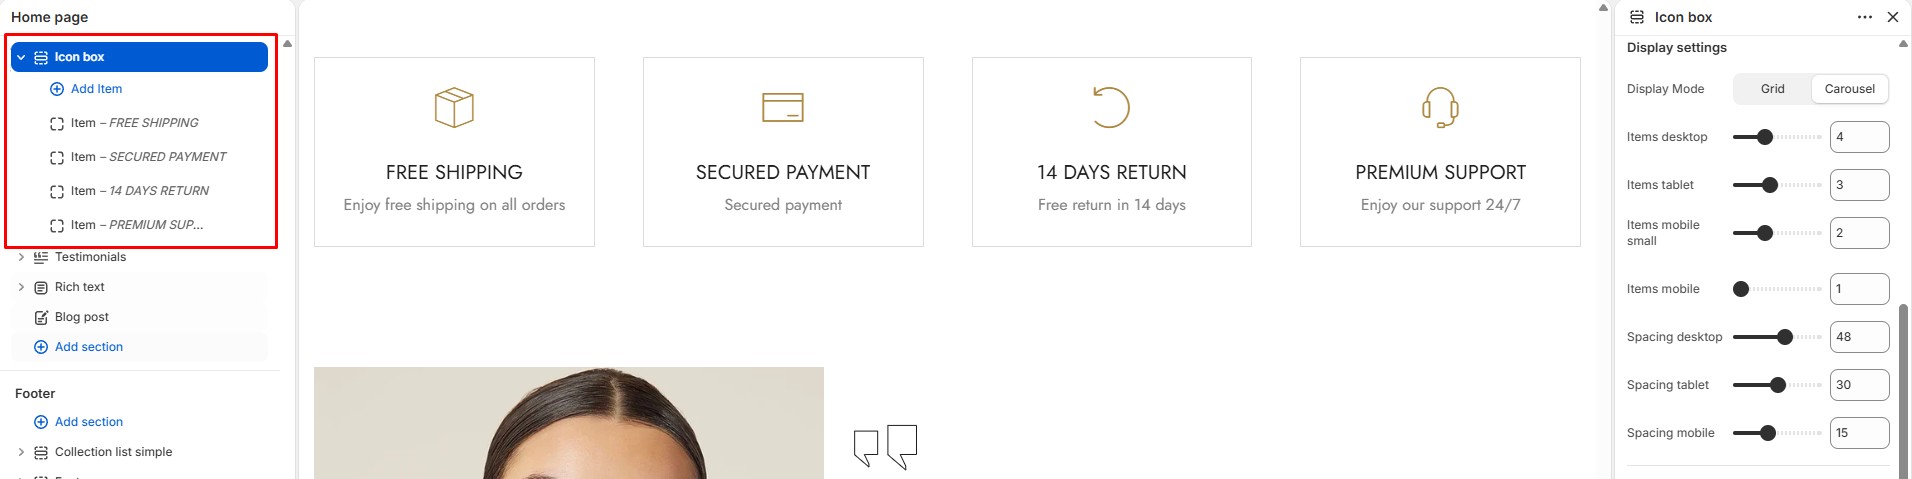
The Icon box section displays service features or store benefits using icons with headings and descriptions. It is commonly used for shipping, returns, support, and payment information.
The Scrolling promotion section displays continuously scrolling promotional text and images to highlight campaigns, announcements, or special offers in an eye-catching marquee style.

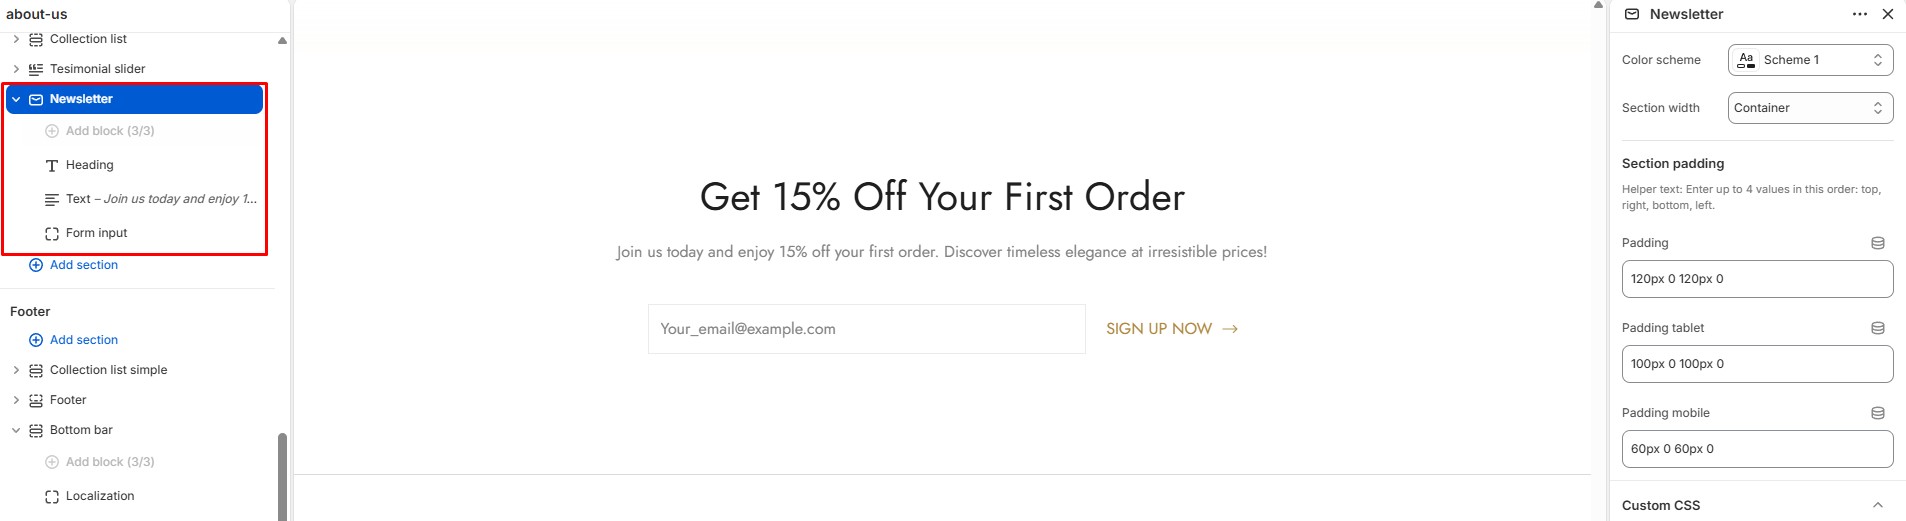
The Newsletter section allows customers to subscribe to your email list through a customizable signup form. It is commonly used for promotions, updates, and marketing campaigns.
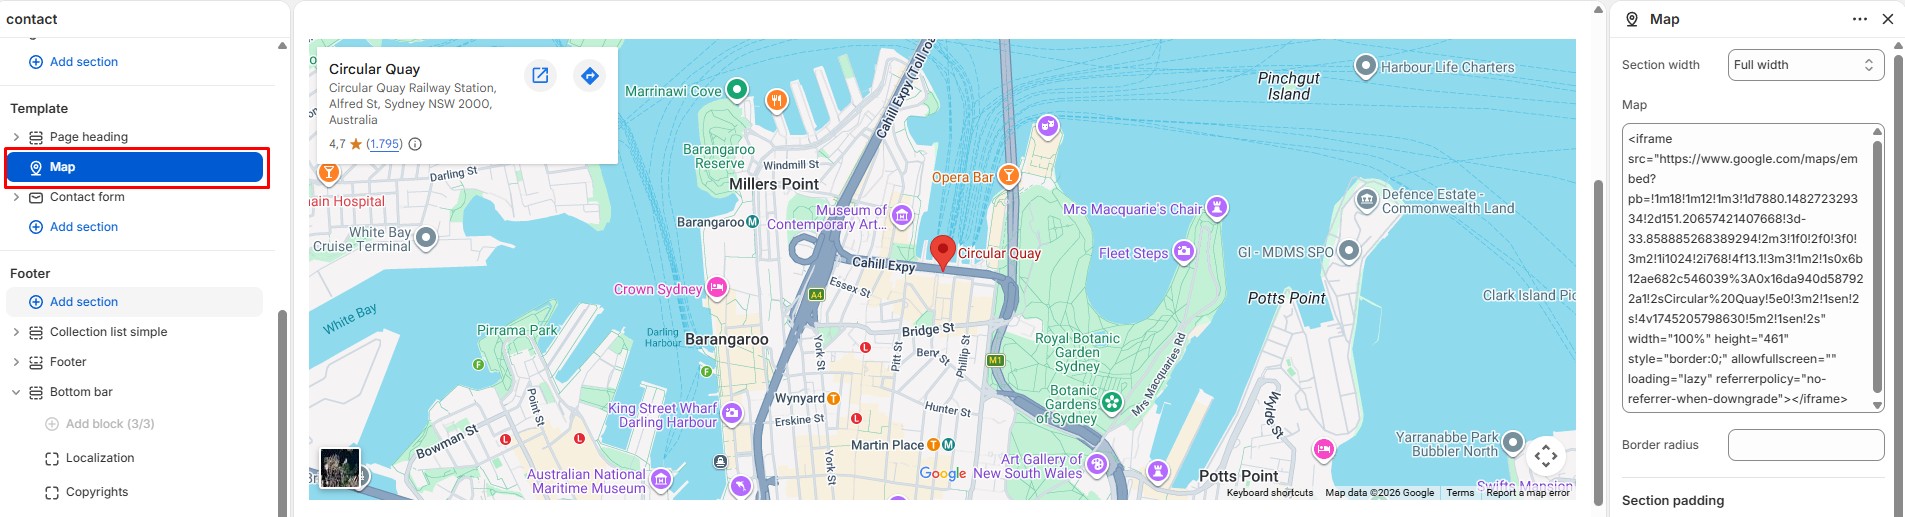
The Map section displays an embedded Google Map to help customers easily find your store location, showroom, or business address.
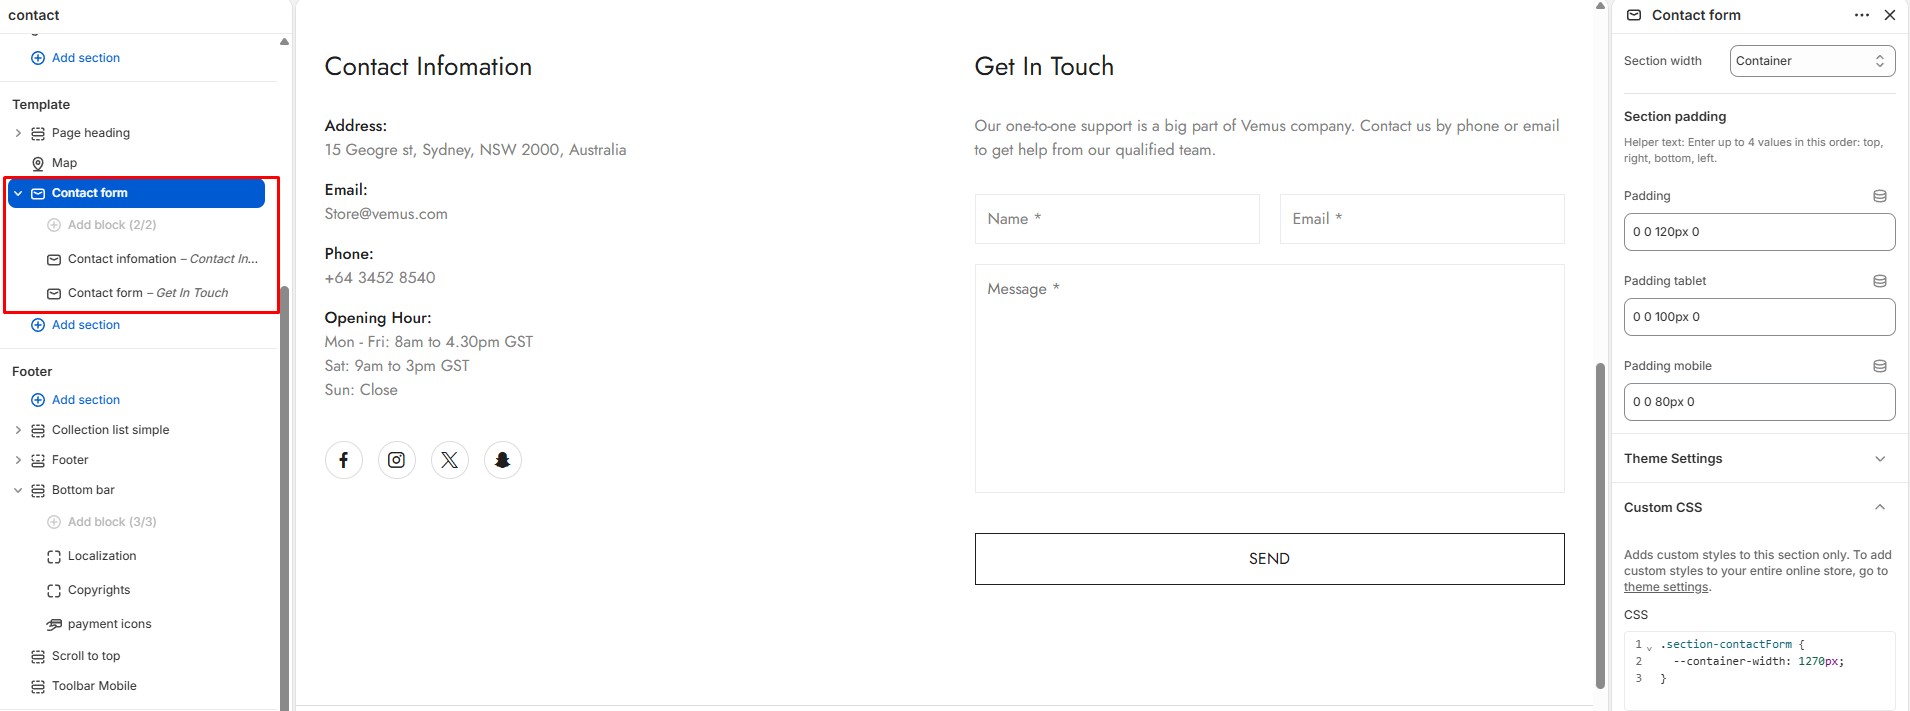
The Contact form section allows customers to send inquiries directly through your store with customizable contact details, form fields, and social links.
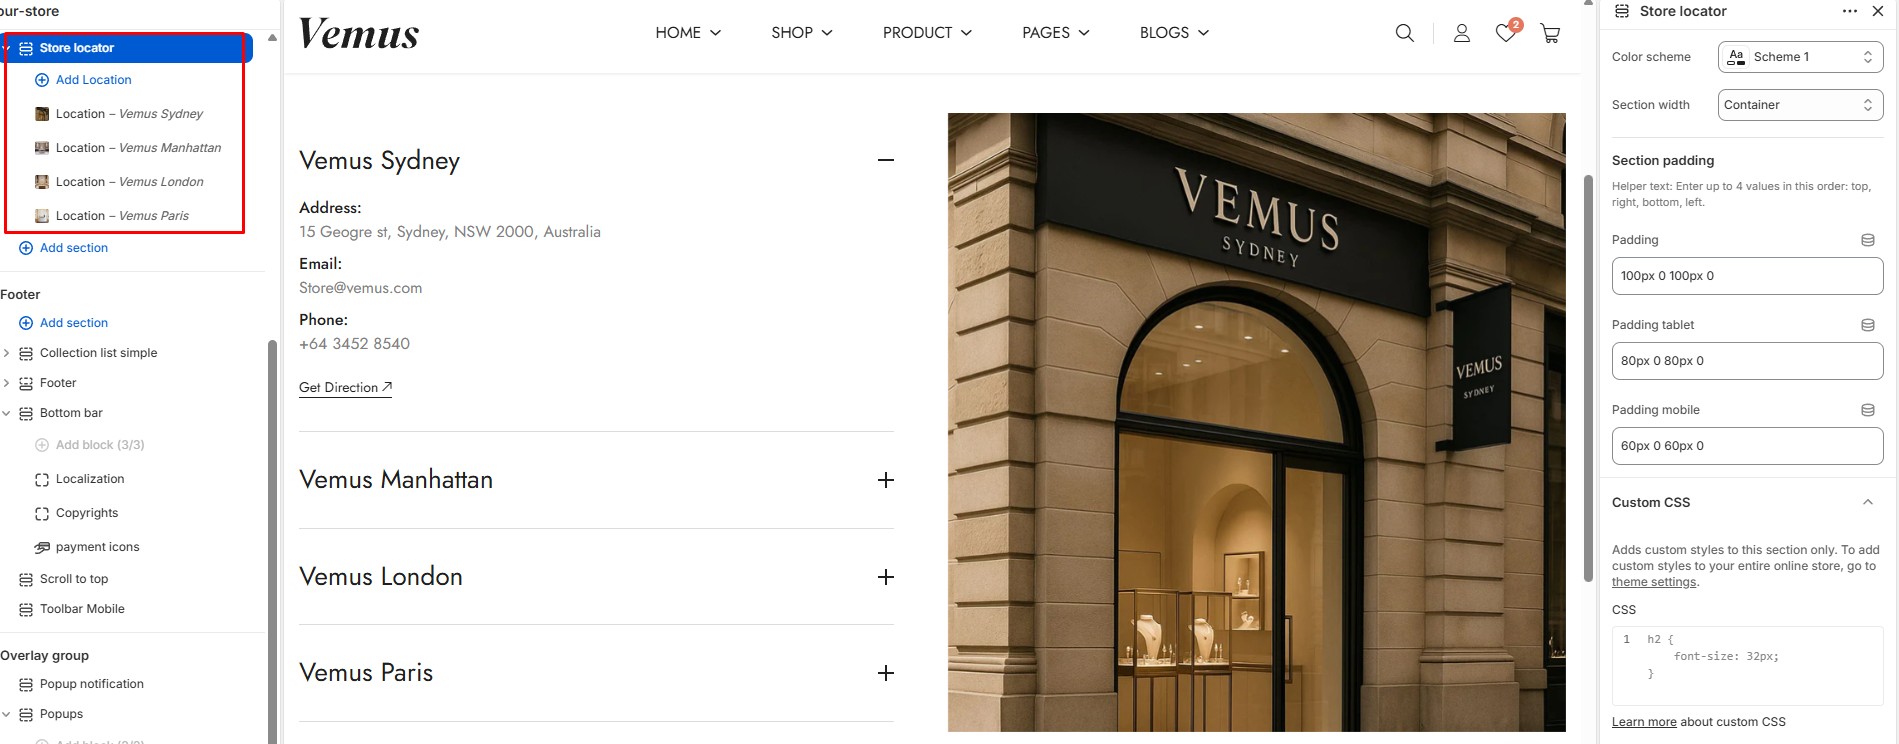
The Store locator section showcases multiple store locations with contact information, images, and expandable details to help customers find nearby branches.
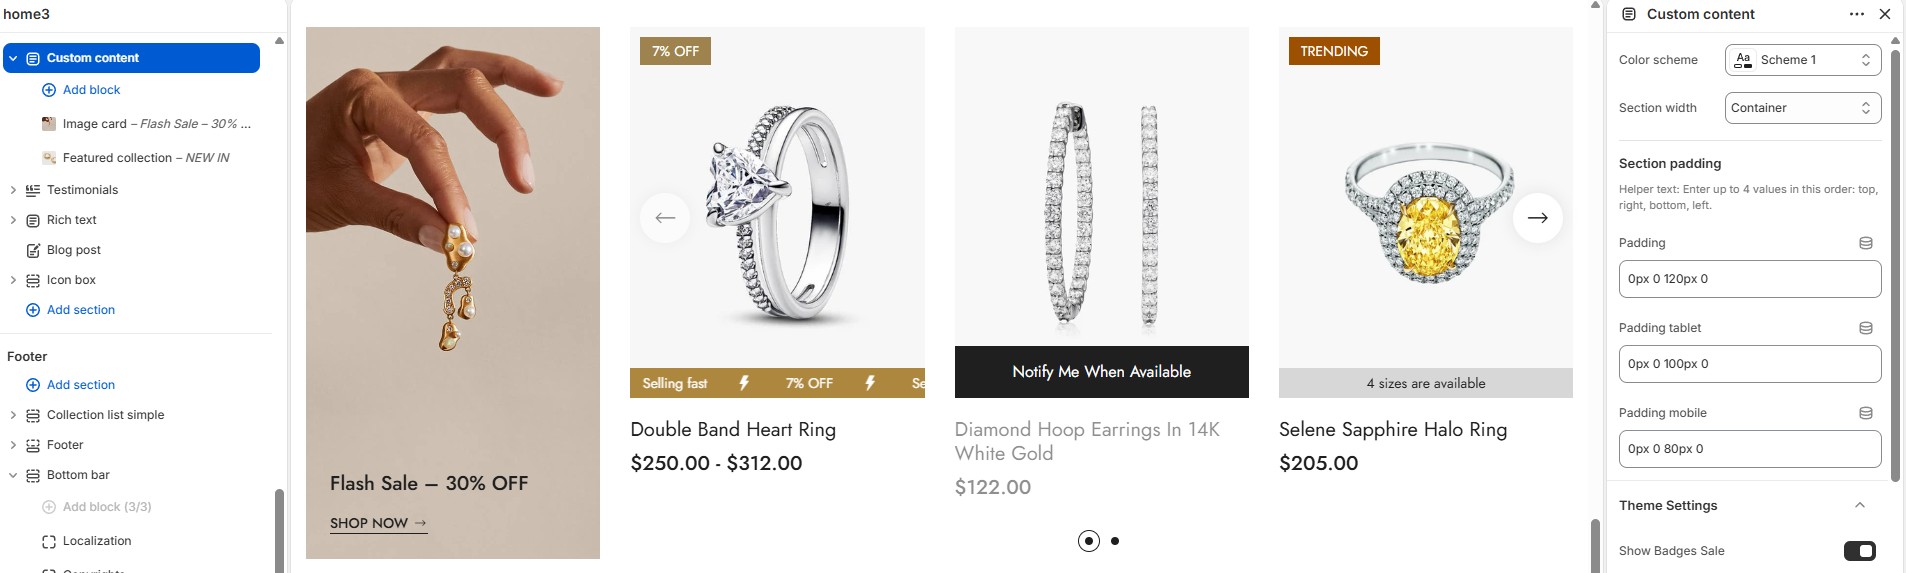
The Custom content section lets you combine promotional banners, featured collections, products, or custom blocks into a flexible mixed-content layout.
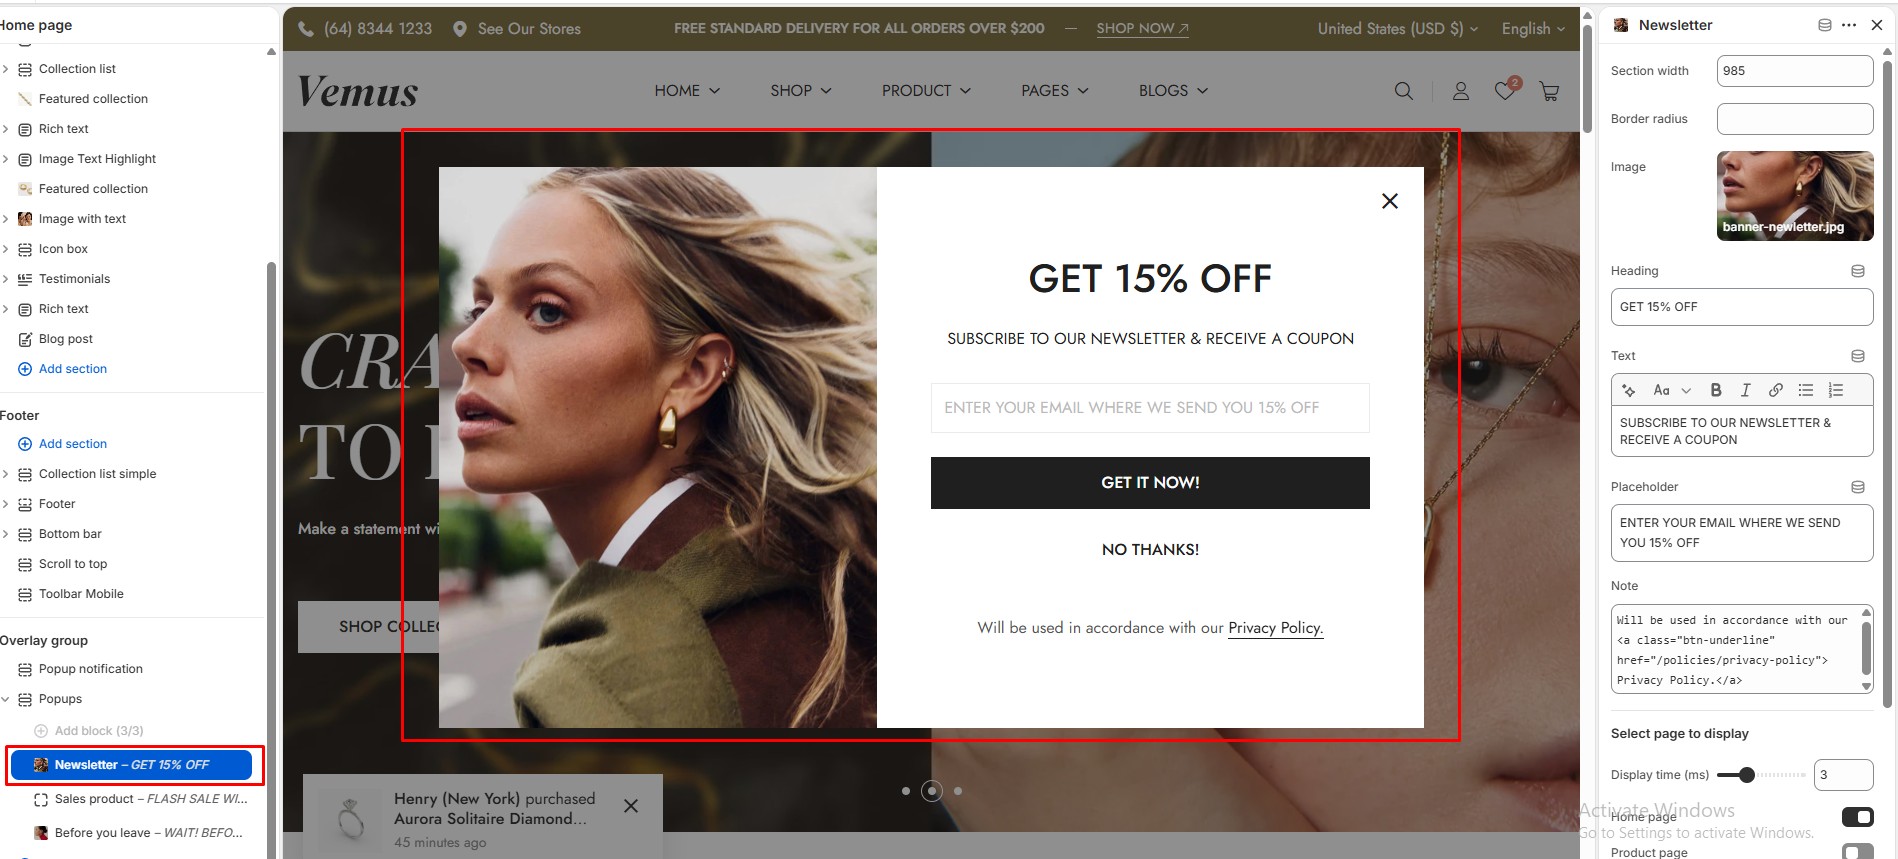
The Newsletter popup displays a promotional subscription popup with custom images, text, discount offers, and email signup forms to grow your mailing list.
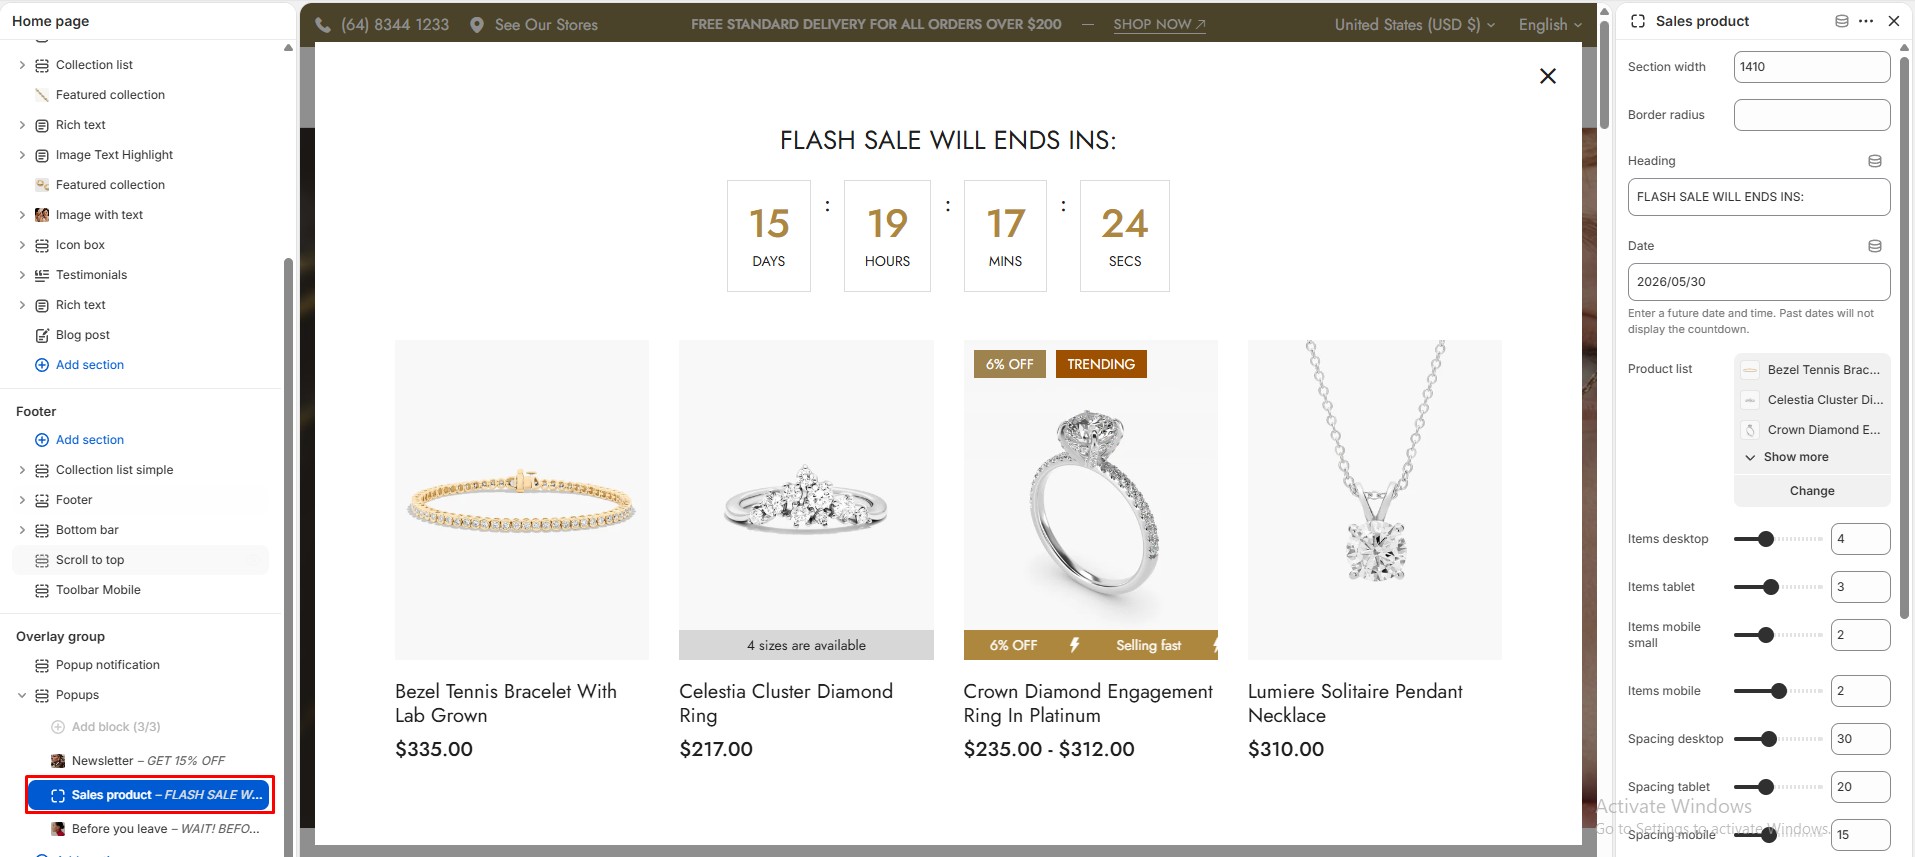
The Sales product popup displays selected products inside a promotional popup with countdown timers to highlight flash sales and limited-time offers.
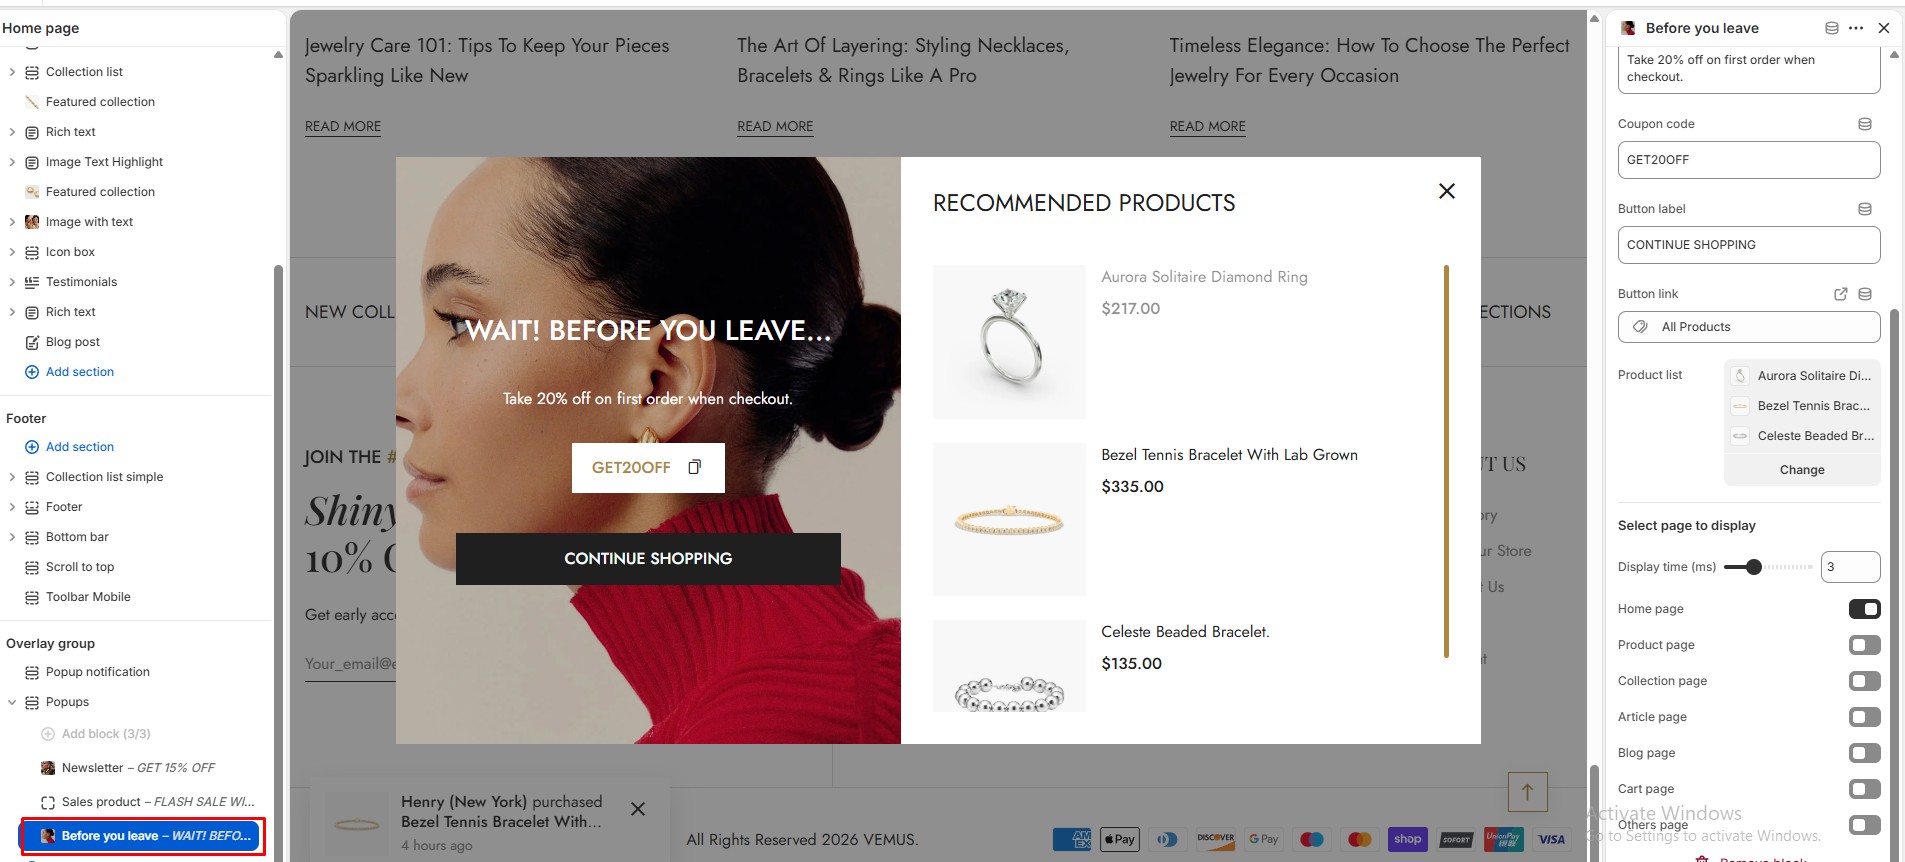
The Before you leave popup appears when visitors are about to leave the store, showing discount offers, coupon codes, and recommended products to improve conversions.
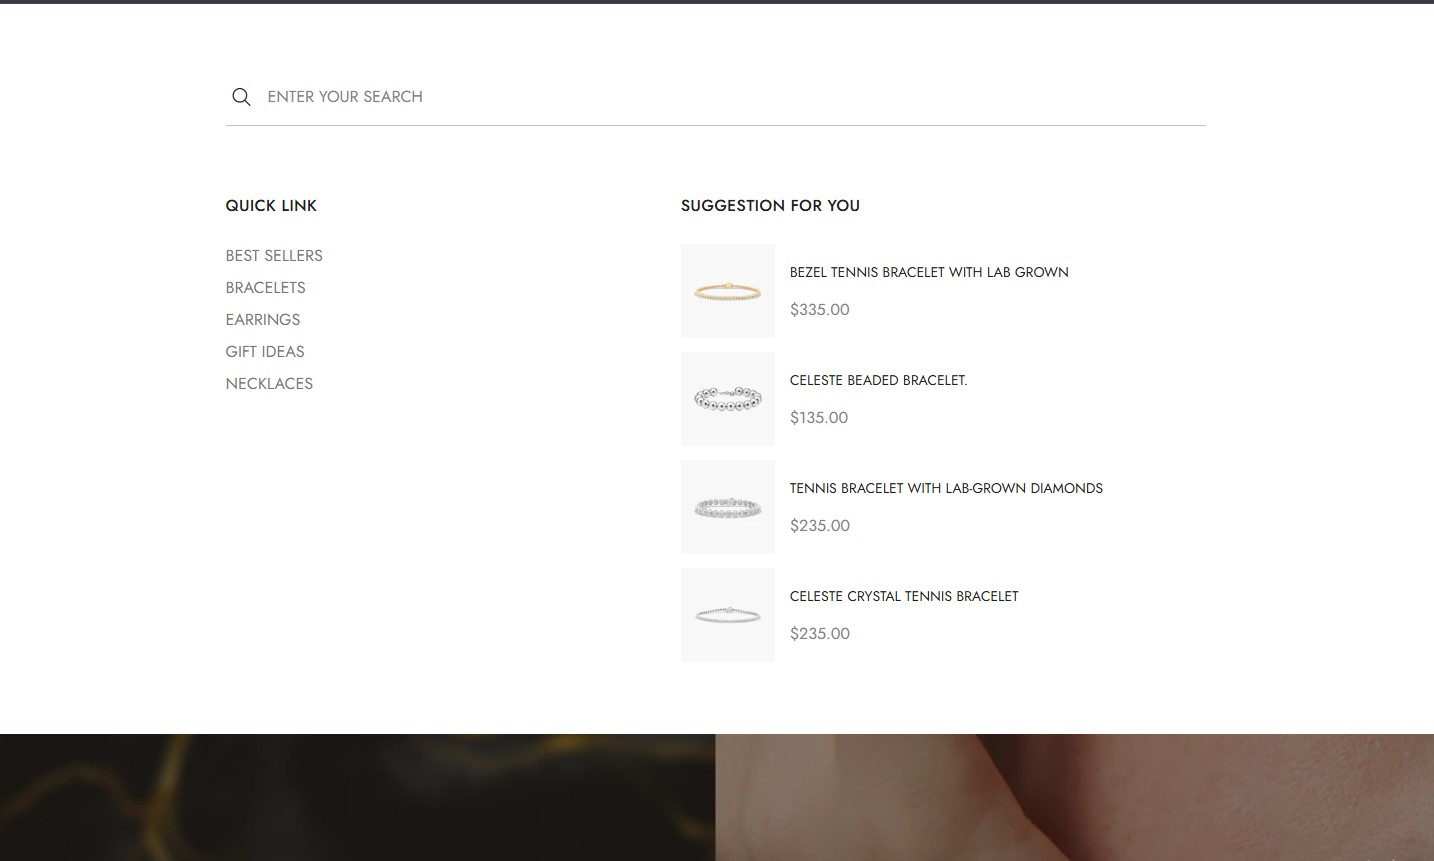
The Predictive search drawer helps customers quickly find products, collections, or pages with live search suggestions and recommended items
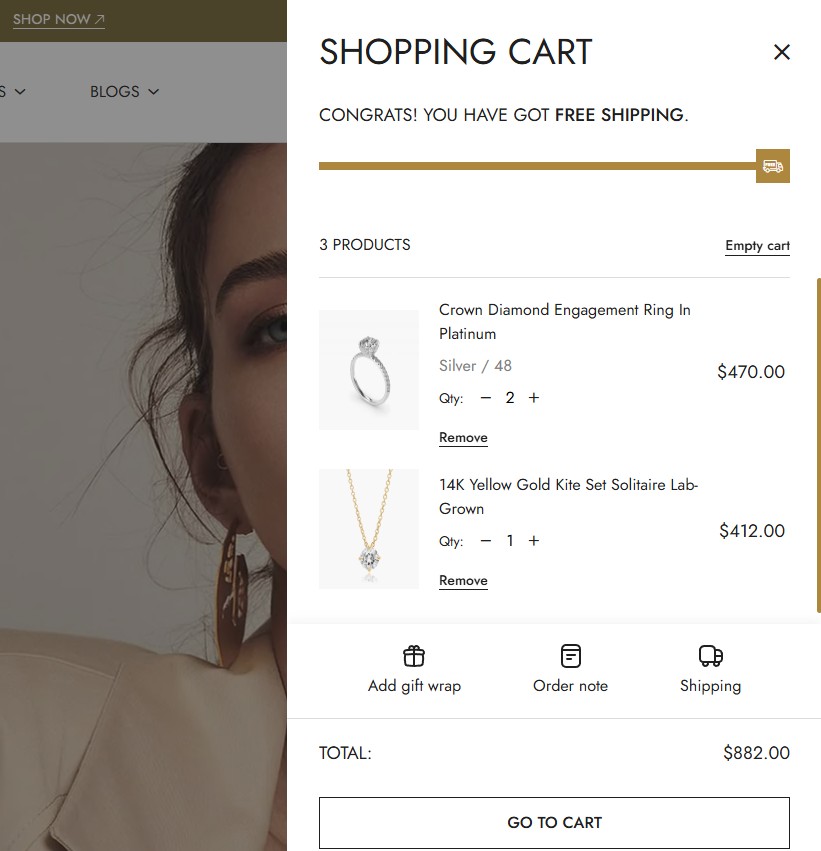
The Cart drawer provides a quick shopping cart overview where customers can manage products, quantities, notes, shipping, and checkout without leaving the page.
The Quick view popup allows customers to preview product details, images, pricing, and purchase options directly from collection or product listings.
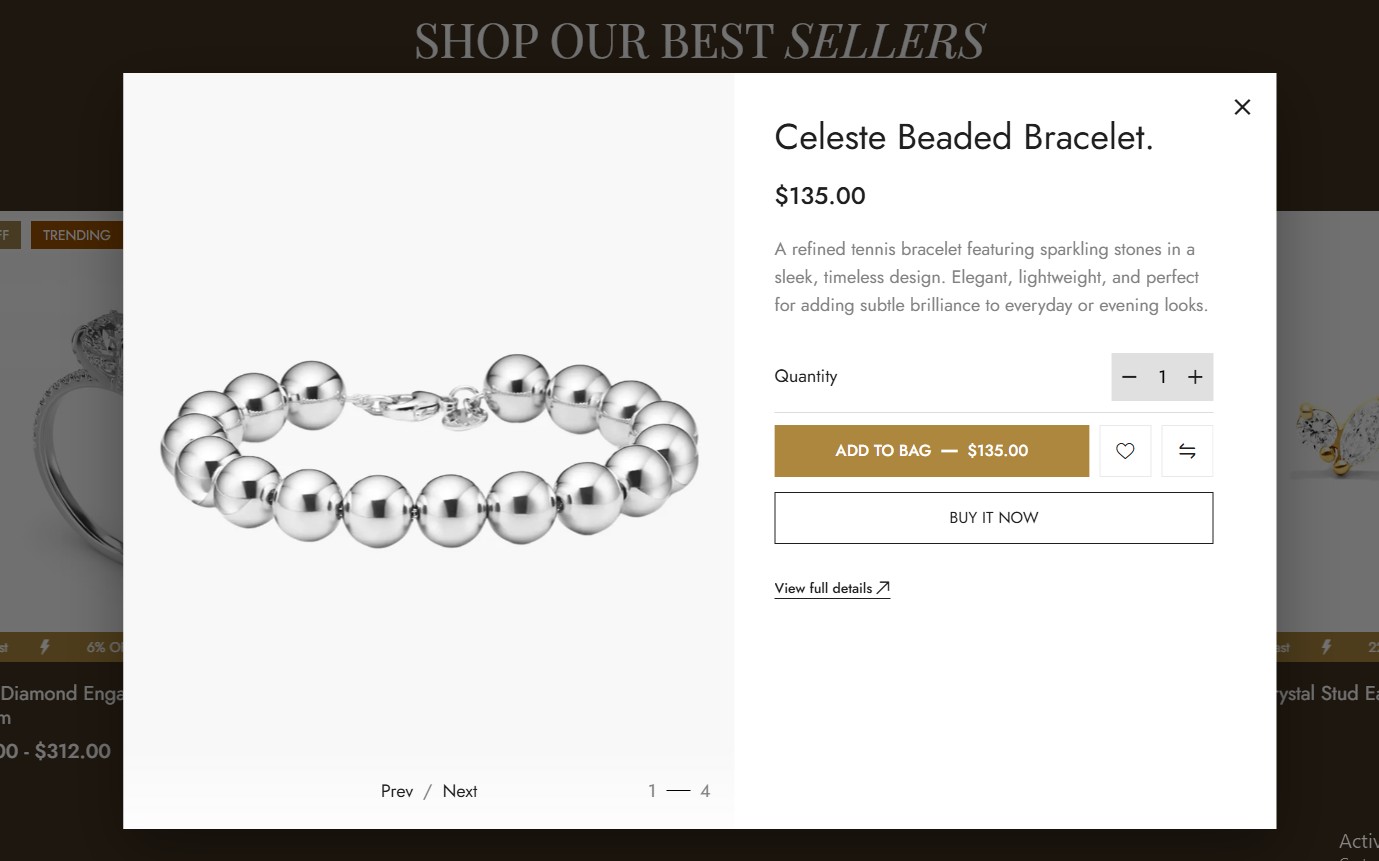
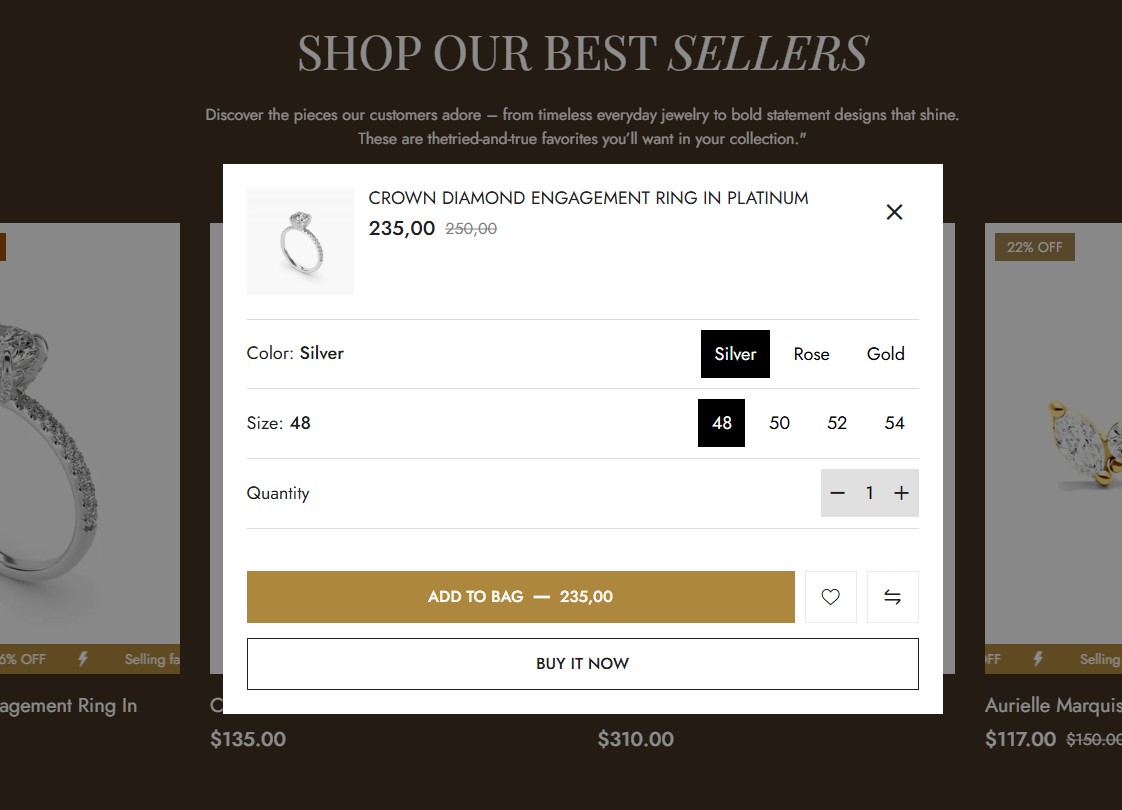
The Quick add popup lets customers quickly select product variants, quantities, and add items to the cart without opening the full product page.
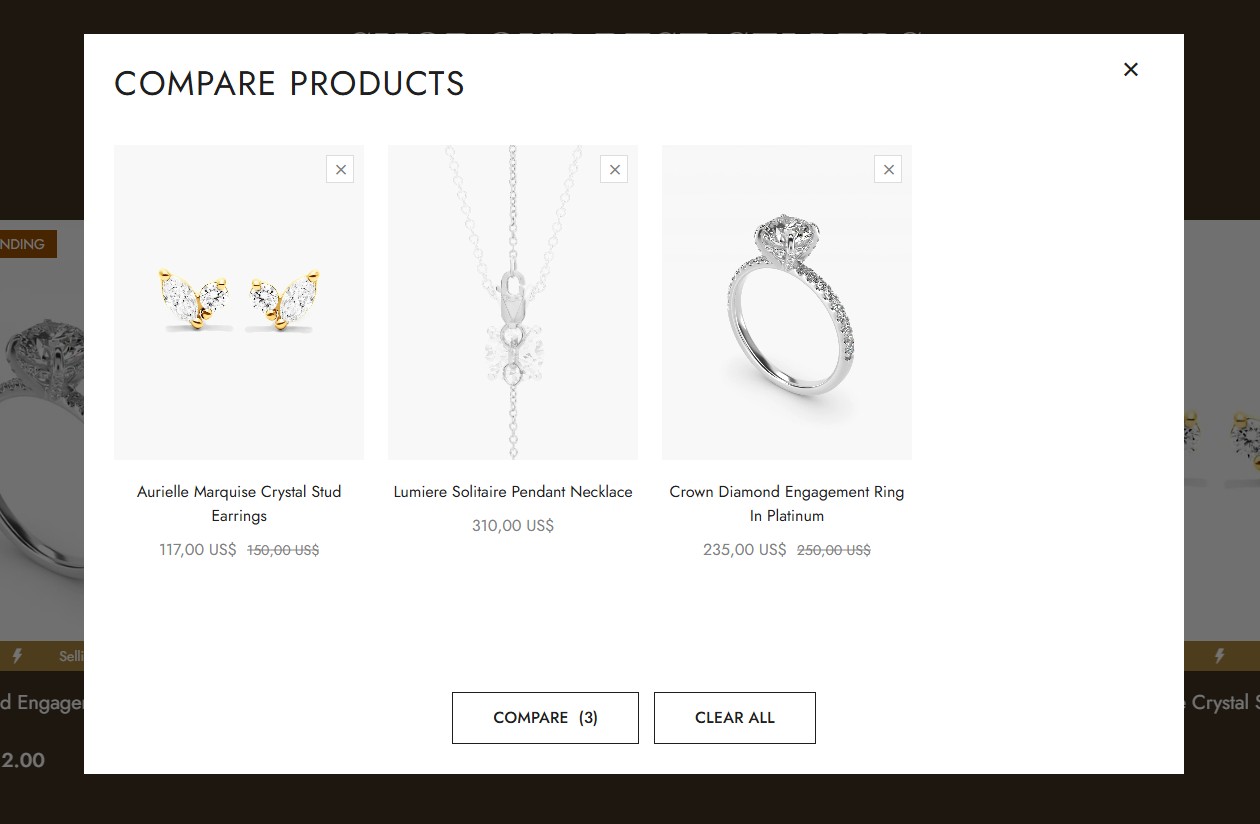
The Compare popup allows customers to compare multiple products side by side, including images, prices, and product information for easier shopping decisions.
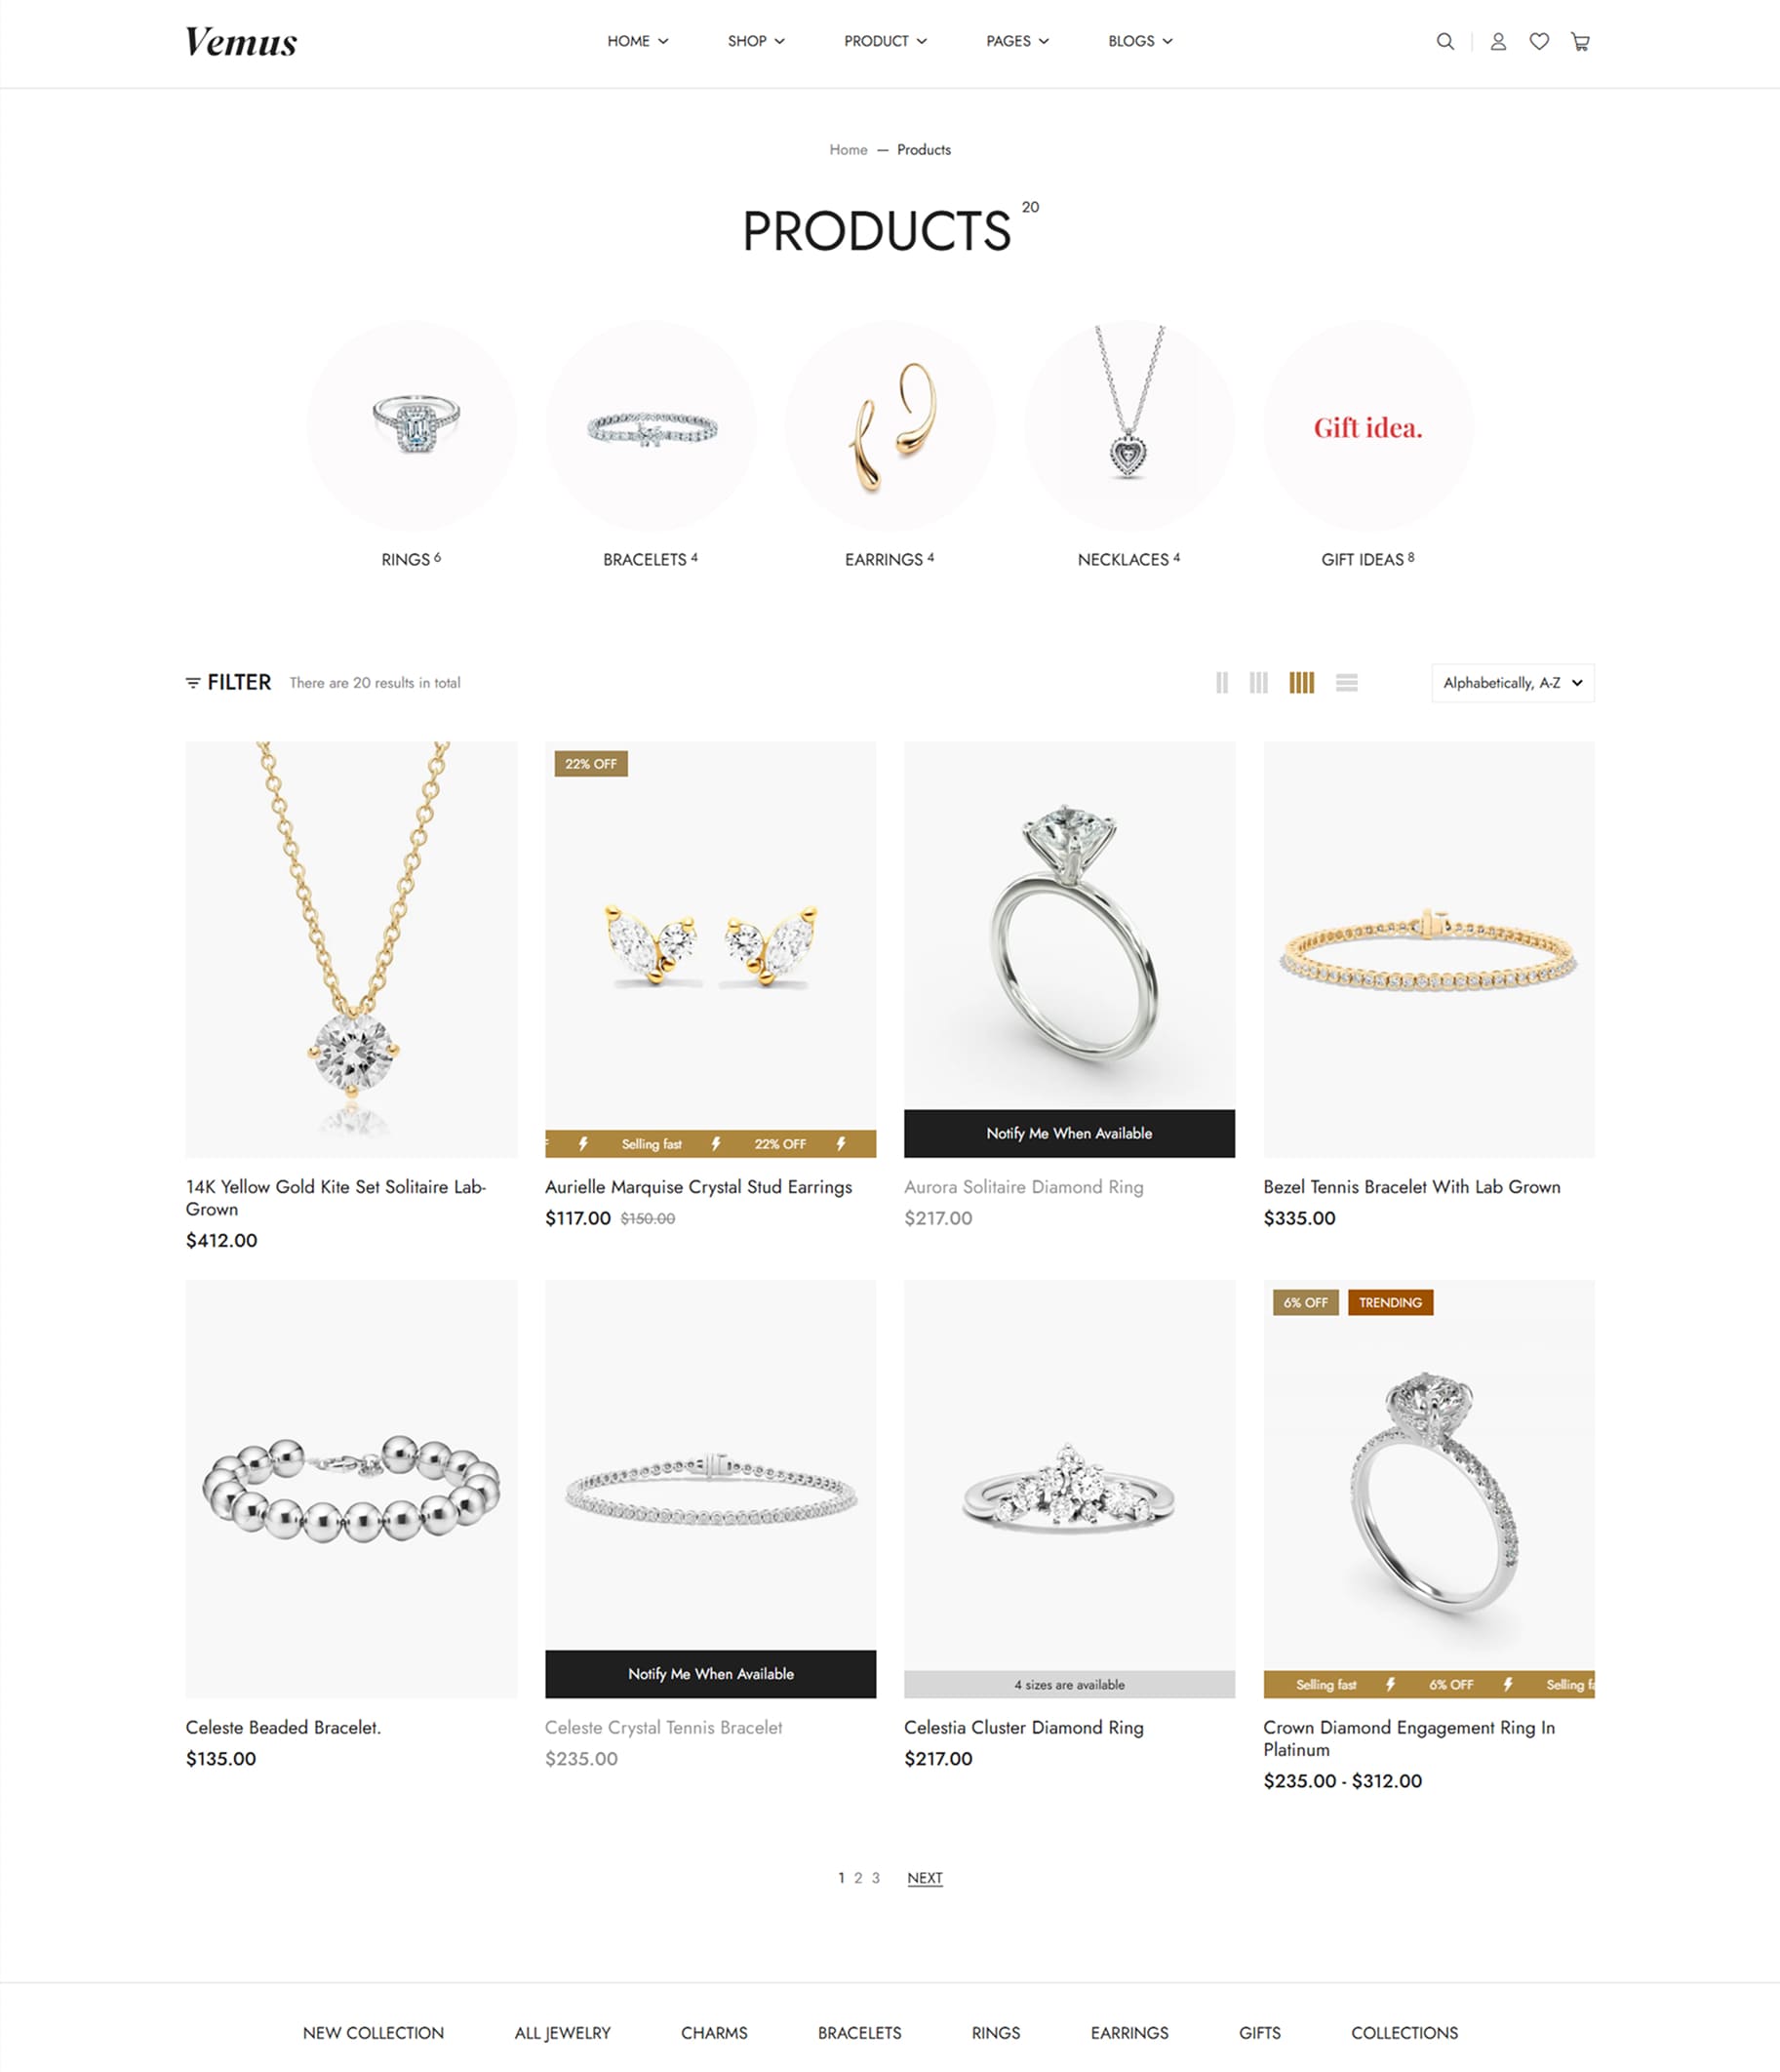
Collection Page is a dedicated page that displays all products belonging to a specific collection. It provides a clear and organized layout where each item is shown with its image, title, and price, allowing customers to easily browse through the selection. By grouping related products together, the collection page helps shoppers quickly find what they’re looking for, improves navigation, and enhances the overall shopping experience.
Note: Please click the link below. We have already provided a step-by-step guide on how to create and configure products. Simply follow the instructions there to set up your products correctly. Link
A Collection List is a page that displays multiple product collections in a grid layout. Each collection is shown with its featured image, collection title, and the number of items it contains. This layout allows customers to easily browse different categories and navigate into a specific collection to view all related products.
The Collection List page helps organize products visually, making it simple for users to explore the store’s offerings and quickly find the collection they are interested in.
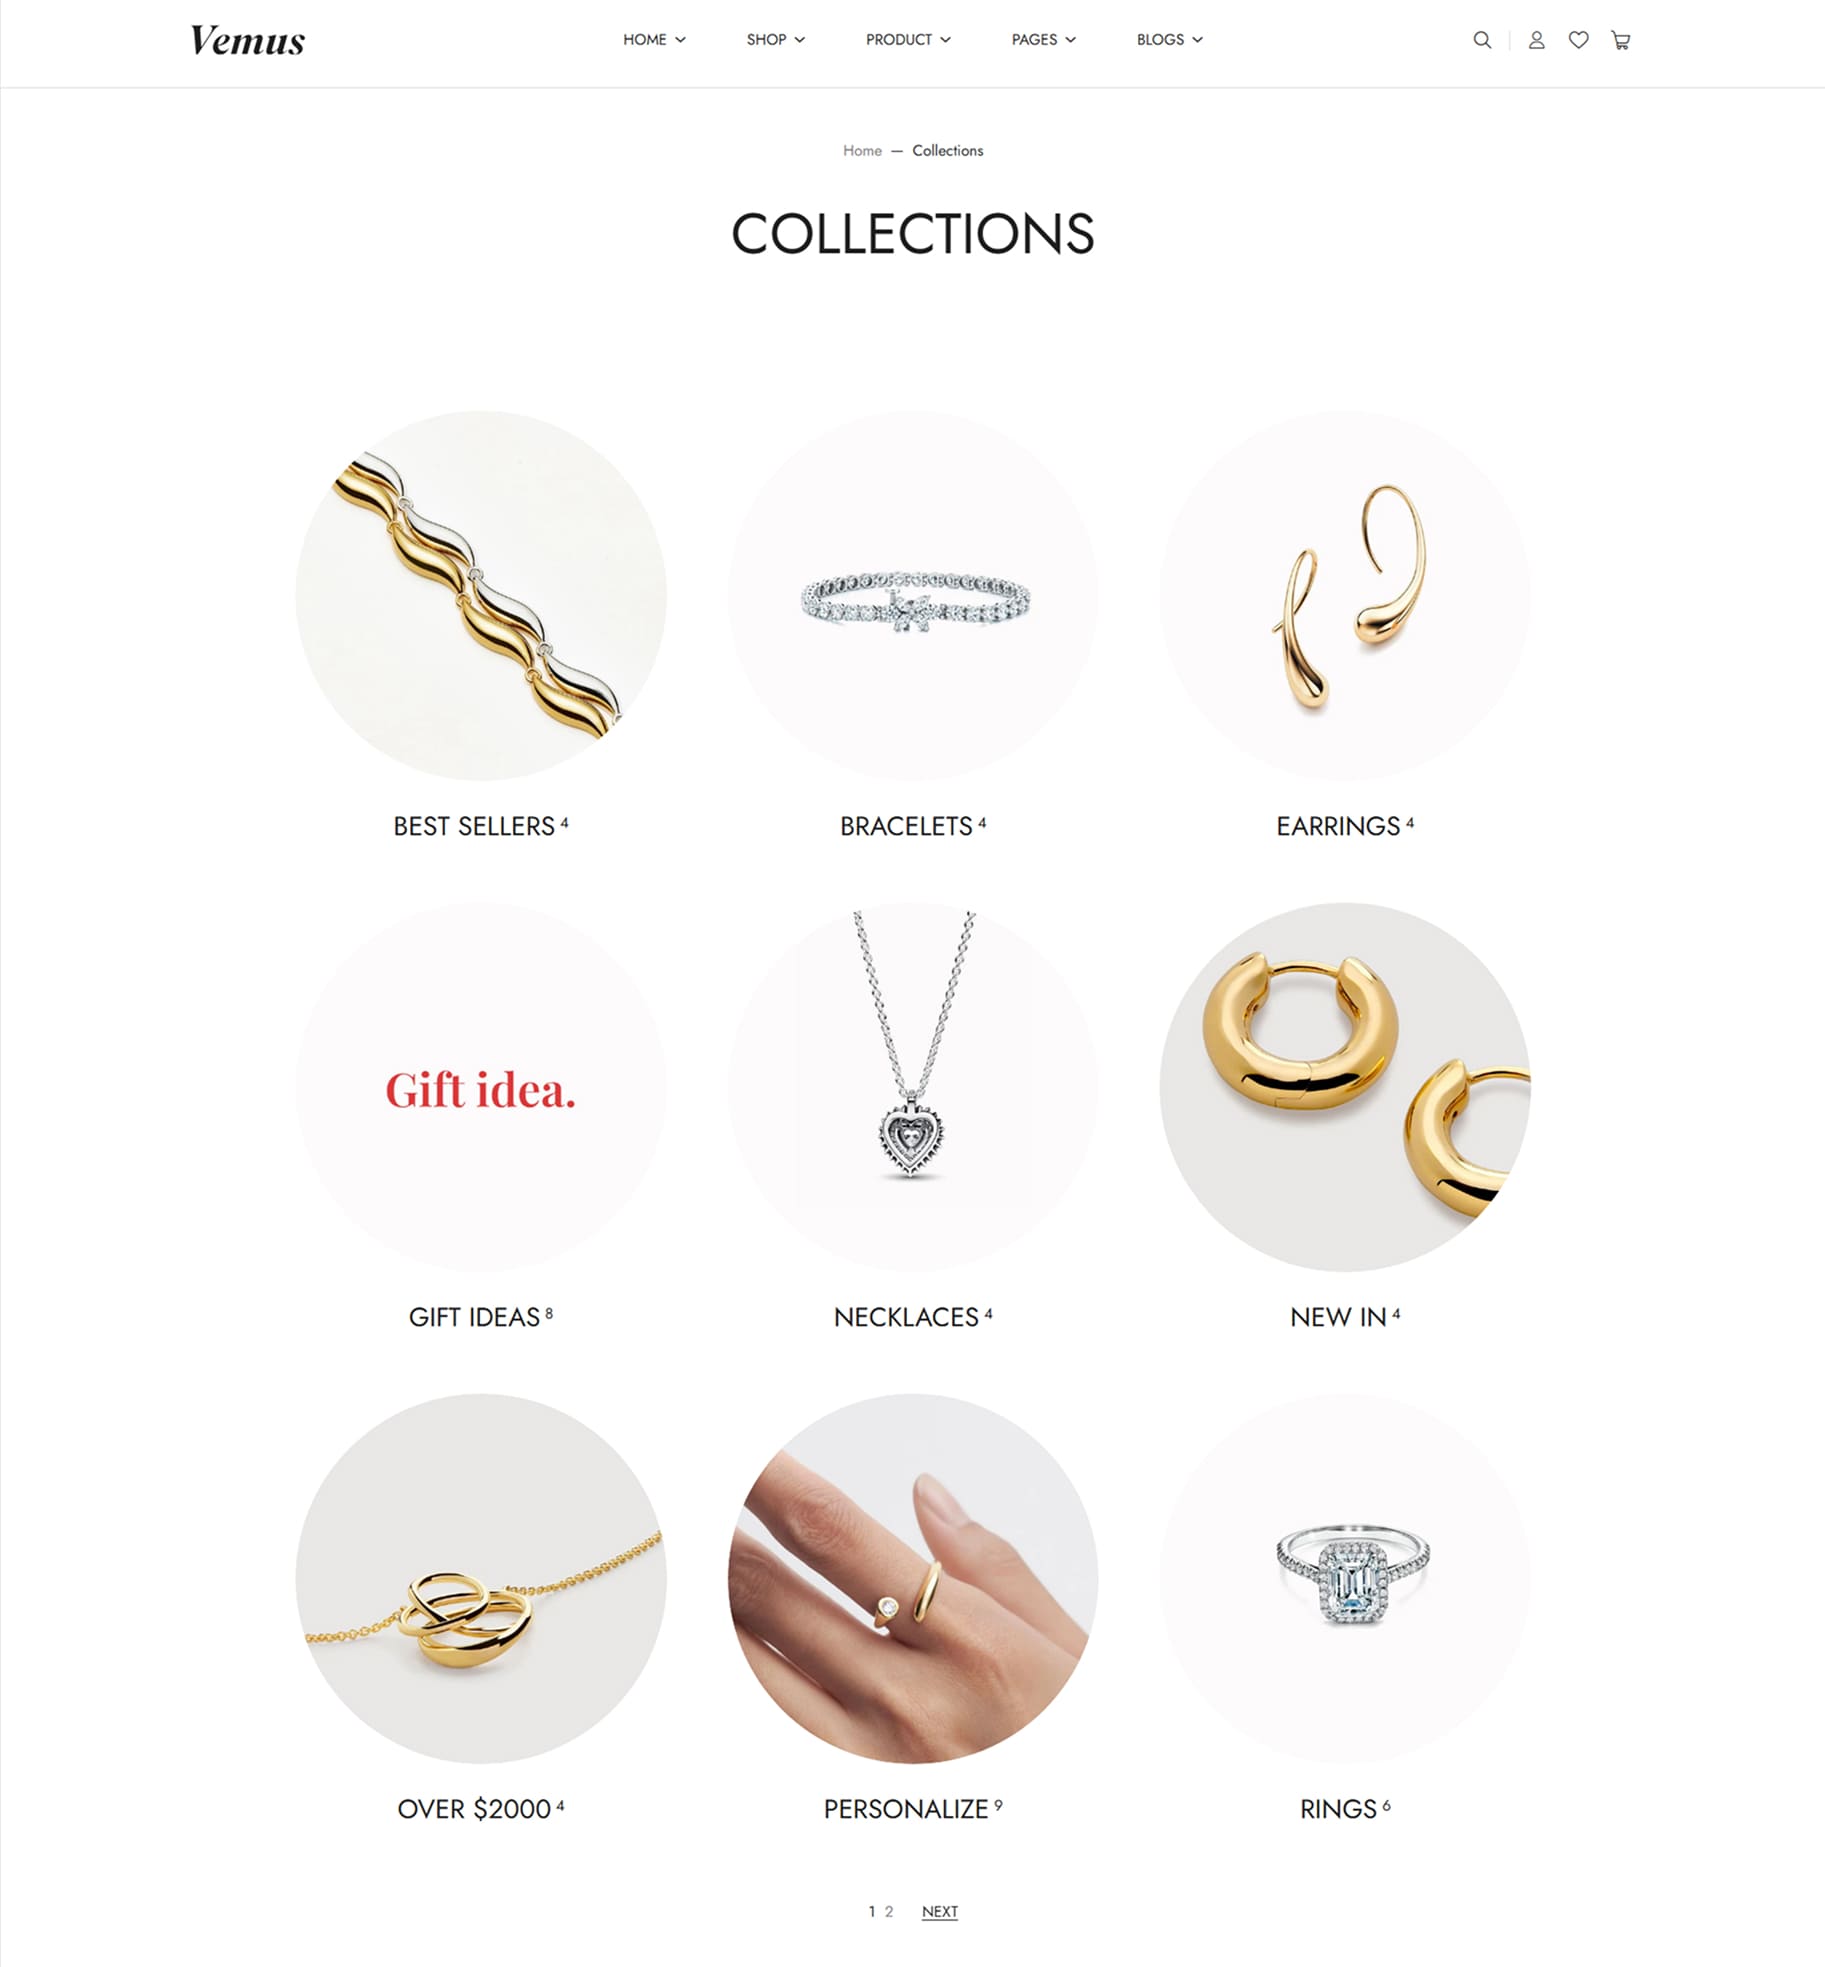
Note: Please click the link below. We have already provided a step-by-step guide on how to create and configure collections. Simply follow the instructions there to set up your collection correctly. Link
The Product Page is one of the most important pages in any Shopify store. It presents the full information of a specific product, helping customers understand the item before making a purchase decision. This page includes essential elements such as the product title, images, price, variants, description, and add-to-cart functionality, all organized to guide the customer smoothly through the buying process.
A well-designed product page allows the shopper to explore key details—images, features, specifications, sizing information, and customer reviews—while also offering interactive features like variant selection, quantity control, and related product recommendations. By providing clarity and convenience, the Product Detail Page plays a crucial role in improving user experience, building trust, and increasing conversion rates.
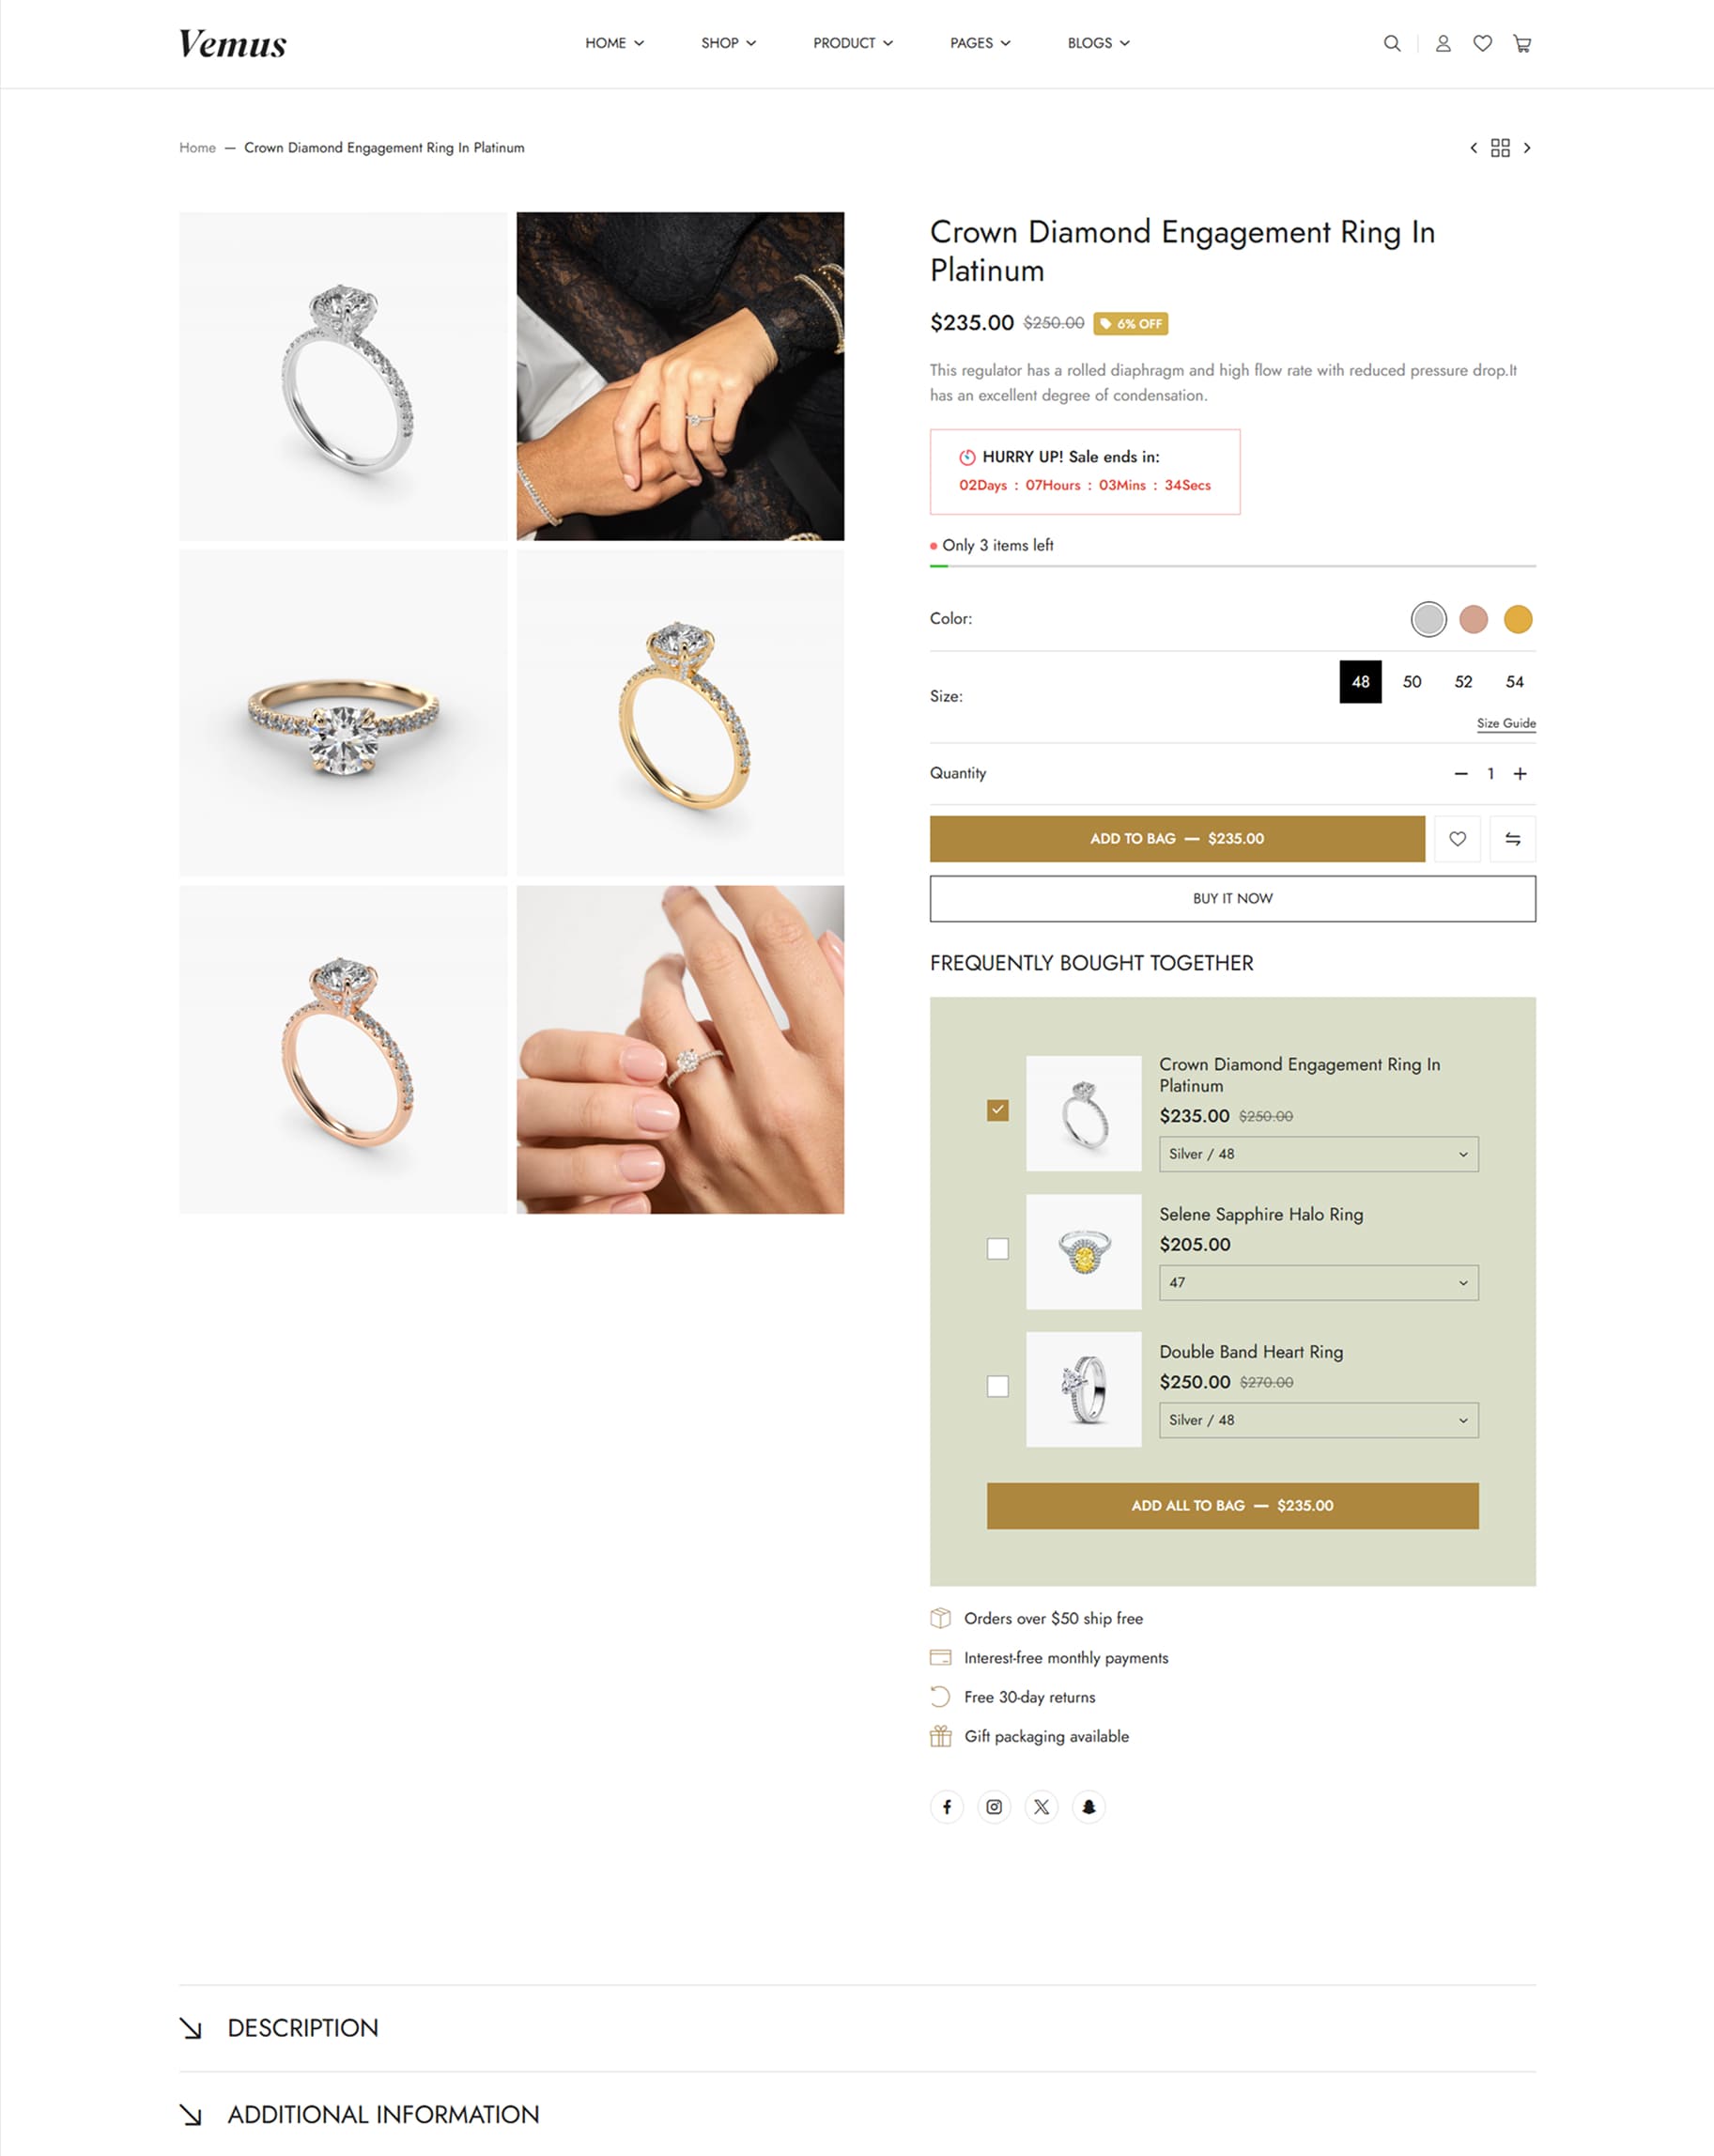
Note: Please click the link below. We have already provided a step-by-step guide on how to create and configure products. Simply follow the instructions there to set up your products correctly. Link
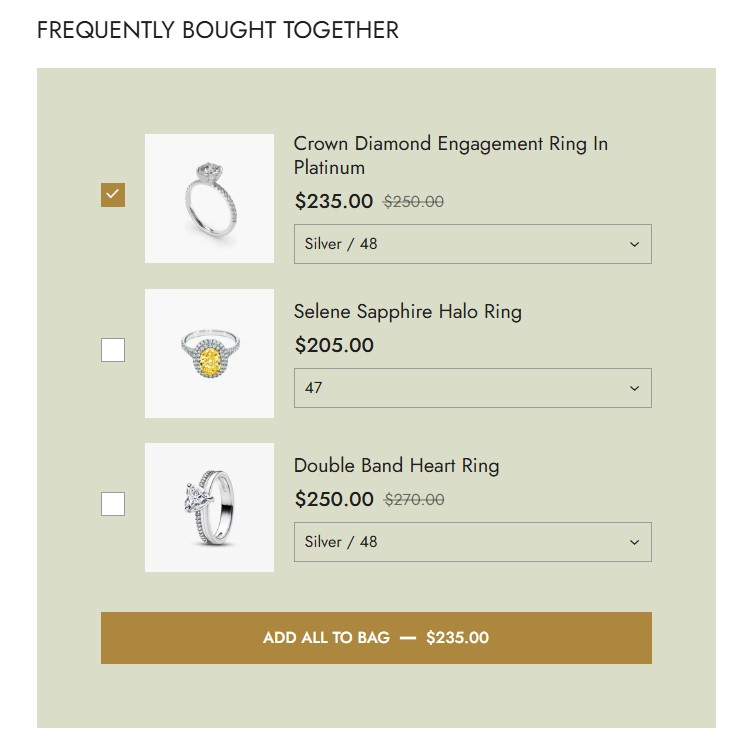
Note: Please click the link below. We have already provided a step-by-step guide on how to create and configure metafields. Simply follow the instructions there to set up your metafields correctly. Link
The Page Blog is the page that displays a list of all blog posts belonging to a specific blog. It shows each post with its title, featured image, and short excerpt, allowing users to browse and select an article to read.
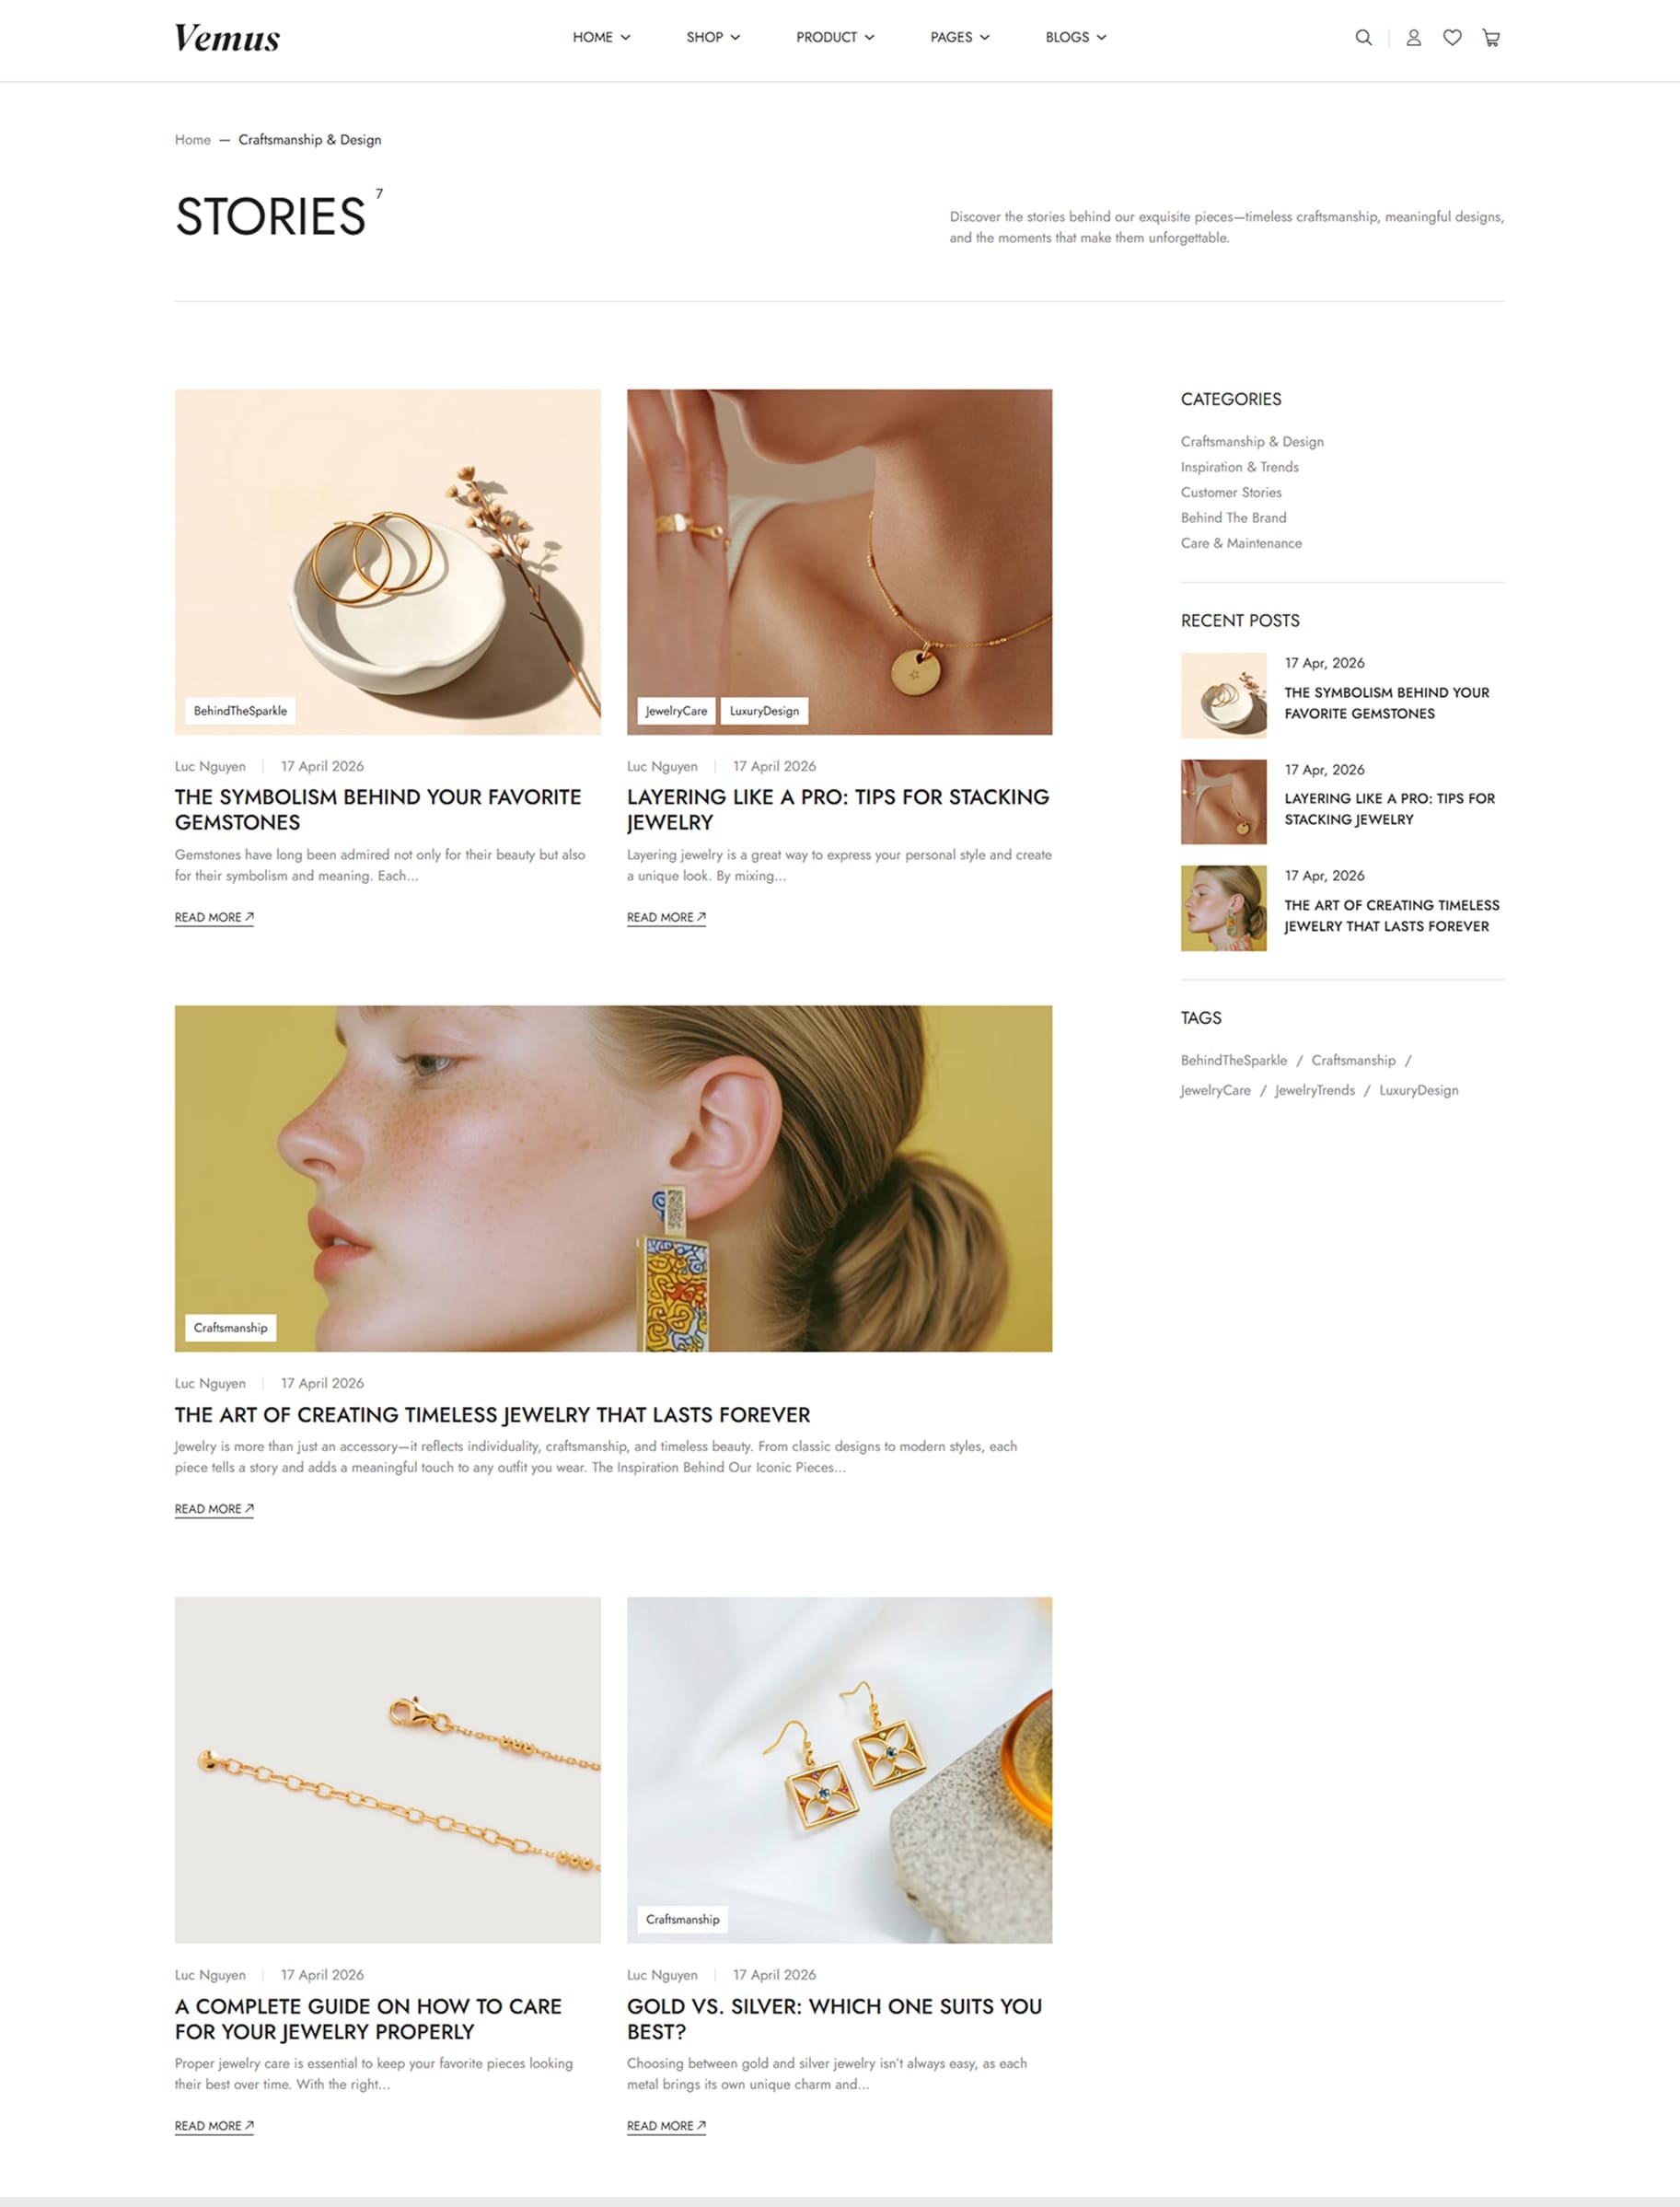
Note: Please click the link below. We have already provided a step-by-step guide on how to create and configure your Blog and Blog Posts. Simply follow the instructions there to set up your blog correctly. Link
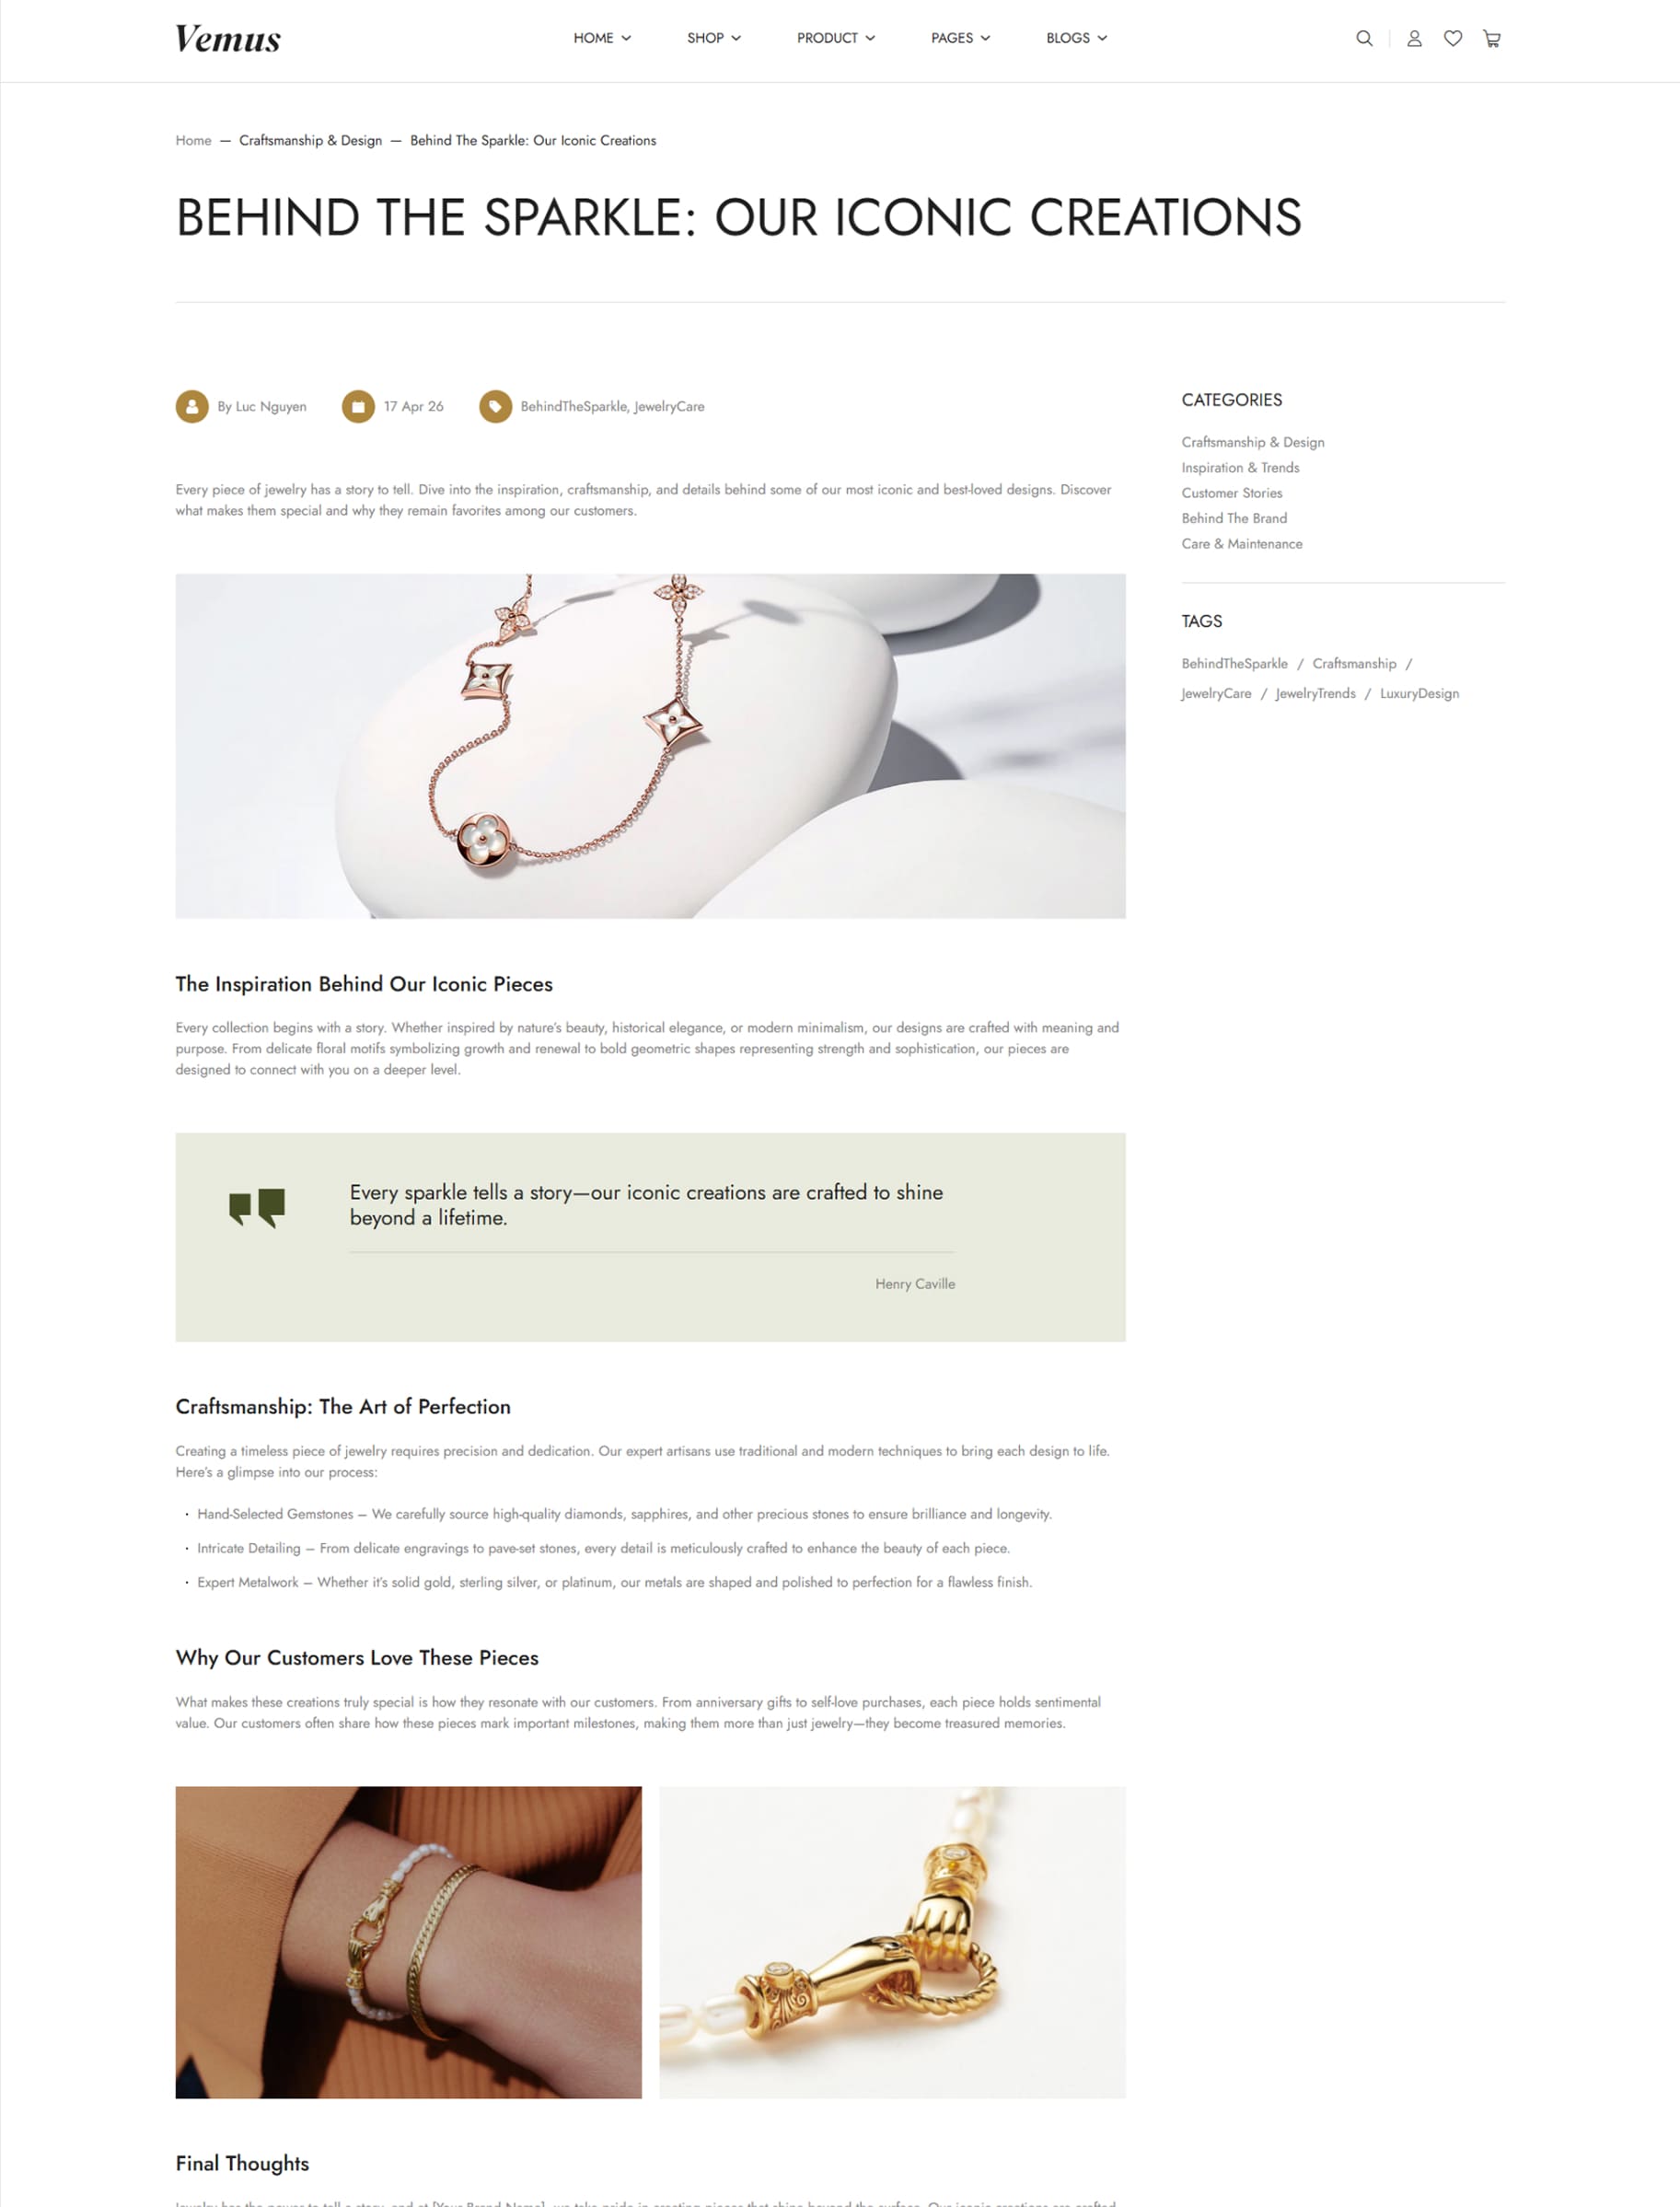
Blog Post is the detailed page of a specific article. This page displays the full content of the post, including text, images, videos, publish date, author, and other custom content blocks. It is where users can read the complete information of the article..
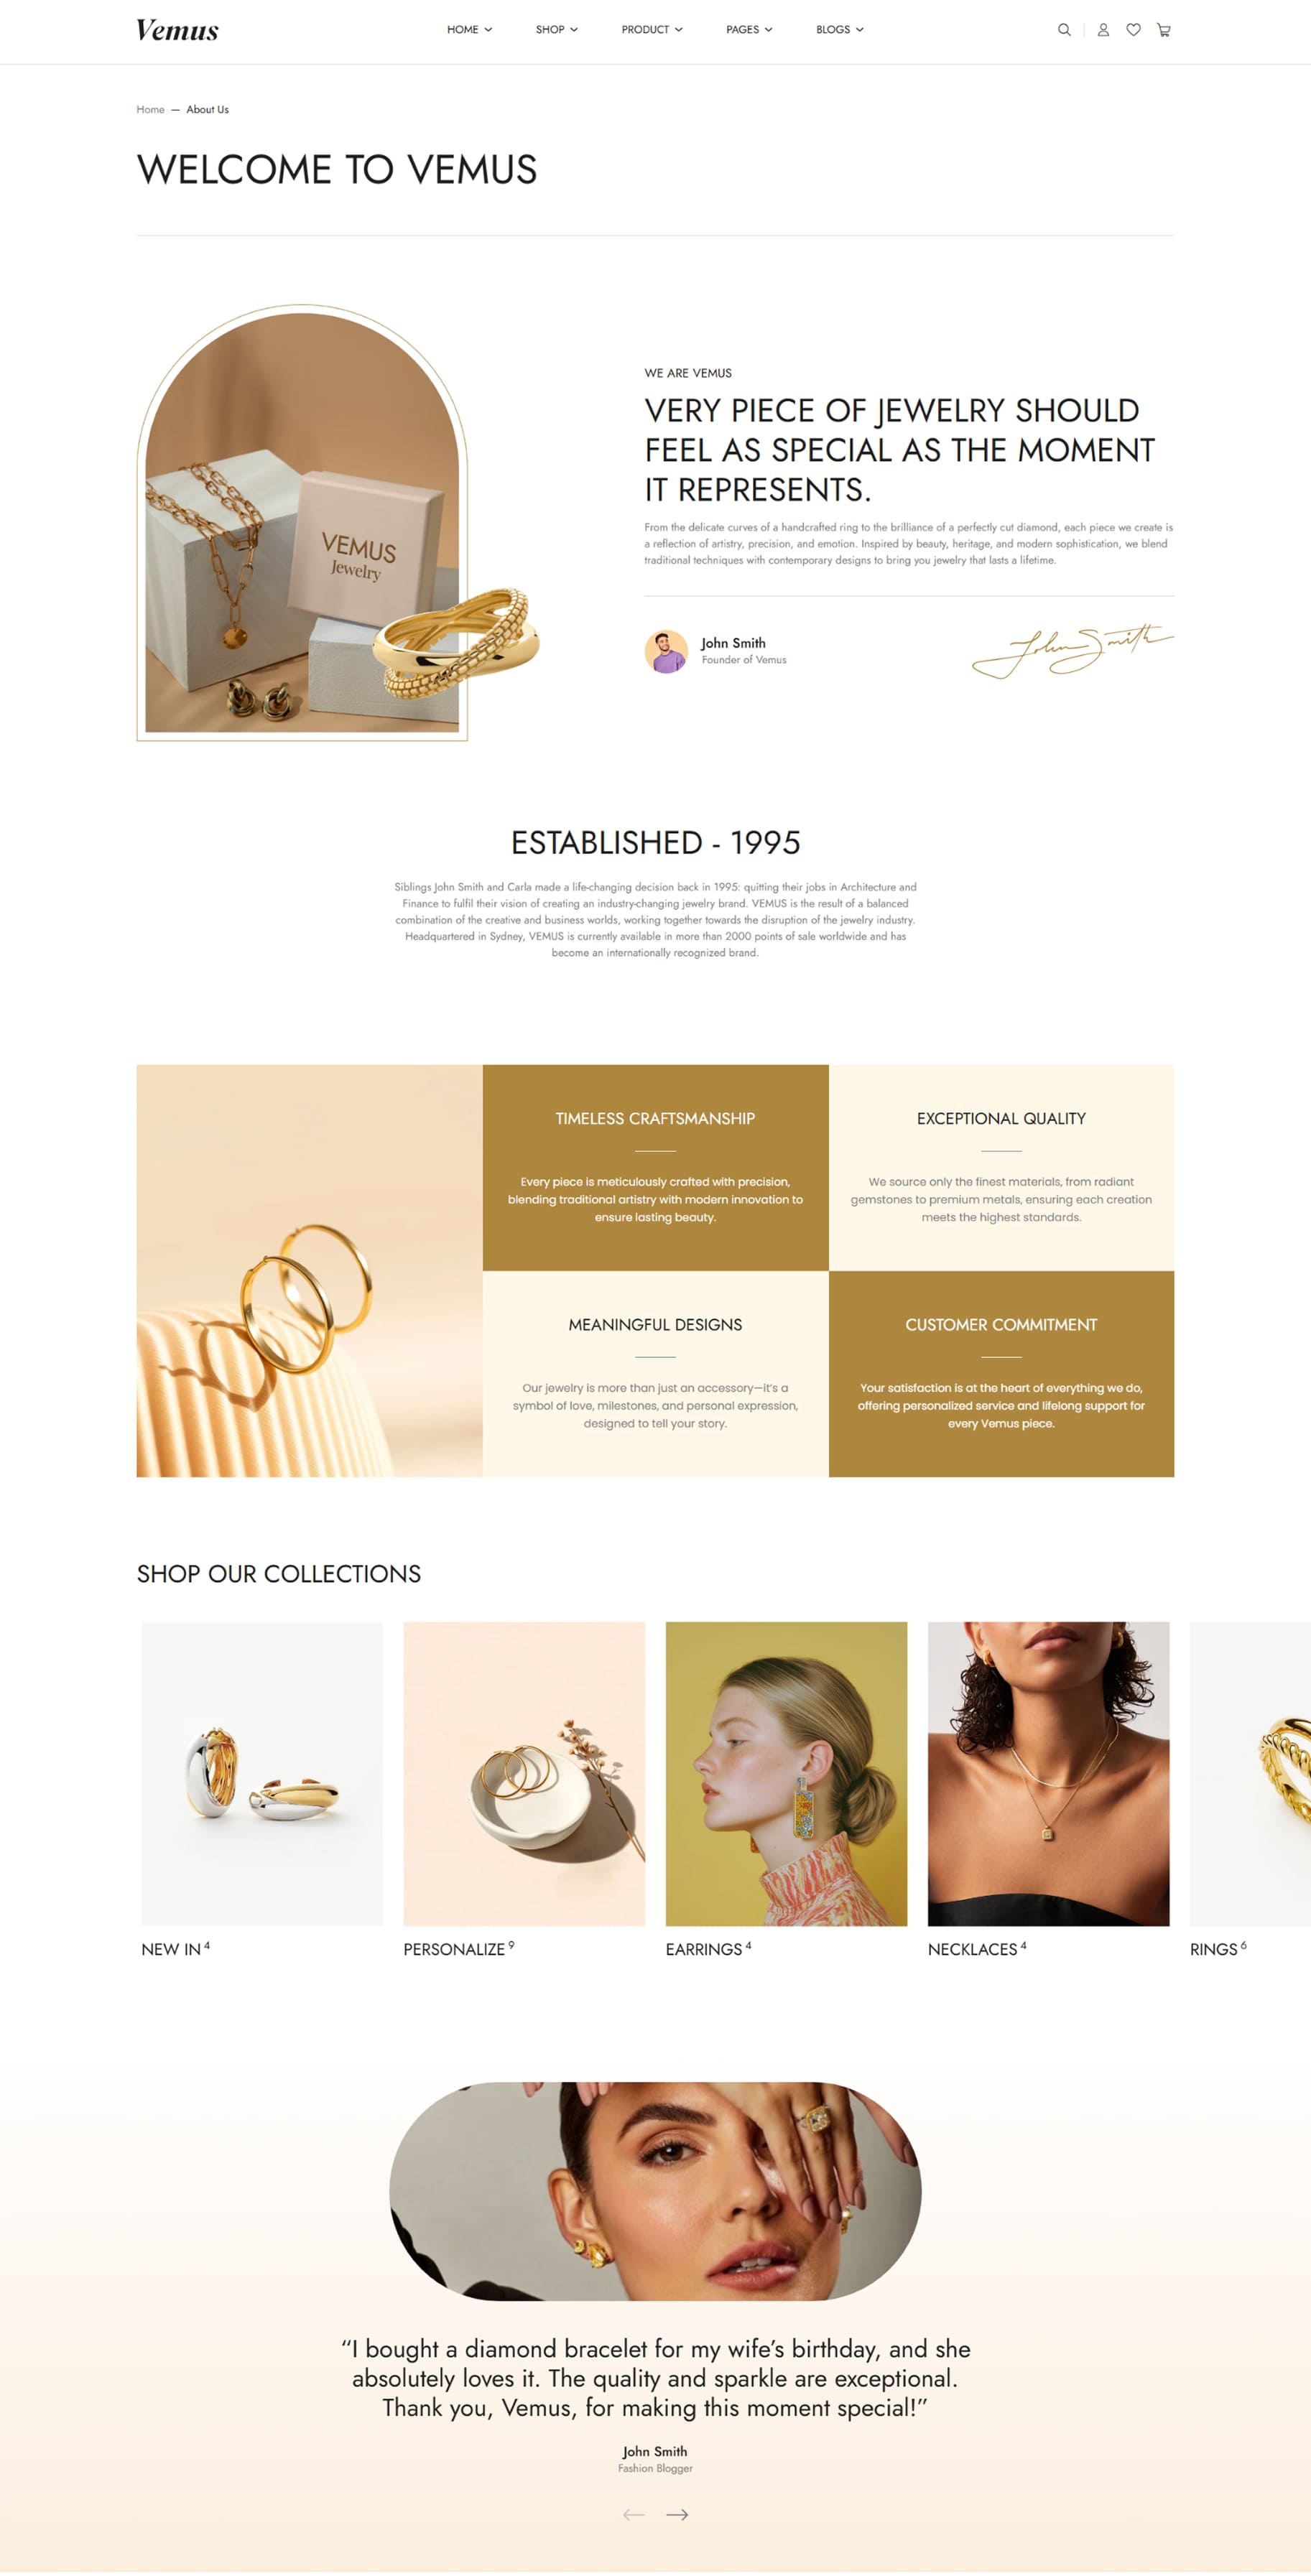
The About Us page introduces your brand story.
This page is used to highlight your background, core values, mission, vision, and team members. You can display content using text blocks, images, banners, or any custom sections supported by the theme. It helps build trust and strengthens your brand identity.
Note: Please click the link below. We have already provided a step-by-step guide on how to create pages and configure them. Simply follow the instructions there to set up your page correctly. Link
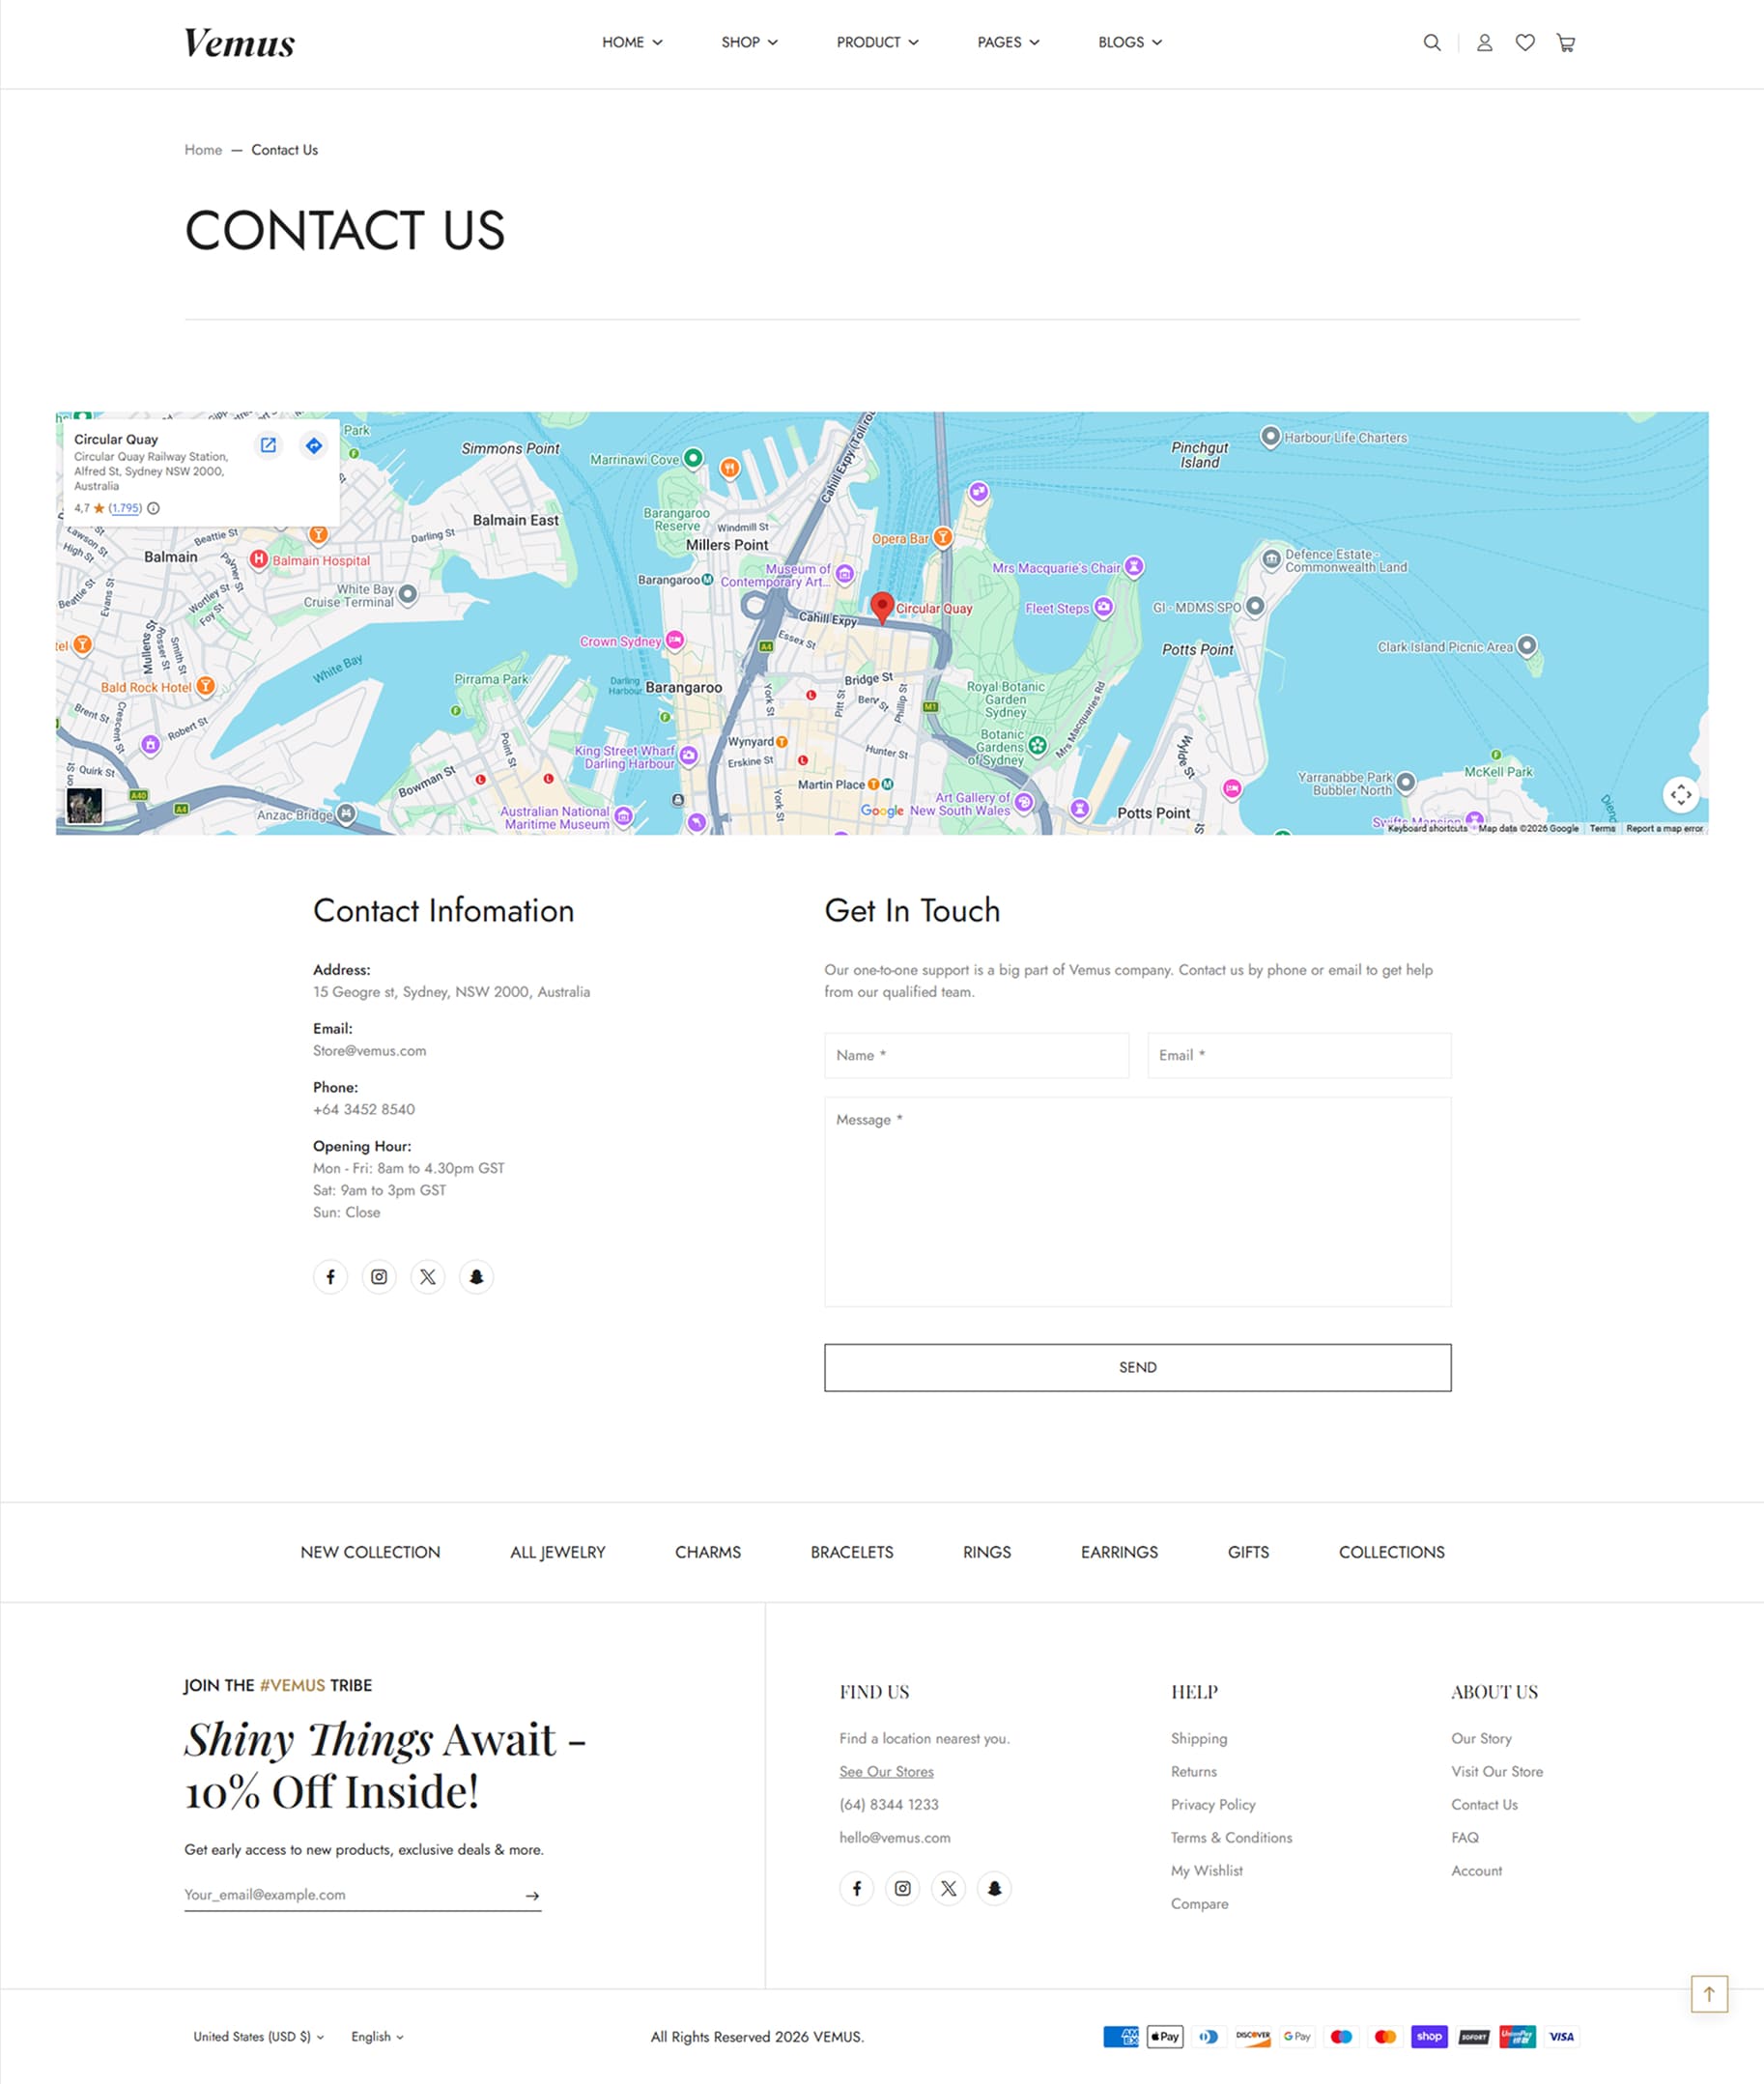
The Contact Us page allows customers to reach your store directly.
It typically includes the Shopify contact form, your business contact information (email, phone), a Google Map, and optional descriptive content.
You can also add icon boxes or support information using theme sections.
Note: Please click the link below. We have already provided a step-by-step guide on how to create pages and configure them. Simply follow the instructions there to set up your page correctly. Link
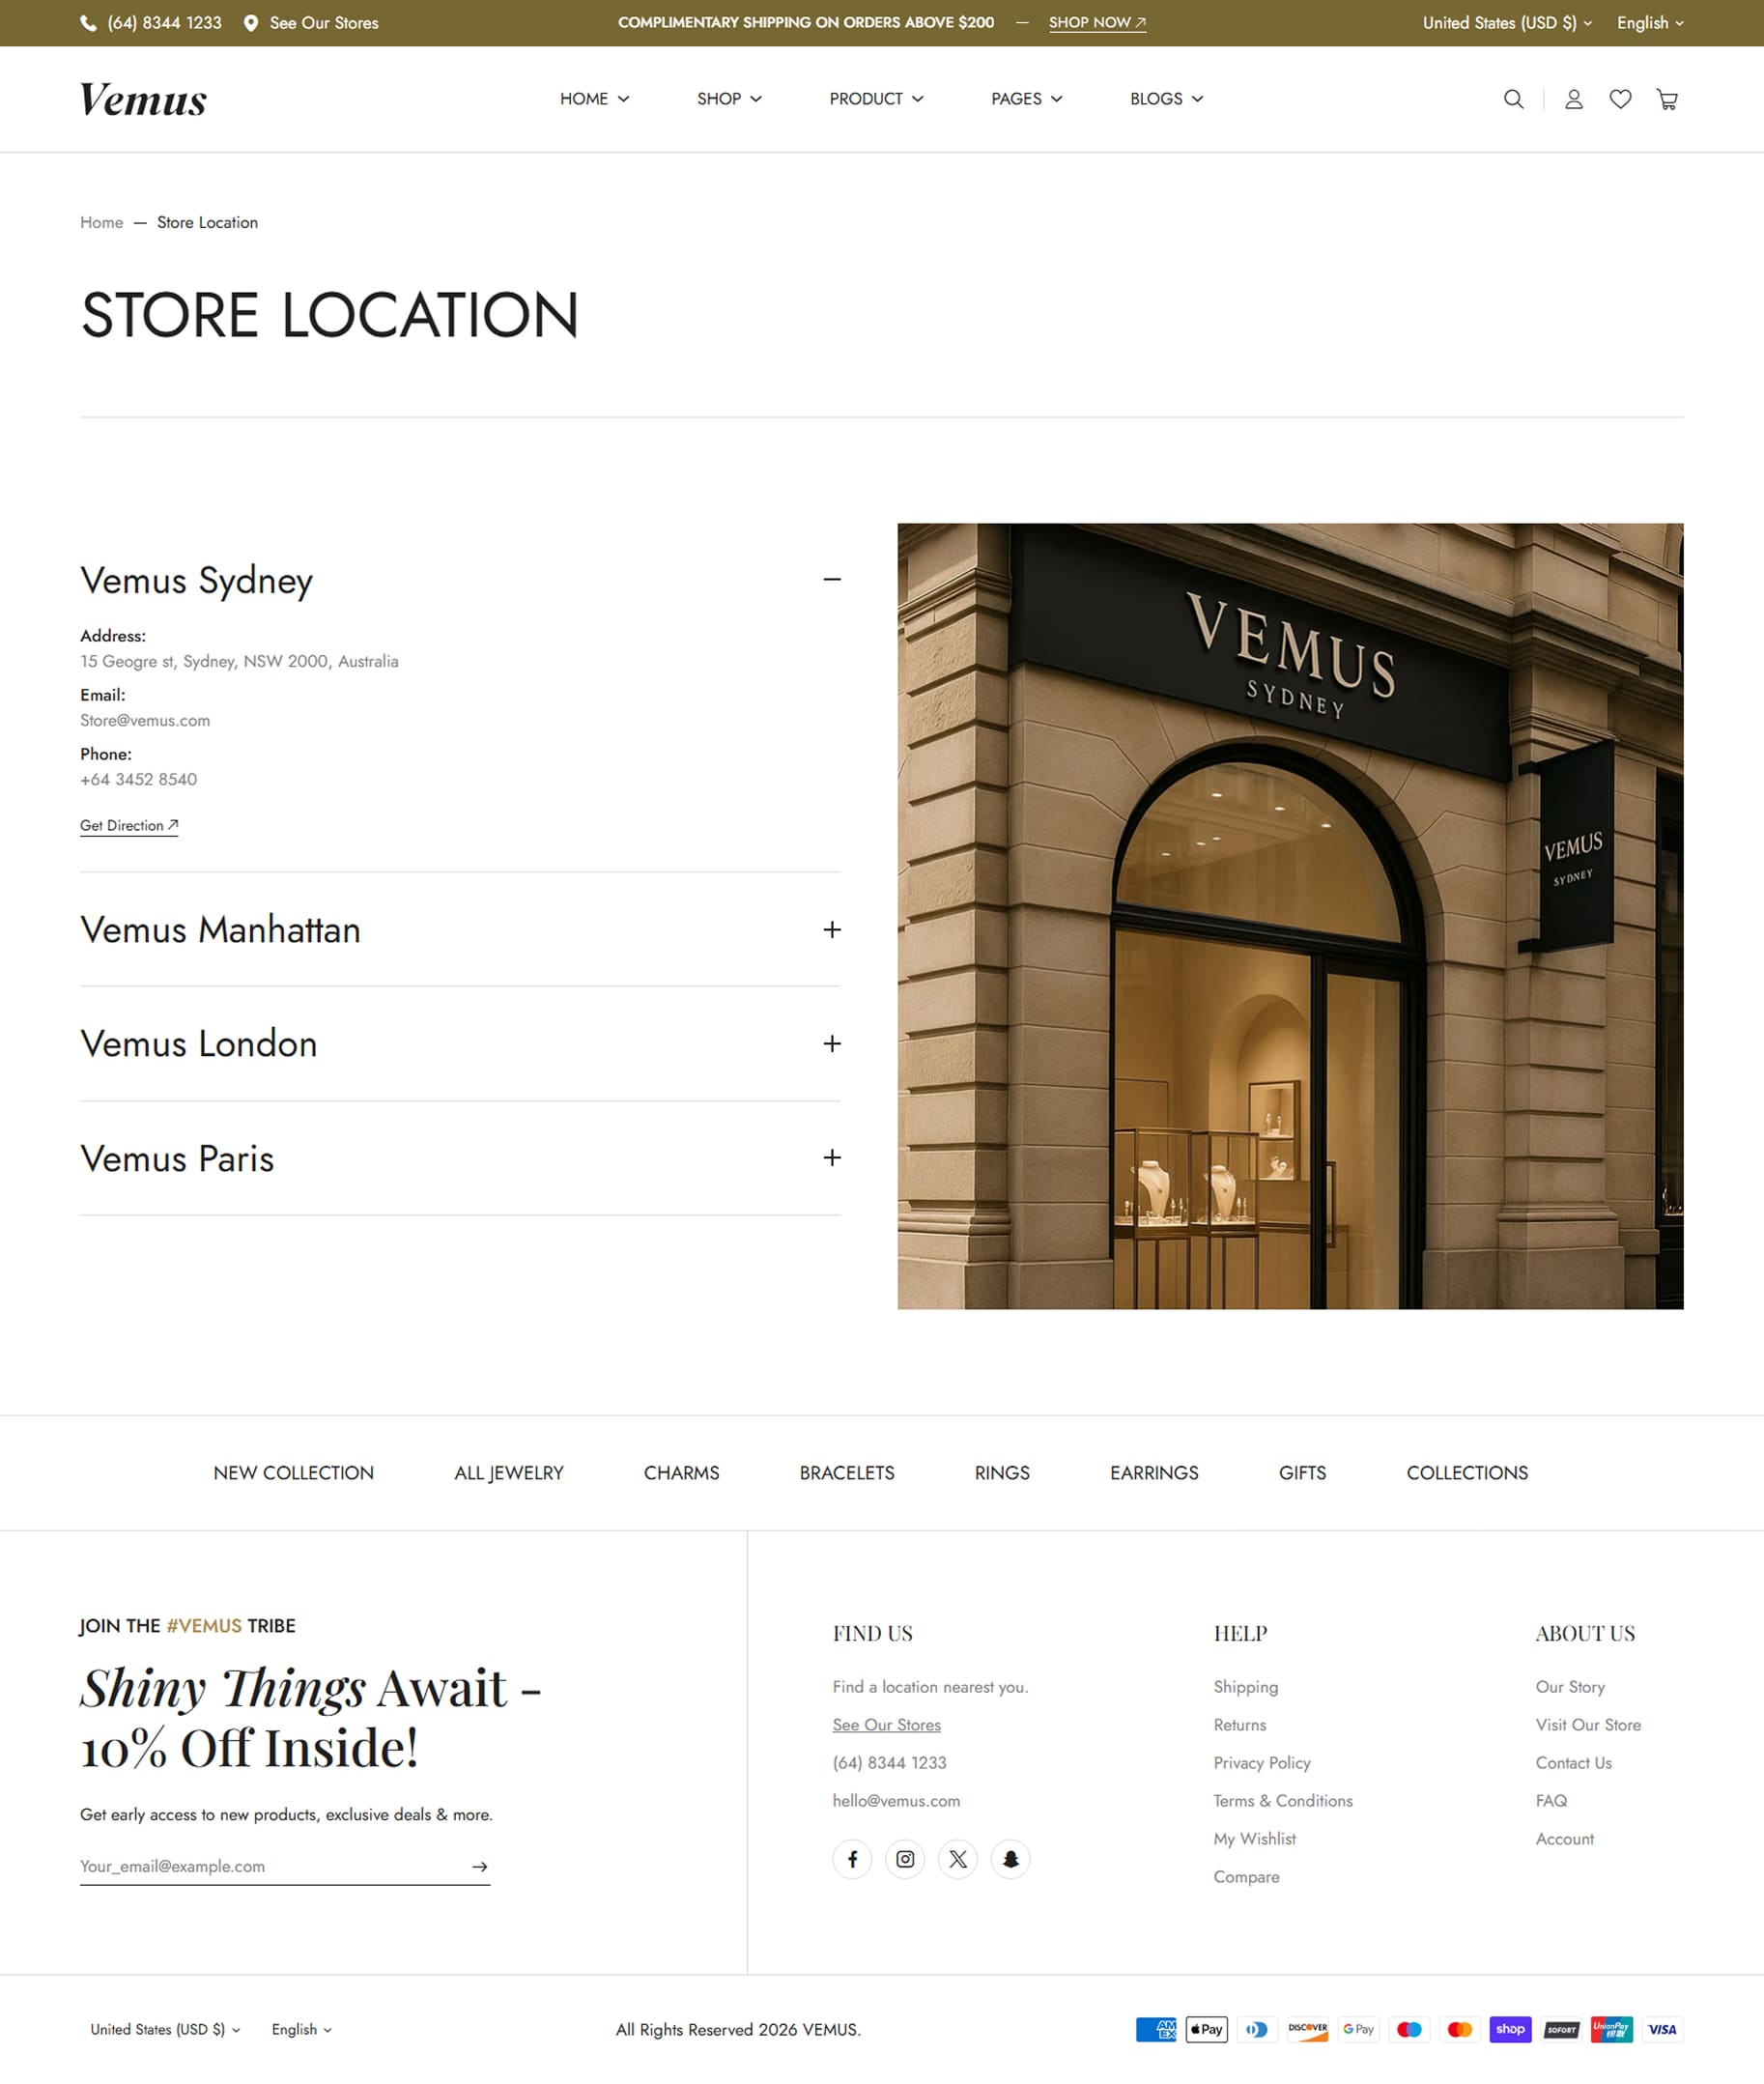
The Store Location page displays all your physical store locations (if applicable).
It may include store addresses, phone numbers, opening hours, store images, and an embedded map.
Vemus supports a clean map-and-list layout to help customers find the closest location easily.
Note: Please click the link below. We have already provided a step-by-step guide on how to create pages and configure them. Simply follow the instructions there to set up your page correctly. Link
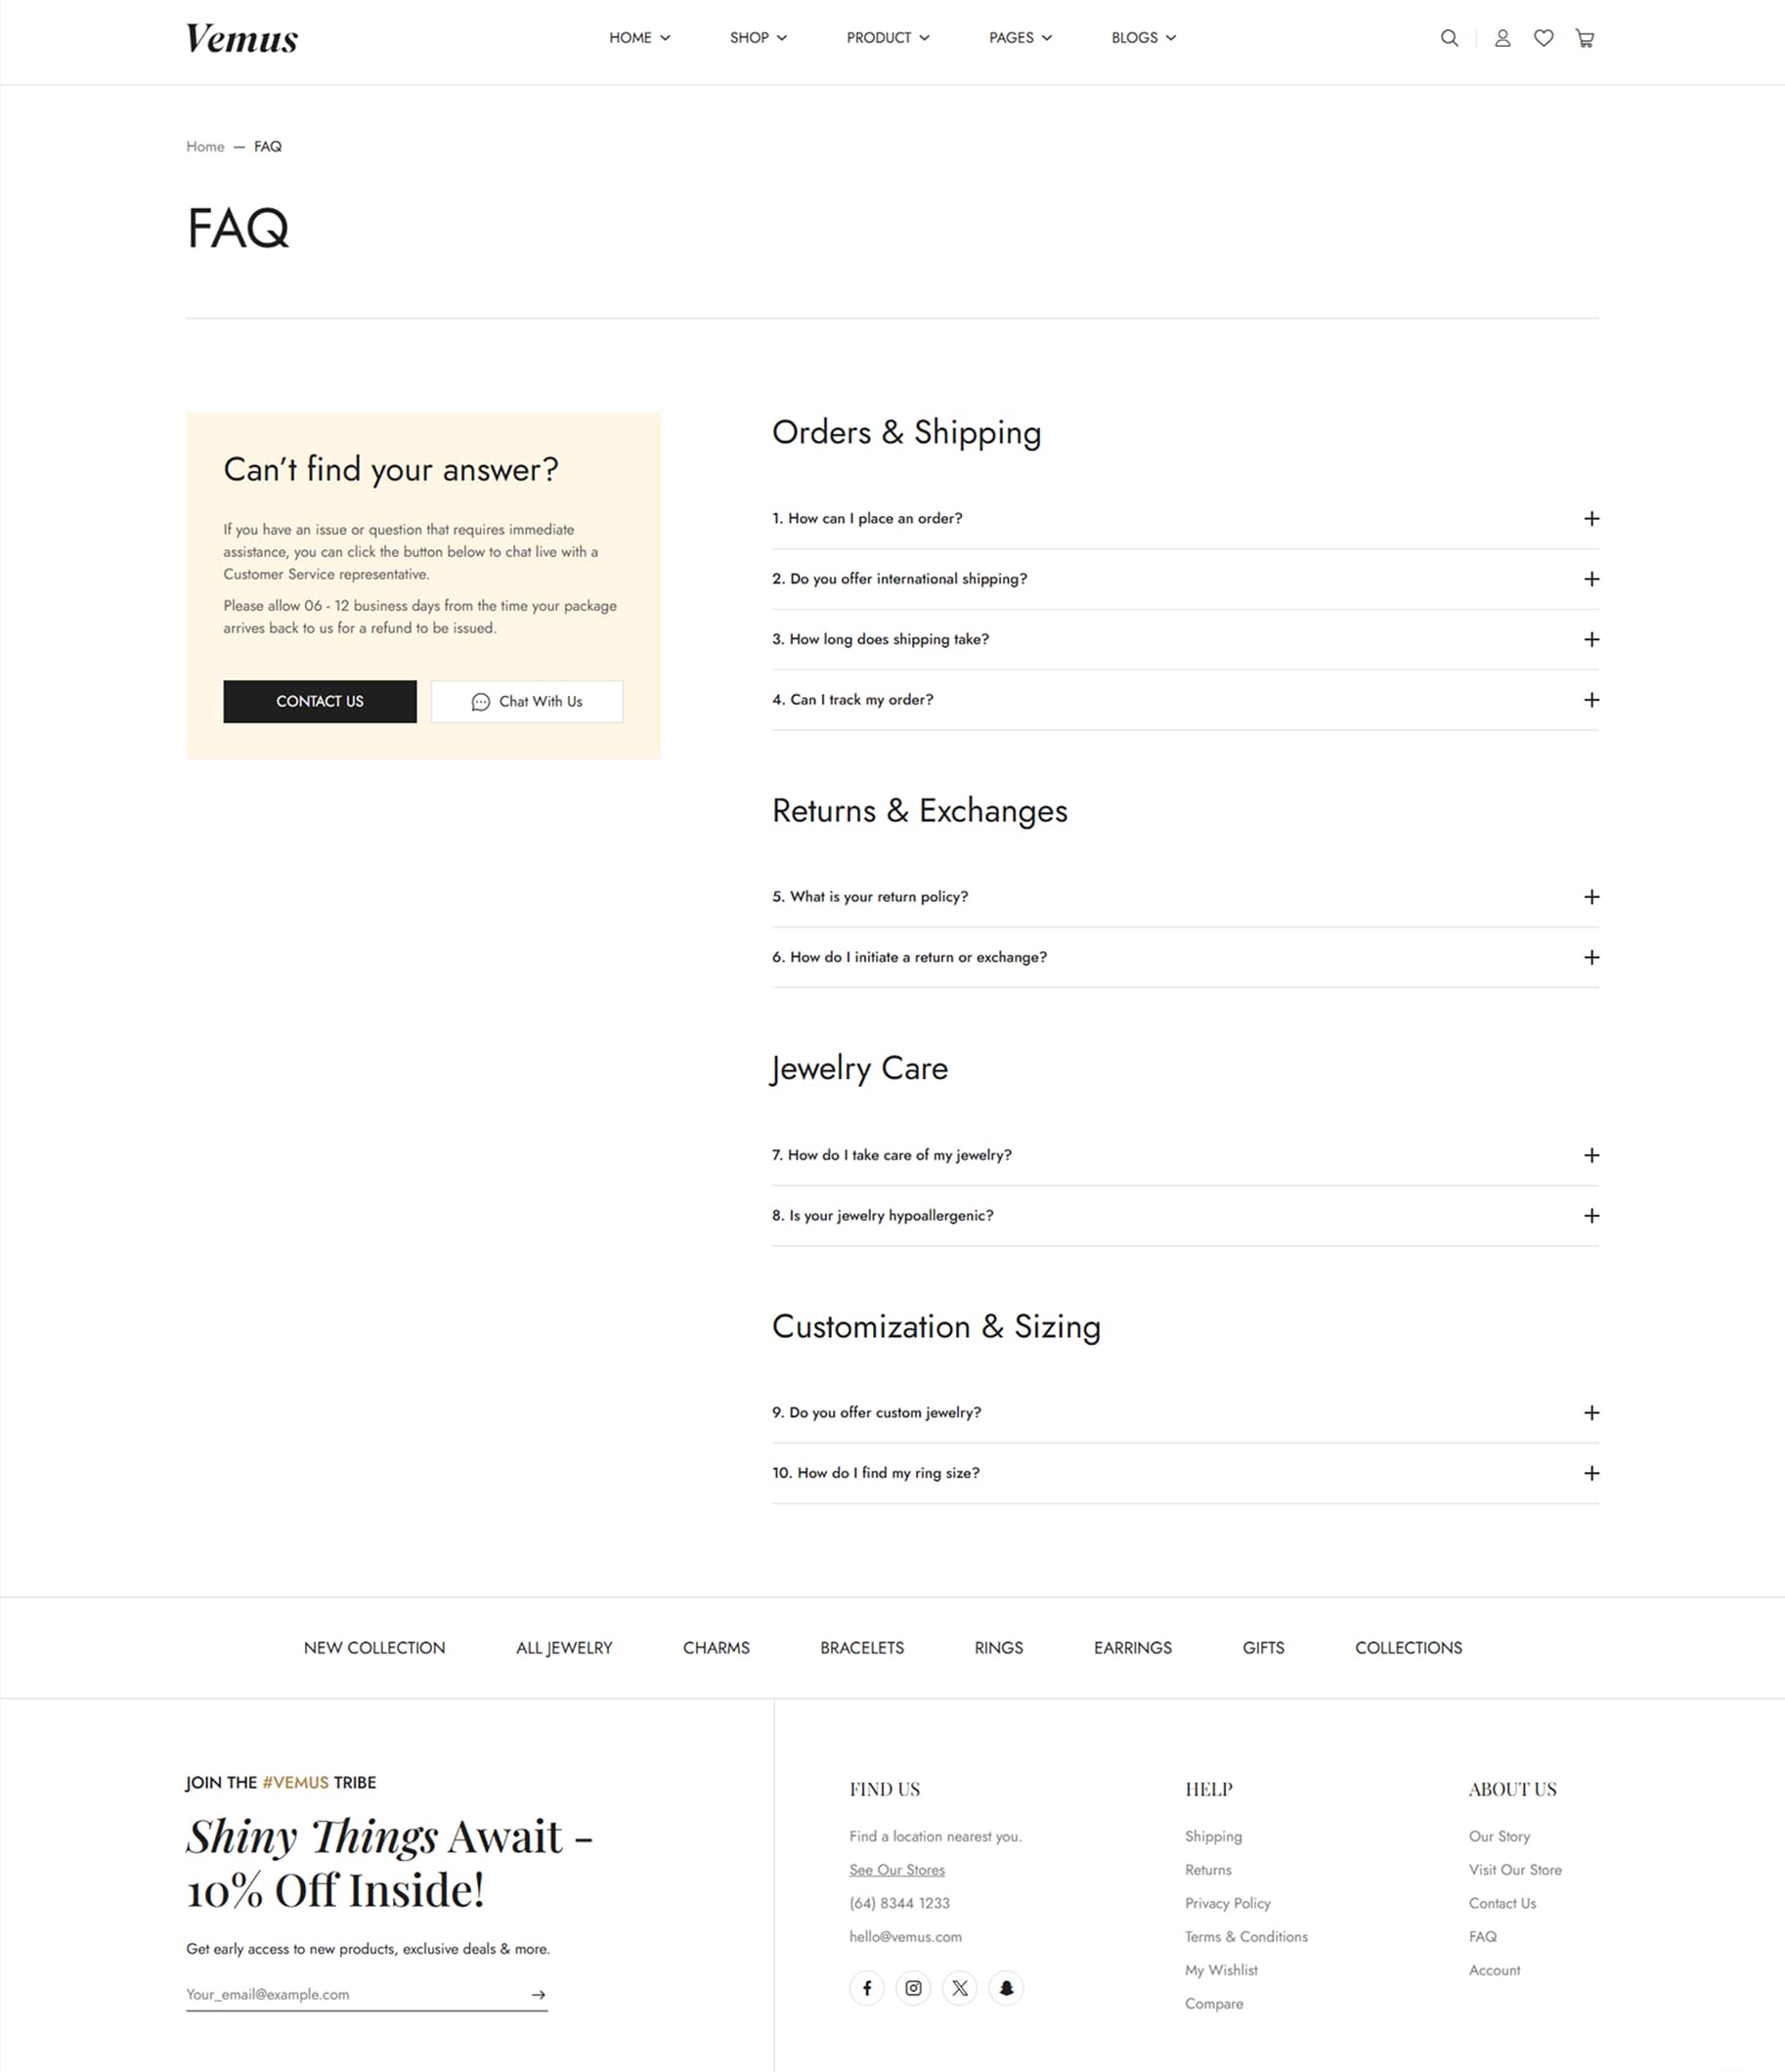
The FAQs page gathers the most frequently asked questions to help customers find answers quickly. It usually includes accordion-style sections organized into topics such as: Shipping, Returns, Payments, Account, Warranty, etc.
This page reduces support requests and improves the overall shopping experience.
Note: Please click the link below. We have already provided a step-by-step guide on how to create pages and configure them. Simply follow the instructions there to set up your page correctly. Link
The Wish List page displays all products that customers have marked as favorites. It allows customers to save items for later, compare, or revisit them before purchasing. Depending on the theme setup, the wishlist may use local storage or a third-party app. This page encourages return visits and increases conversion rates.
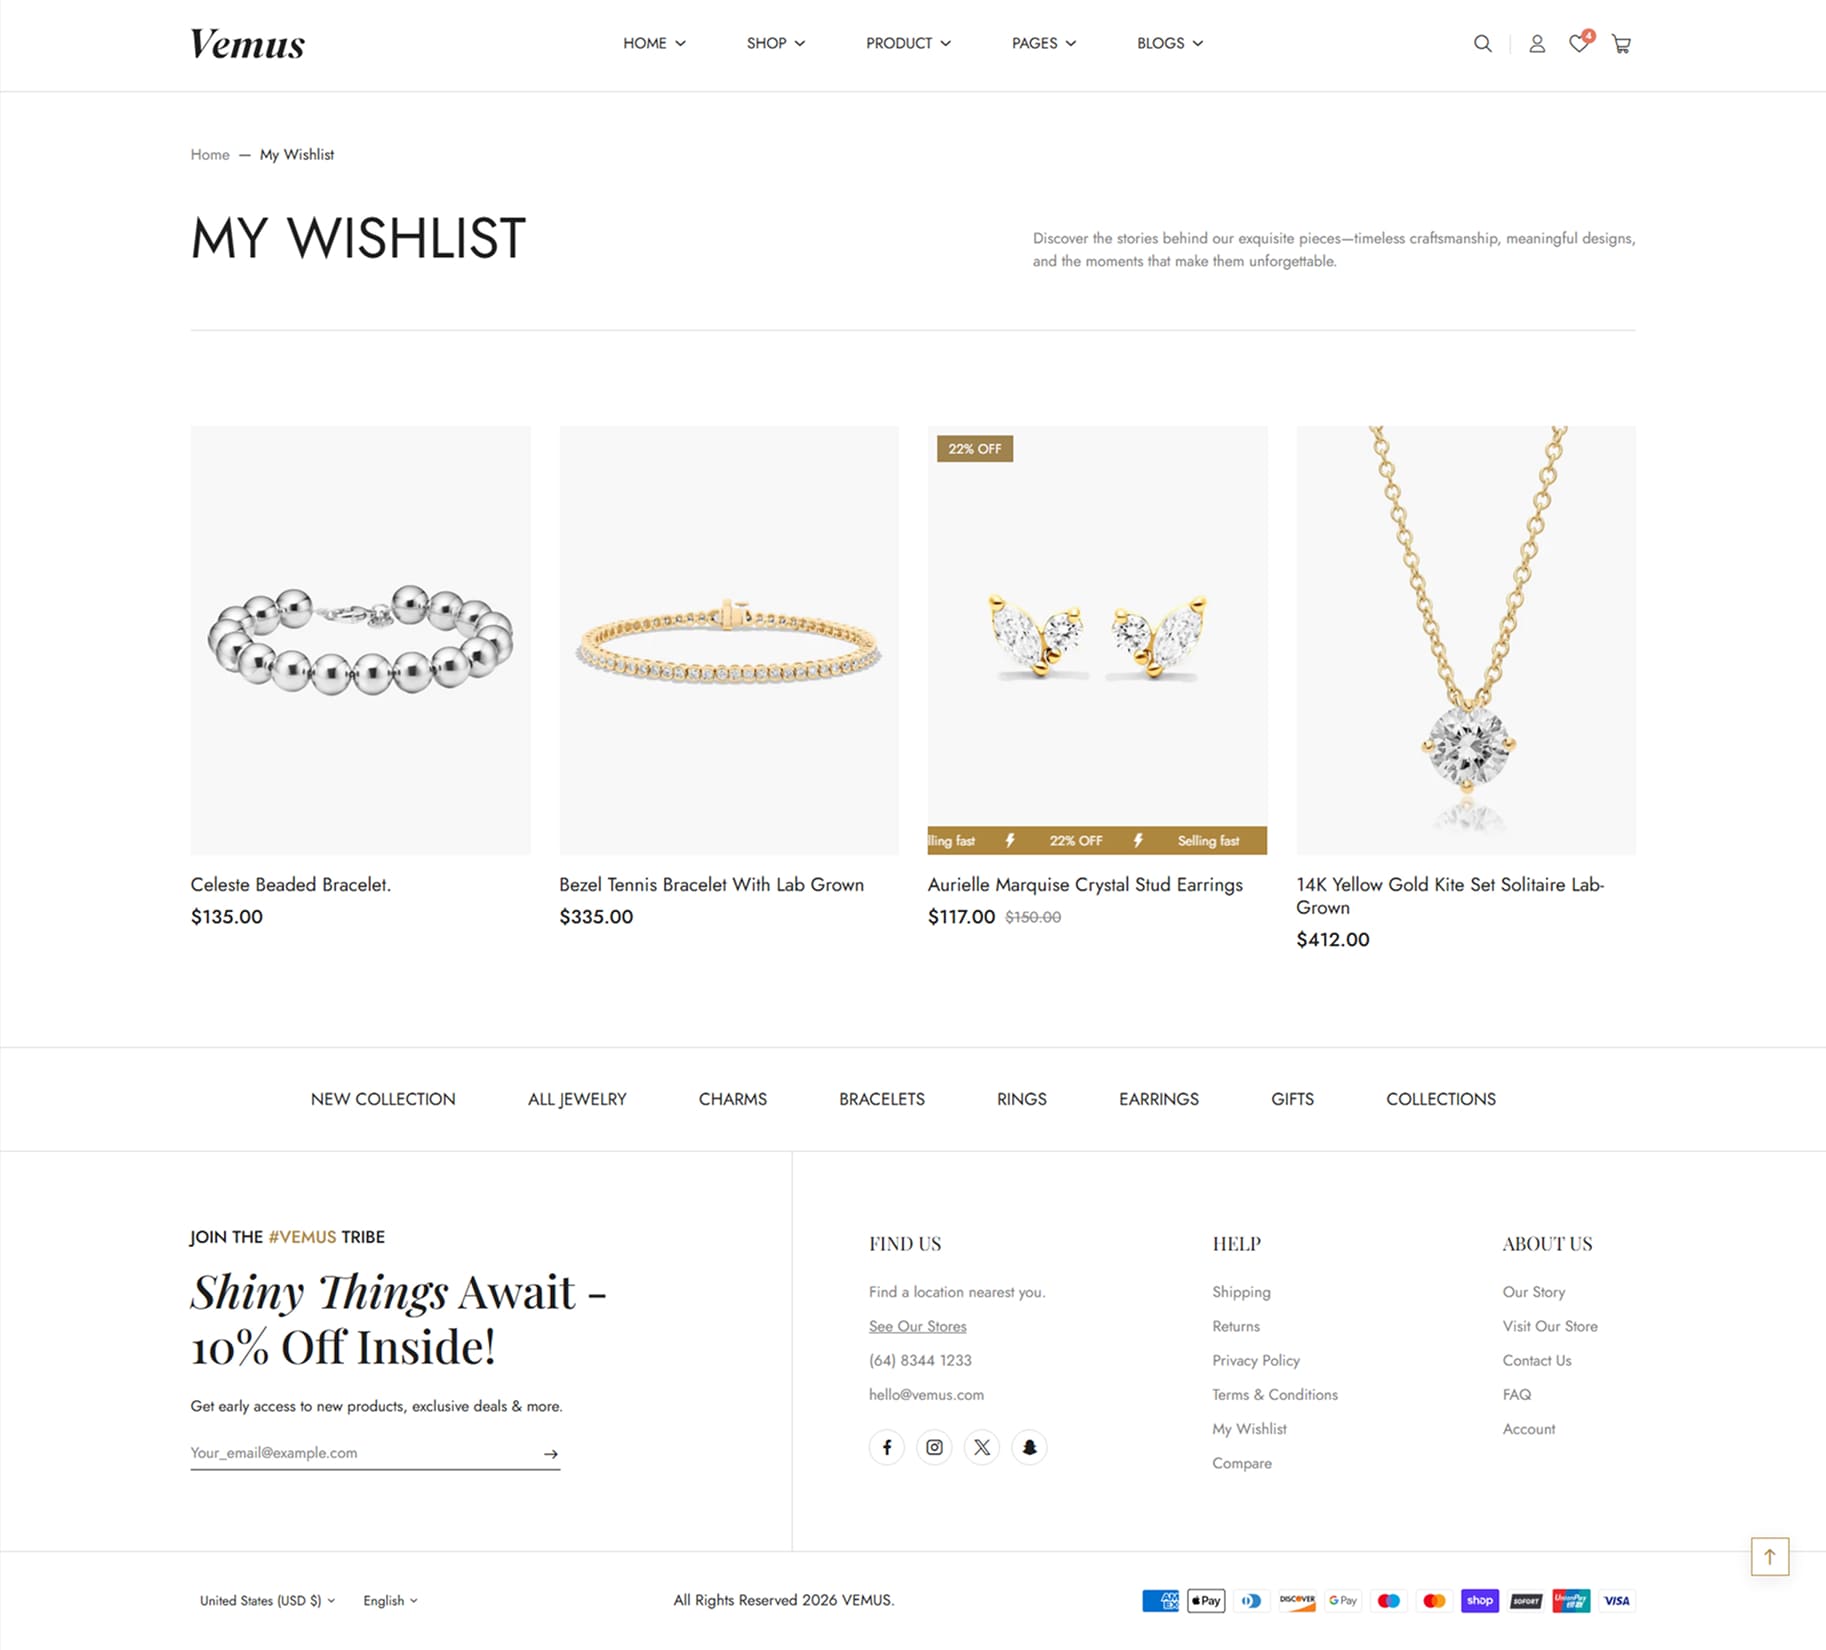
Note: Please click the link below. We have already provided a step-by-step guide on how to create pages and configure them. Simply follow the instructions there to set up your page correctly. Link
The Compare page lets customers compare selected products side by side. It typically displays a comparison table with attributes like price, features, materials, sizes, specifications, etc.
This is especially useful for stores selling electronics, equipment, accessories, or any items with detailed specs.
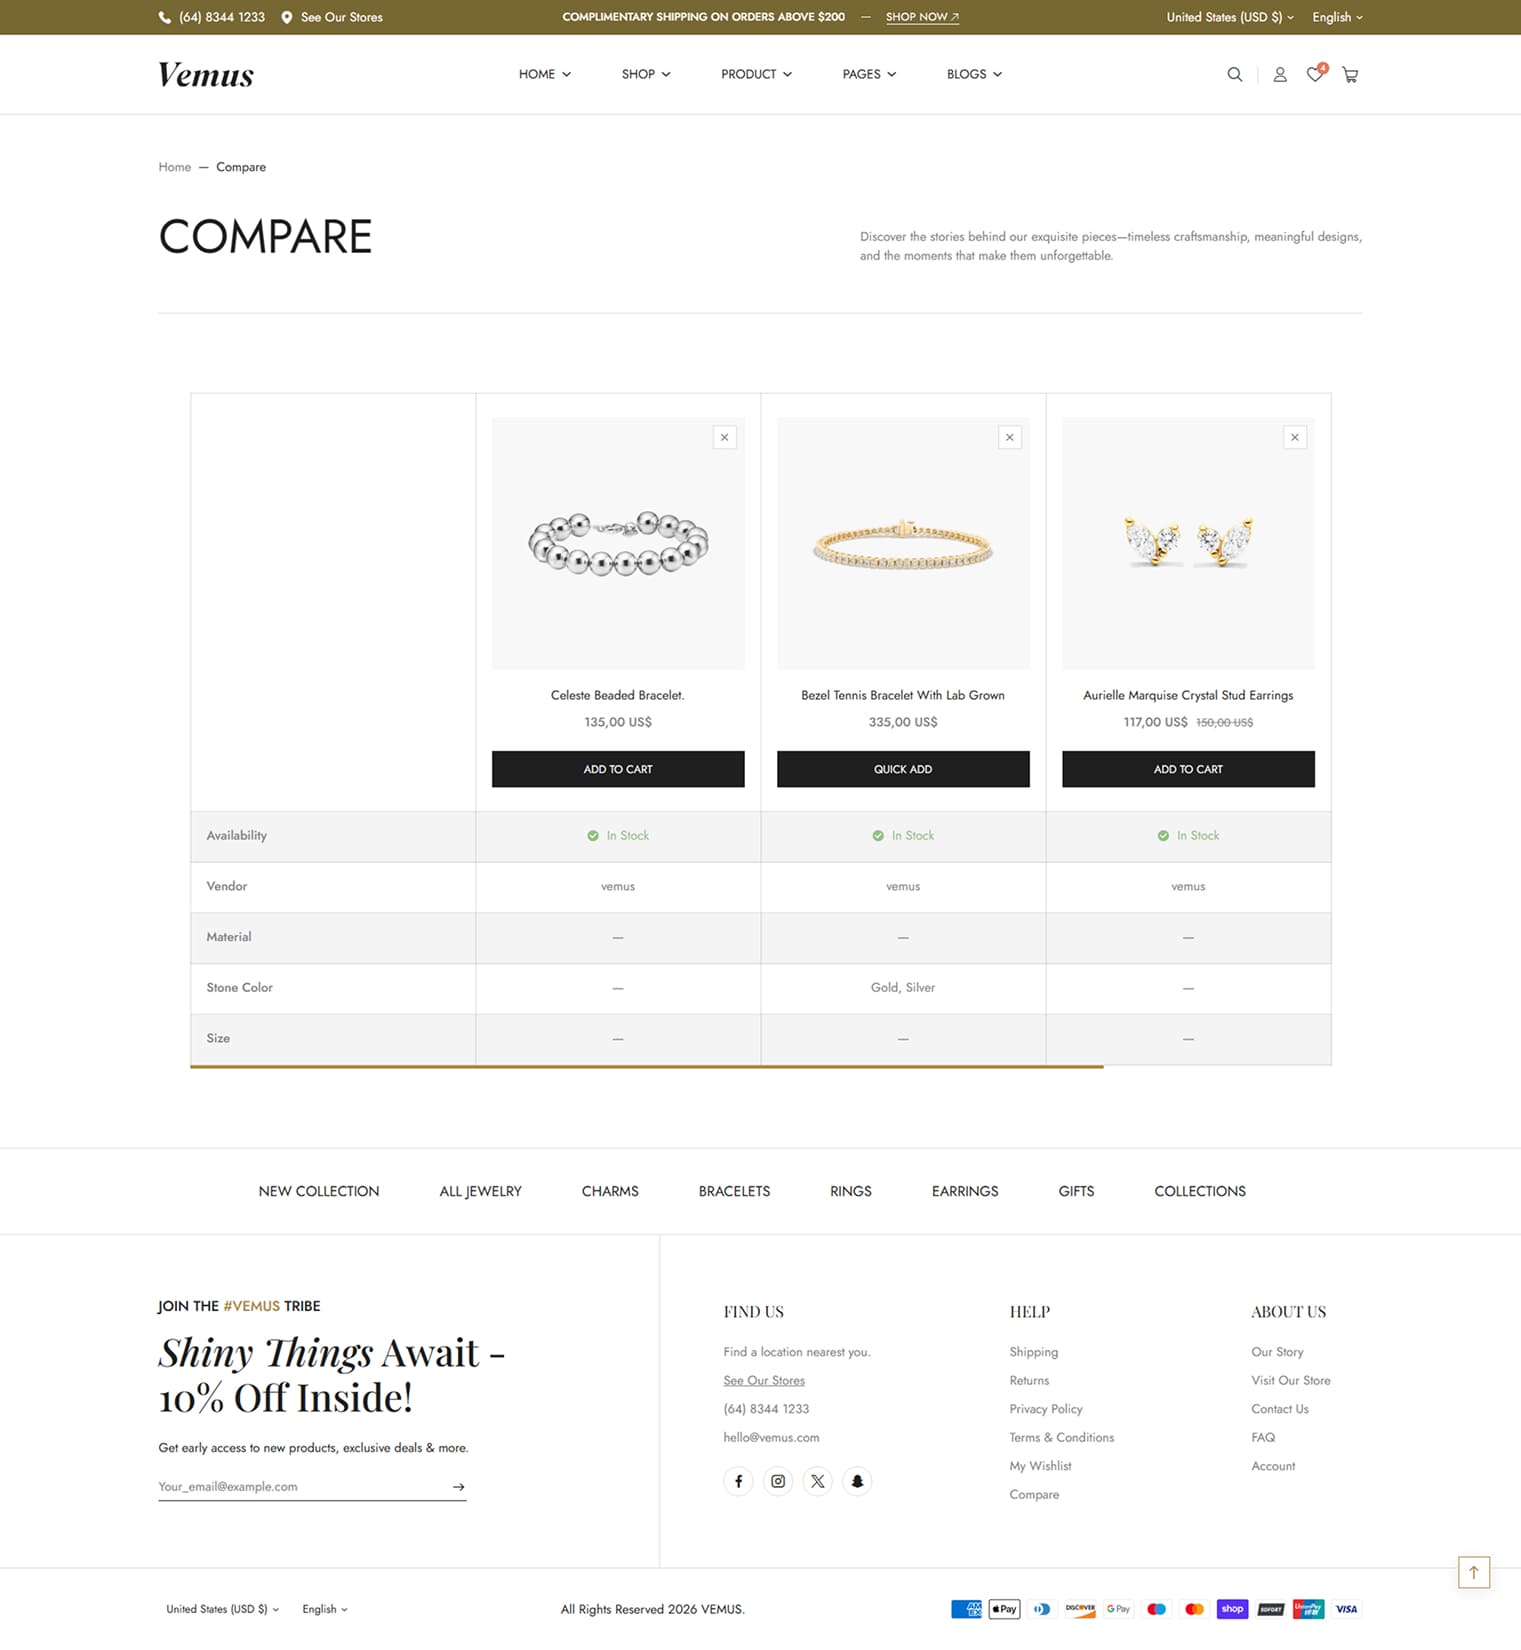
Note: Please click the link below. We have already provided a step-by-step guide on how to create pages and configure them. Simply follow the instructions there to set up your page correctly. Link
The Search page is a vital tool for efficiently finding specific products or information on a website. It displays search results tailored to your query, saving time and simplifying navigation. This feature enhances user experience by quickly connecting users with their desired items, streamlining the online shopping process
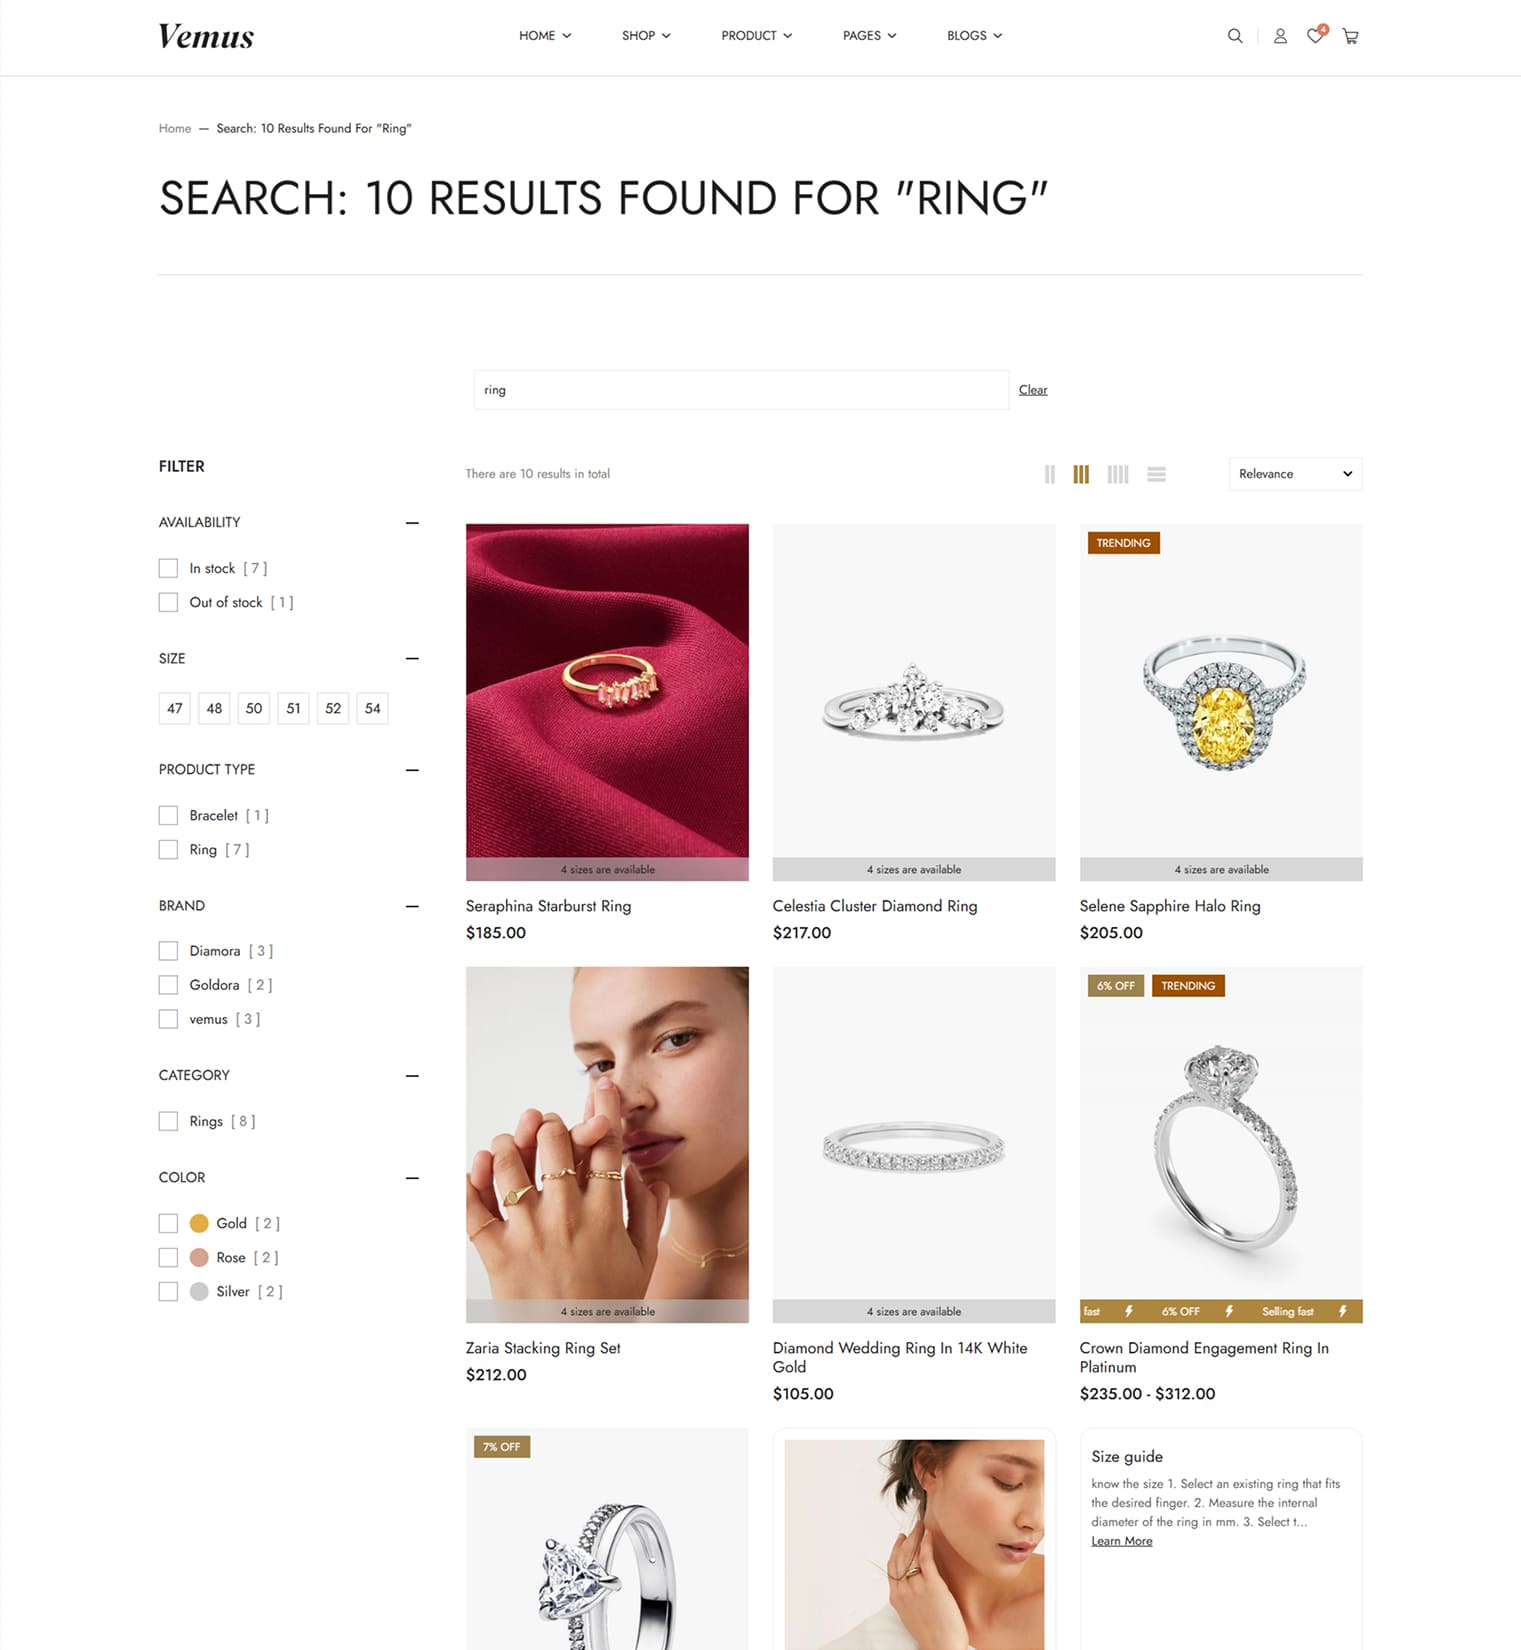
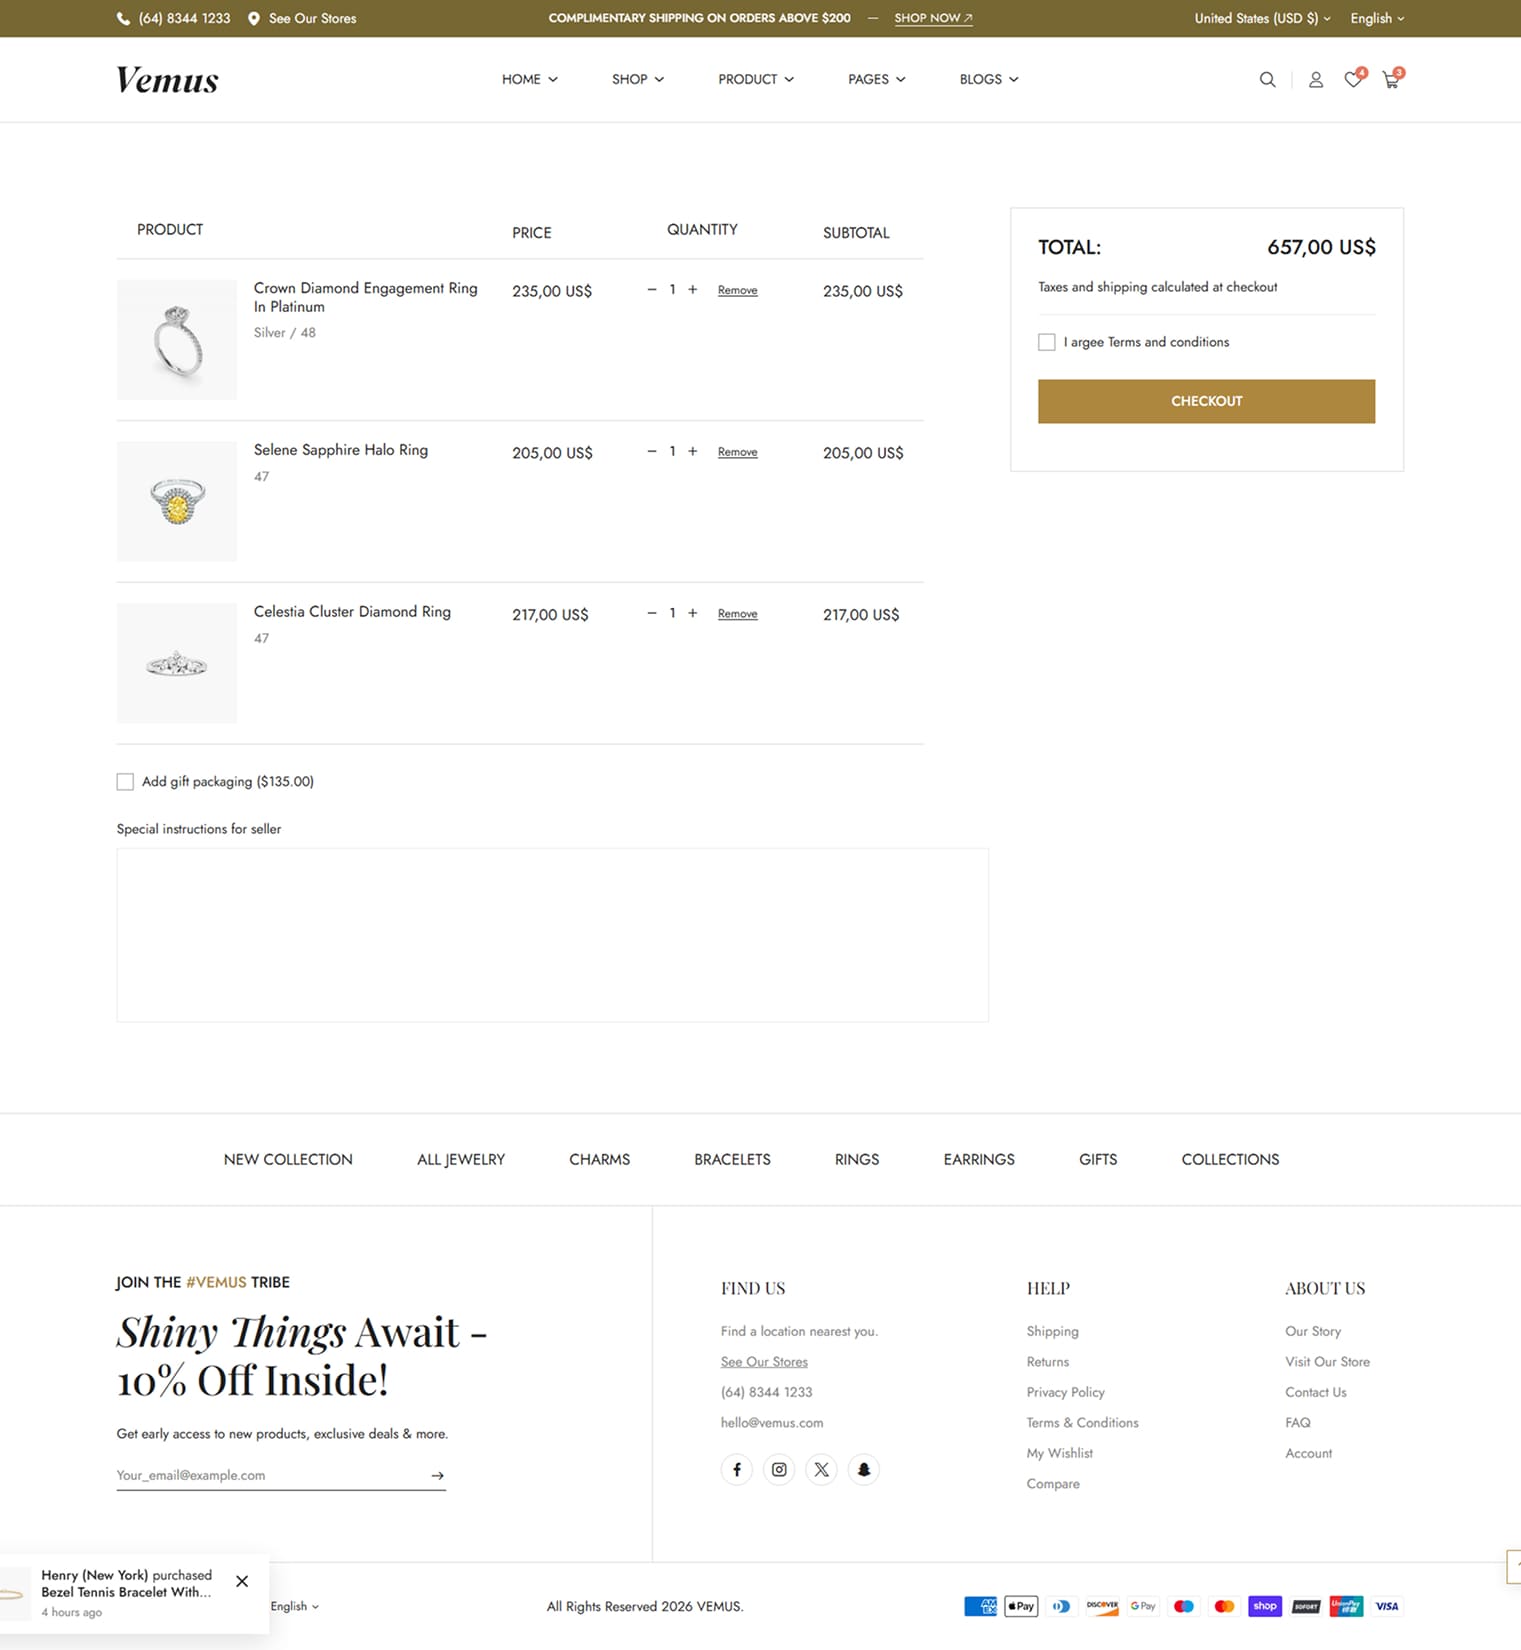
The Cart page shows all items the customer has added before proceeding to checkout. It includes product details such as image, name, variant, quantity, subtotal, and cart total.
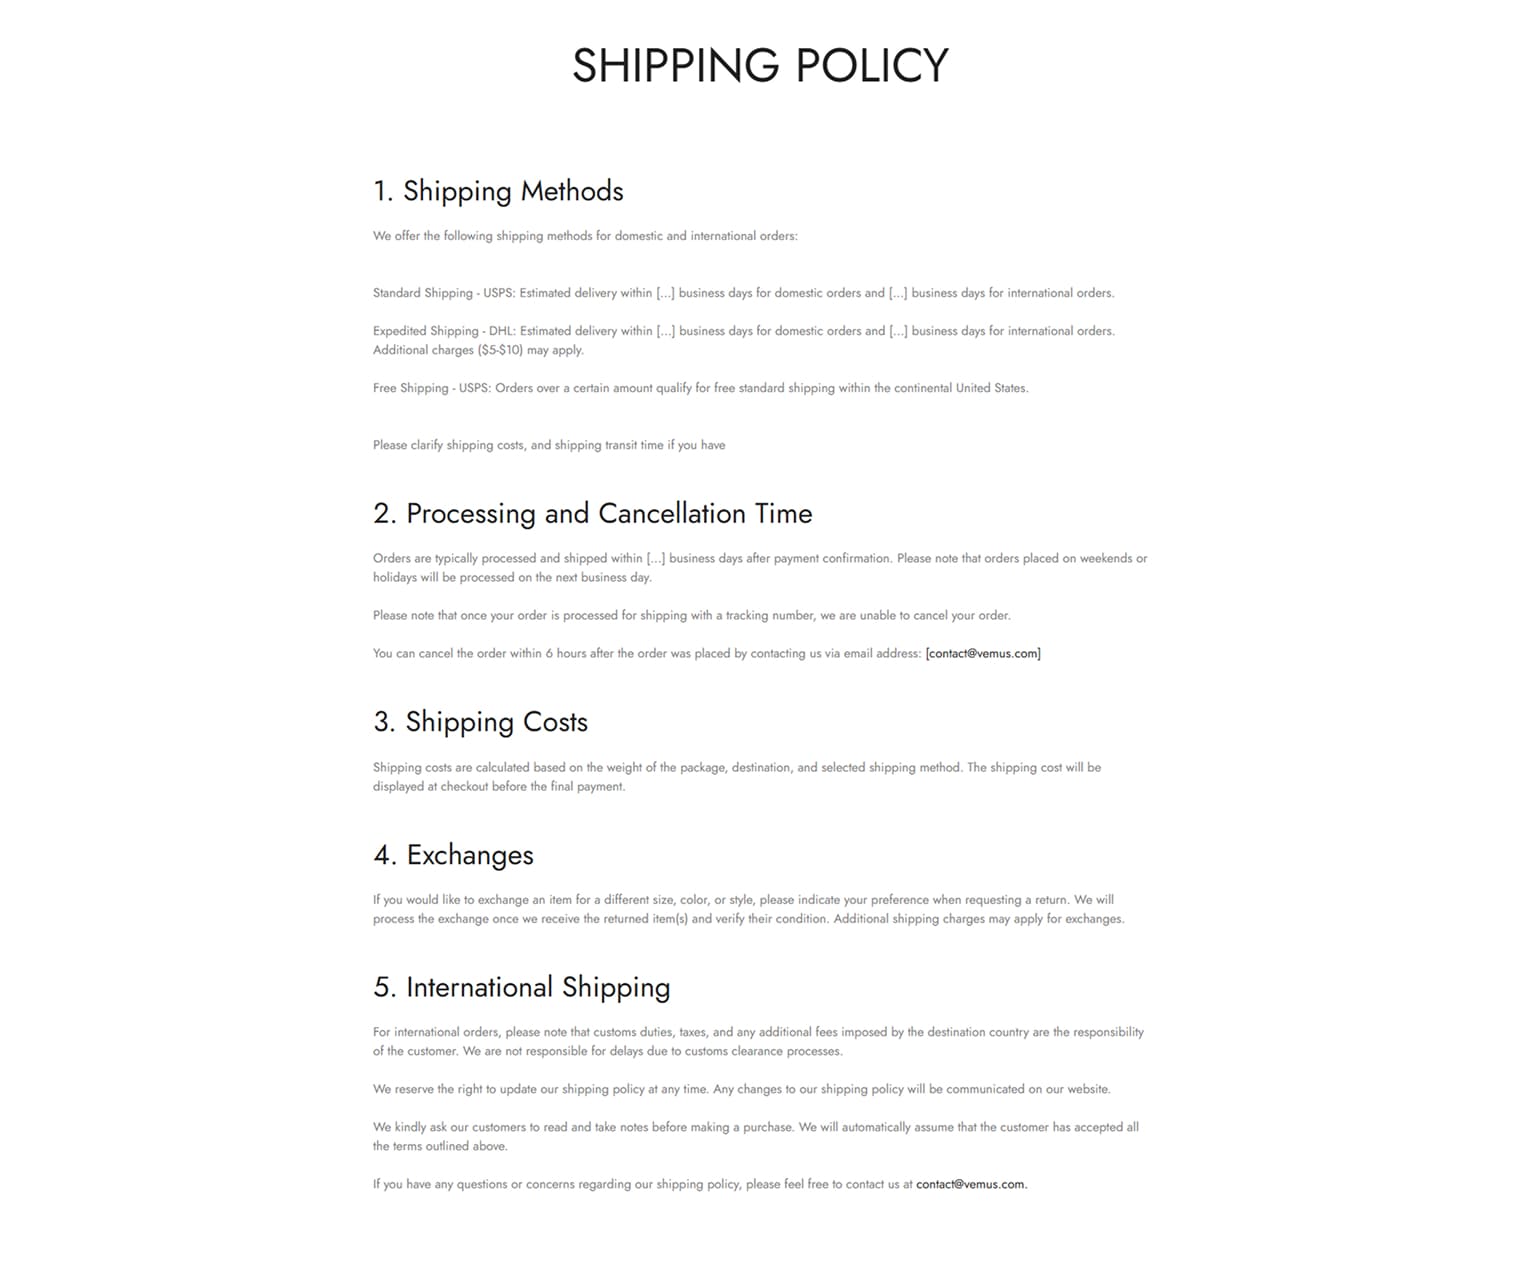
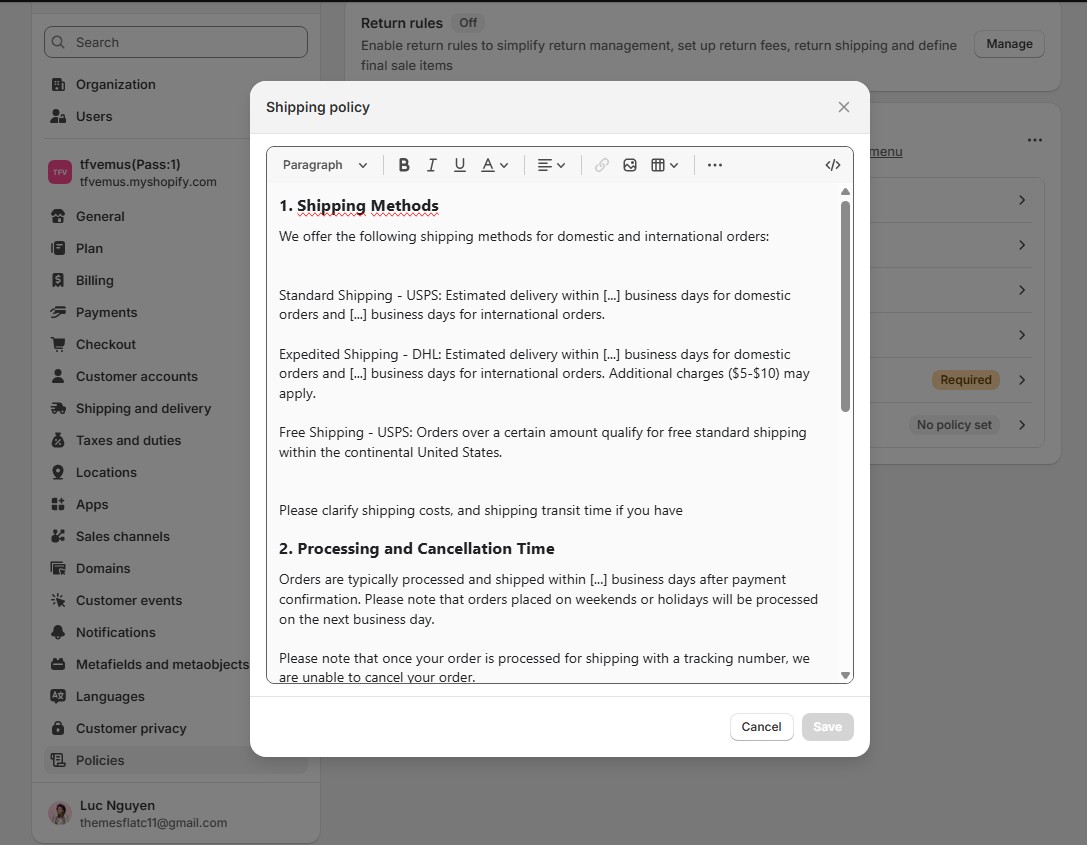
Provides clear information about shipping methods, delivery times, and costs. It helps customers understand how and when their orders will be delivered, including domestic and international shipping details.
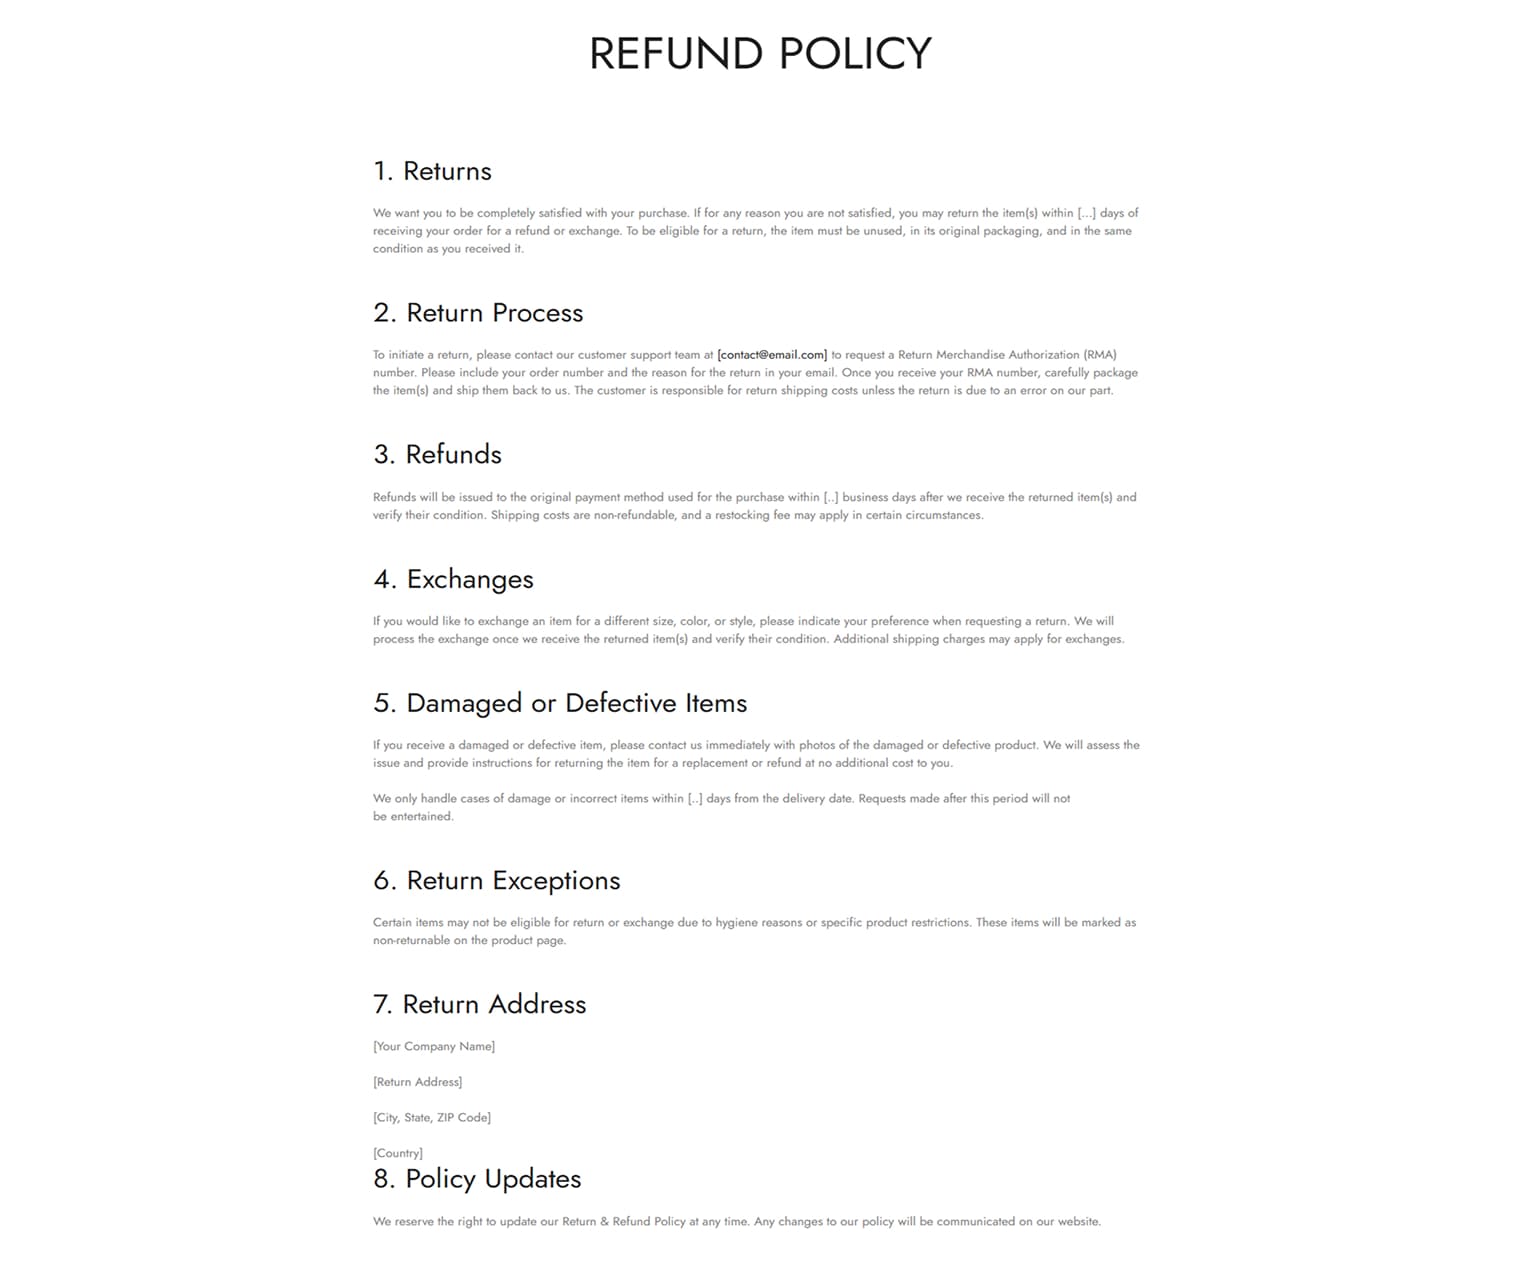
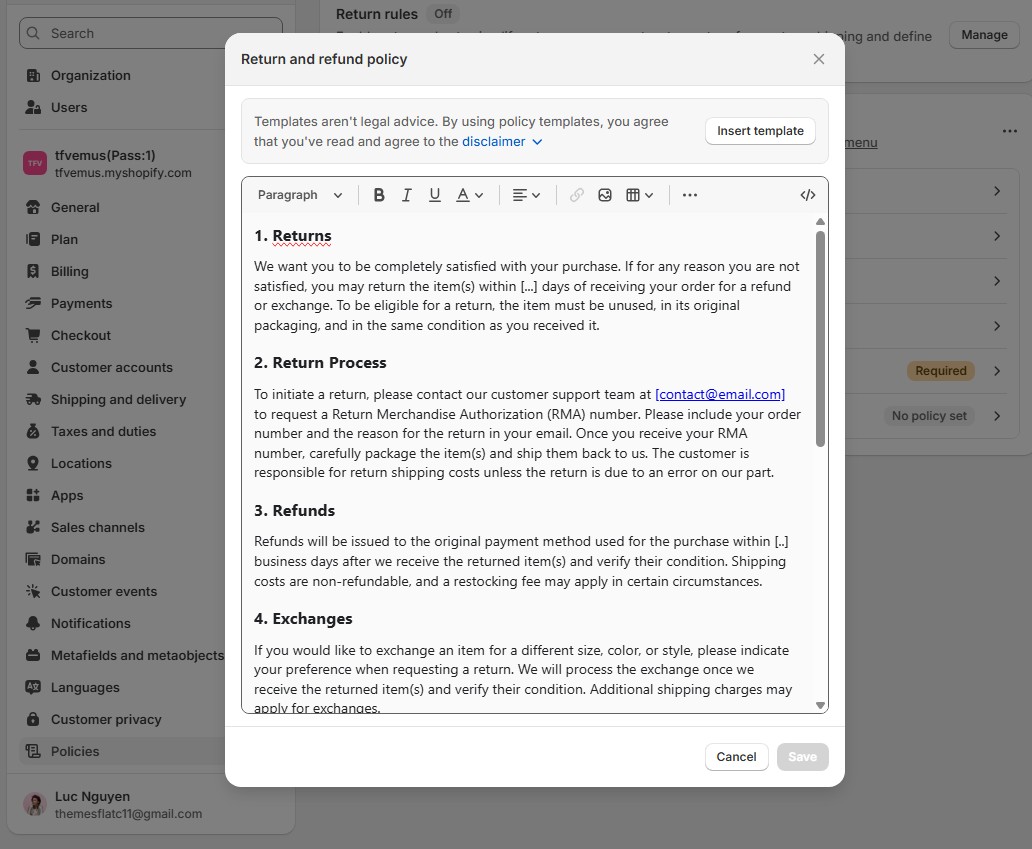
Explains the return and refund process, including conditions, timelines, and exceptions. It ensures customers know what to expect if they need to return or exchange a product.
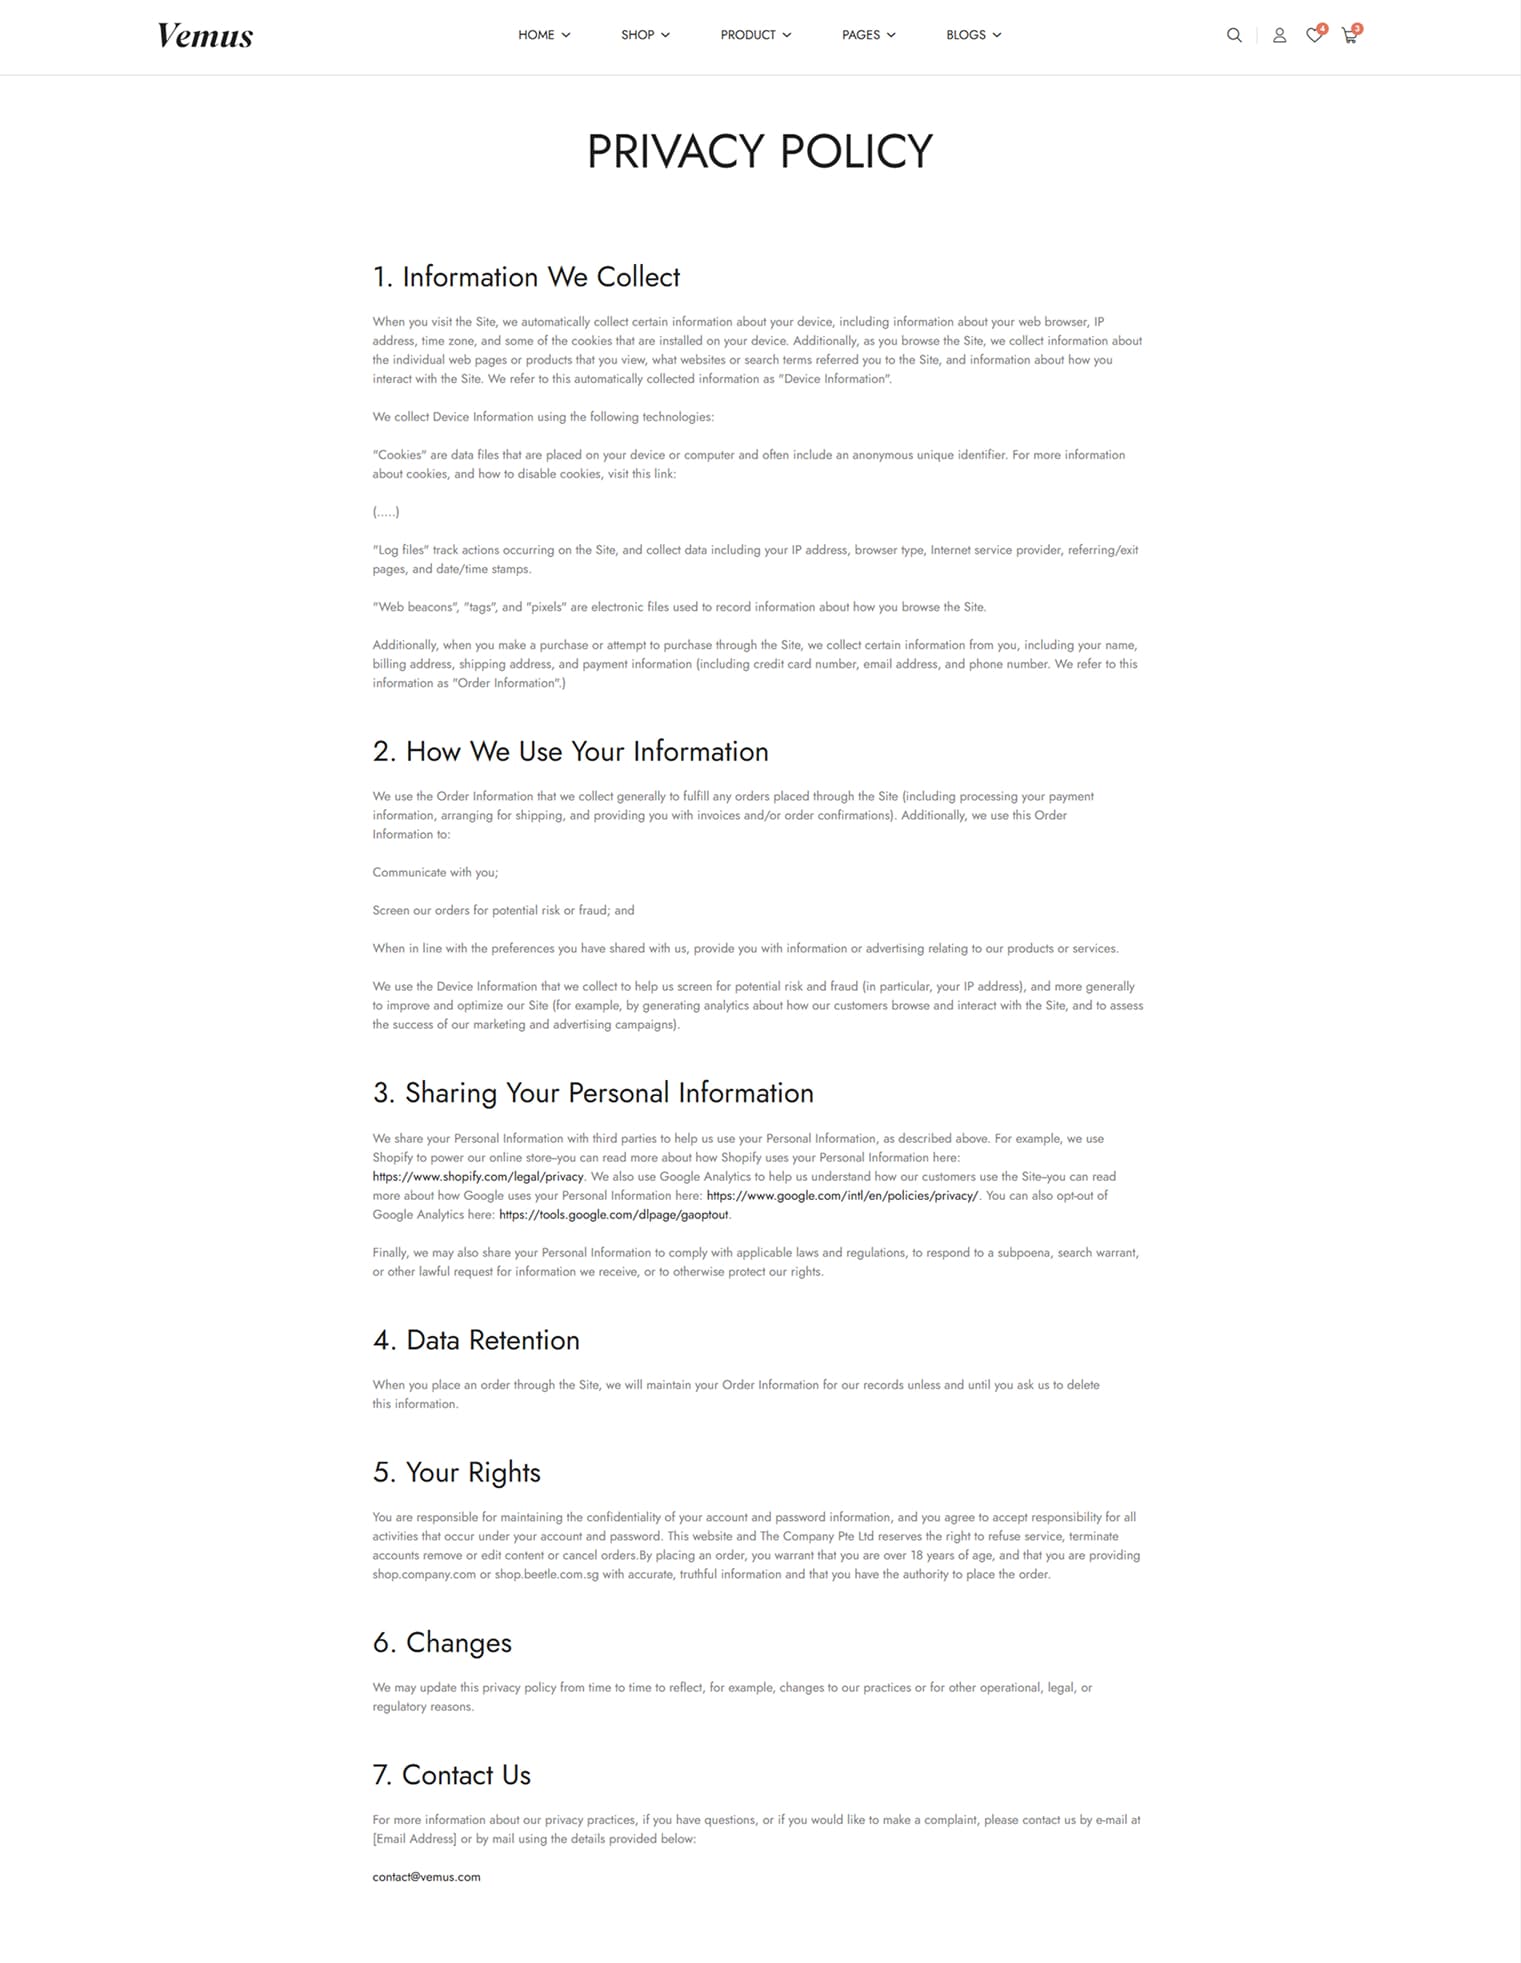
Describes how customer information is collected, used, and protected. It builds trust by ensuring transparency and compliance with data privacy standards.
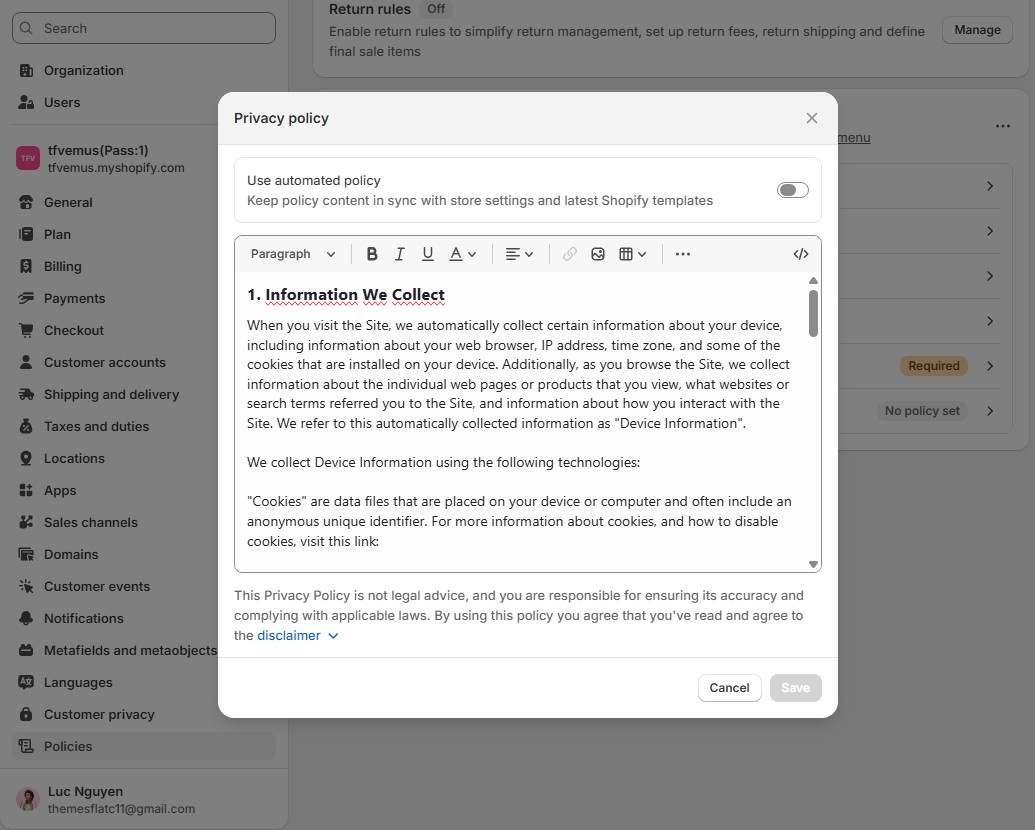
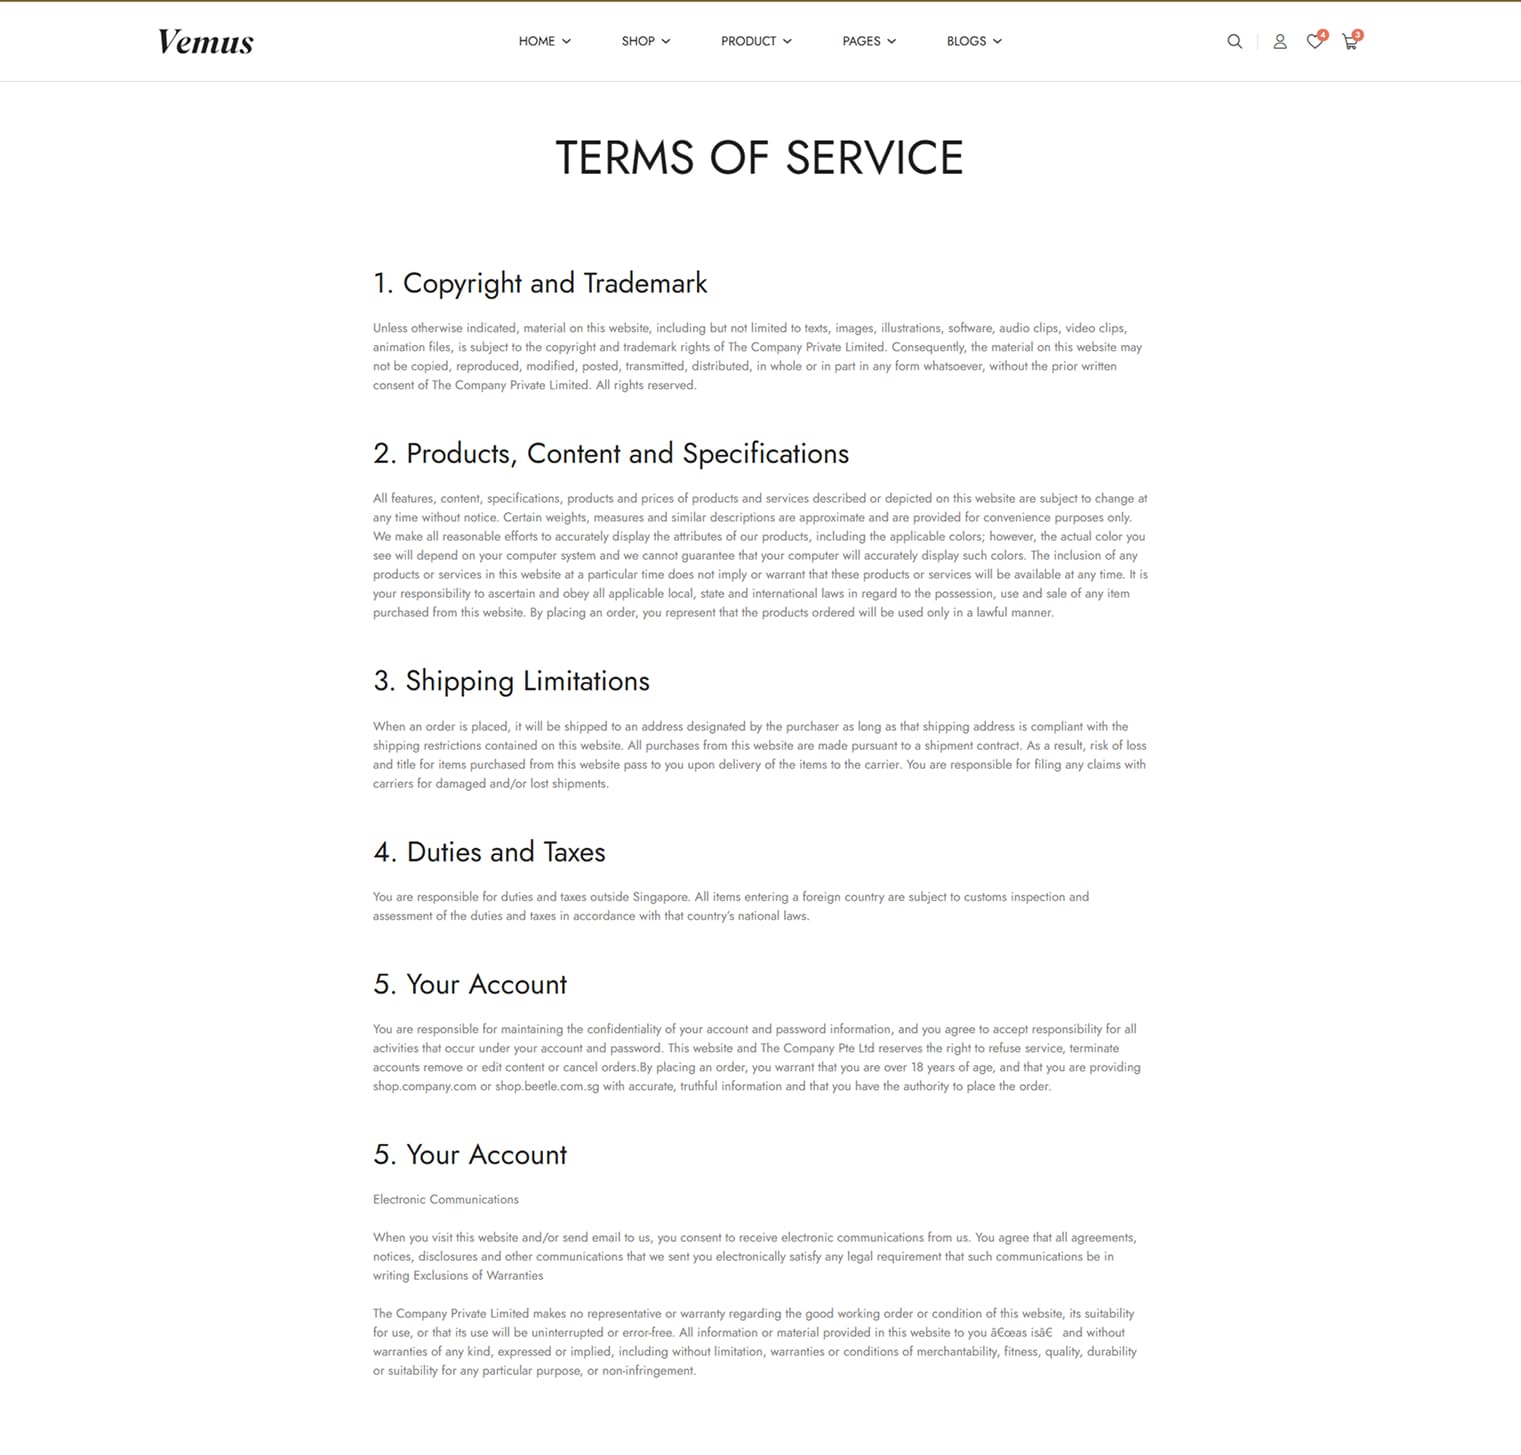
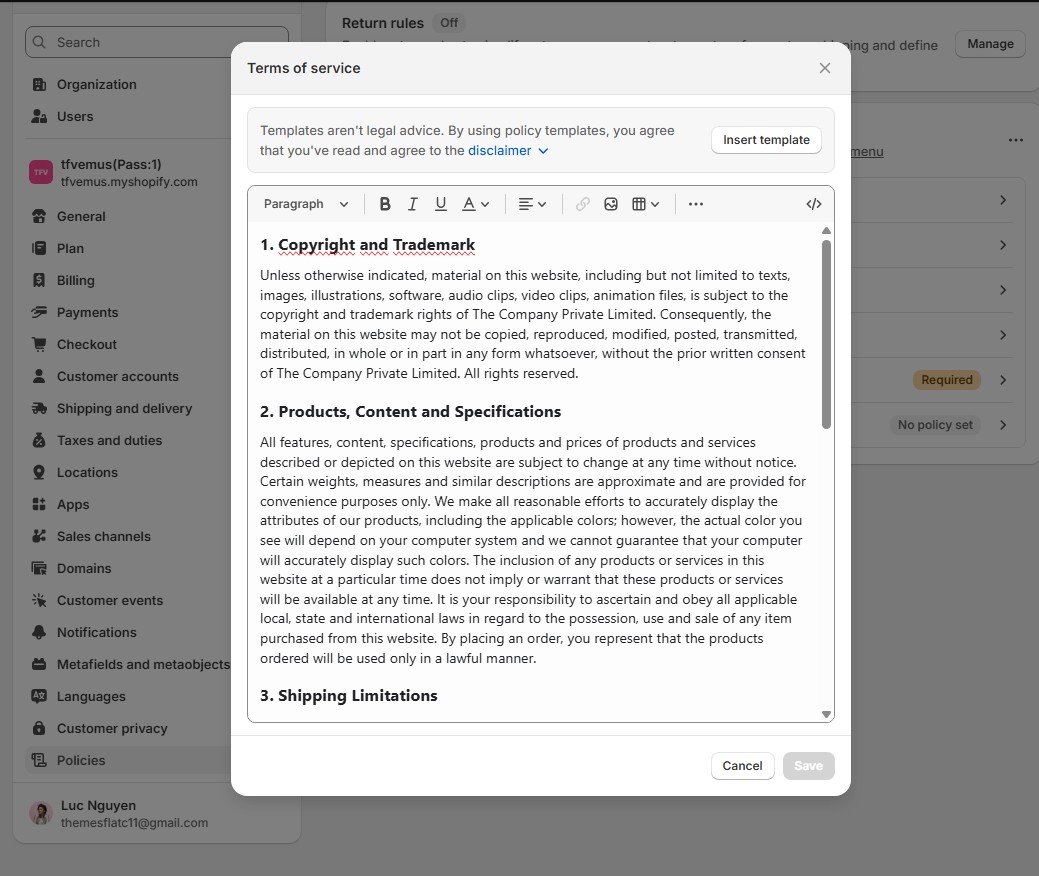
Outlines the rules and conditions for using the website, including user responsibilities, product information, and legal terms. It protects both the business and its customers.
If you are unable to find your answer here in our documentation, please contact us via email: themesflat.com or with skype: themesflat.
Our support covers configuration, building site as demo, trouble using any features, and bug fixes. We don't provide support for customizations or 3rd party extension.
We try our best to monitor the email around the clock, however, this is not always possible due to different time zones. We will try to reply you as fast as we can.
Our working time is 8.00 AM - 5.30 PM, Monday to Friday (GMT+7). So if ask for help in the weekend, you may have to wait a little bit for support and please be patient.